Customer reviews
Fantastic product that lifted me to another astroimaging level !
Review by LJ_Tiger on 28.04.2020 09:53:44( 5 / 5 )
I've been using 11" (2800 mm) F/10 fork mounted scope for a years. And everytime I've tried astroimaging using F/6.3 focal reducer, I went upset, because the results were poor no matter what I've tried.
The best results were with the OAG (Off-axis) guider along with modified DSLR camera, but that kind of setup took so much time to prepare, calibrate and then finally perform astroimaging.
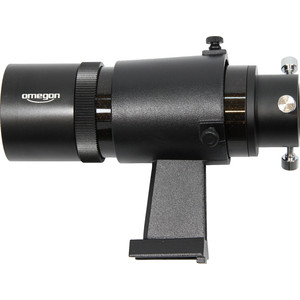
Then I was searching for any kind of stand-alone guider solution and found it! Now I use my 11" Schmidt-Cassegrain telescope on the Wedge with additional guiding scope on top and a Skywatcher's SynGuider II stand-alone autoguiding camera and it works fantastically! No more laptops, cables, calibrations. You just plug-in the camera into your main telescope autoguider port, prepare the guide scope (500mm focal and 90mm diameter) with 1.5x barlow lens, fill-in the SynGuider II guider and start photography session!
I was lucky enough to get 1, to maximum 2 minutes of guided photos using OAG (Off-axis guider) on my primary scope... But now, I can get 15 minutes exposure without any problem!
I'm using Fujifilm X-A3 mirrorless camera and SynGuider II as a standalone guider camera and the results lifted me to another level I was seeking so many years! SynGuider II works straight away out of the box. I even haven't read the manual (but it is highly recommended), and got great first light with this small autoguider camera! It saves my time for seting up and preparing the equipment by hudge amount of time so now I'm able to go to dark site and just enjoy it!
The are some information in various astro forums where astroimagers have problems for setting up the SynGuider II or have bad guiding results, so these are my main steps to be successfull in astroimaging using SynGuider II:
1) Schoose relatively bright star (but not Capella, Arcturus or Vega for sure) in your primary scope. Center it.
2) Center the same star in the GuideScope eyepiece using special autoguiding telecope base where you can move Guiding telescope up/down and right/left with the small adjustemen screws or bolts.
3) Focus the star in GuideScope (I've found the best matching eyepiece for that is Orion 66 degree 20mm eyepiece, but your GuideScope setup may be different)
4) Remove the eyepiece from GuideScope and insert the SynGuider II stand-alone guiding camera with the barlow ending screwed in (you get 1.5x magnification with that). I use the 1,5x Barlow because 500mm GuideScope focal lengh is too small for my 1764mm primary scope for guiding.
5) Power on the SynGuider II and set the exposure with the "+" to some 1/300s and you should see the star in the LCD
6) Select "LOCK" menu and do AUTO. SynGuider II lock the brightest star. Adjust focus so the "BRI" value becomes highest and then set the exposure to some level ("+" or "-" sign on handpad) that BRI reading is about 30. Press "ENTER" and then "MENU".
7) Select "GUIDE" menu and press Enter. Then select "AUTO". Autoguiding camera calibrates the camera for your telscope mount R.A and DEC. responsivness and starts autoguiding!
PS: Be sure you Align SynGuider II with the mount where moving scope in RA you get the guiding star to move left/right accordingly the horizontal line, and moving DEC you get the star moving up/down parallel to straight line.
Read the SynGuider II manual before use as it will help you to get used to it as soon as possible. But for me this product works just great. The only downside is the small LCD screen. There was enough room in the design to use the bigger screen, but hopefully Skywatcher will upgrade it to newer version and we will get it!
Compose your own review
Do you have specific questions about your order or products? Please contact our customer service!
Customers who bought this product also bought...
