5 ways to document your observations
No matter whether it’s with photos, sketches or an audio recording. Every hobby astronomer should think about keeping an observation journal. In this article you will learn why.
 Photo: AstroStar/shutterstock
An observation journal documents your observations and your journey as a hobby astronomer. Find out why it's worth the effort, and what type of record-keeping might work best for you.
With the rising of the Sun, it’s not only the darkness that disappears, but unfortunately often also the memory of your last observation. No matter whether your telescope observation was a success or a failure, all the details are lost far too quickly if you don't make notes.
So, next time, take some time and document your results. You can go back days, months, or years and see your progress as your knowledge, interests, or even equipment continues to evolve.
Why keep an observation journal?
An observation journal helps you to archive your observations, to compare them with each other, to learn as much from your mistakes as you do from successes, and simply to record beautiful experiences. In any case, you will take a more in-depth look at your observation, which can also help you in the long term. Of course, in documented form, it's also much easier to share your results with friends and other amateur astronomers.
There are no rules about how to do this, because your journal should be tailored to your personal needs. Analogue or digital, with text or pictures, or a combination of both. You should make your documentation as convenient and easy as possible. It should be fun and not a chore at the end of a long observation evening. While you’re still at your observing location, note or sketch the most important key data, then you can go into more detail later at home.
How do I describe an observation?
You decide how detailed or scientific your notes will be. So only choose points from the overview that seem important and useful to you. For newcomers to astronomy, for example, listing every technical feature is less interesting in the beginning than recording personal expectations and impressions.
With your growing knowledge, you can also expand the amount of detail you record over time. Important: also note what you didn't see or if you couldn't identify an object with certainty. Using the data that you have recorded about the observing conditions, you will find the reason for this more quickly, and have learned something for the next time.
Collect your observations in one place so that you can refer back to them at any time, whether in a ring binder or on your laptop. The easiest way to document your observations is to record them chronologically. Astronomy photos and sketches can be arranged according to their catalogue number or their respective constellation. Here are our five suggestions on how you can go about recording your experiences:
 Planetary Nebula NGC 7354 in Cepheus, sketch by Marcus Schenk, observed with a 12 inch Dobsonian
1. For new observers: a handwritten logbook
This type is probably the simplest and most intuitive type of documentation. Many people like the tactile experience of writing and browsing through notes. Make a note of what you see and what equipment you use during your observation. Use one notebook on site to capture key points and another one at home where you expand your thoughts and ideas.
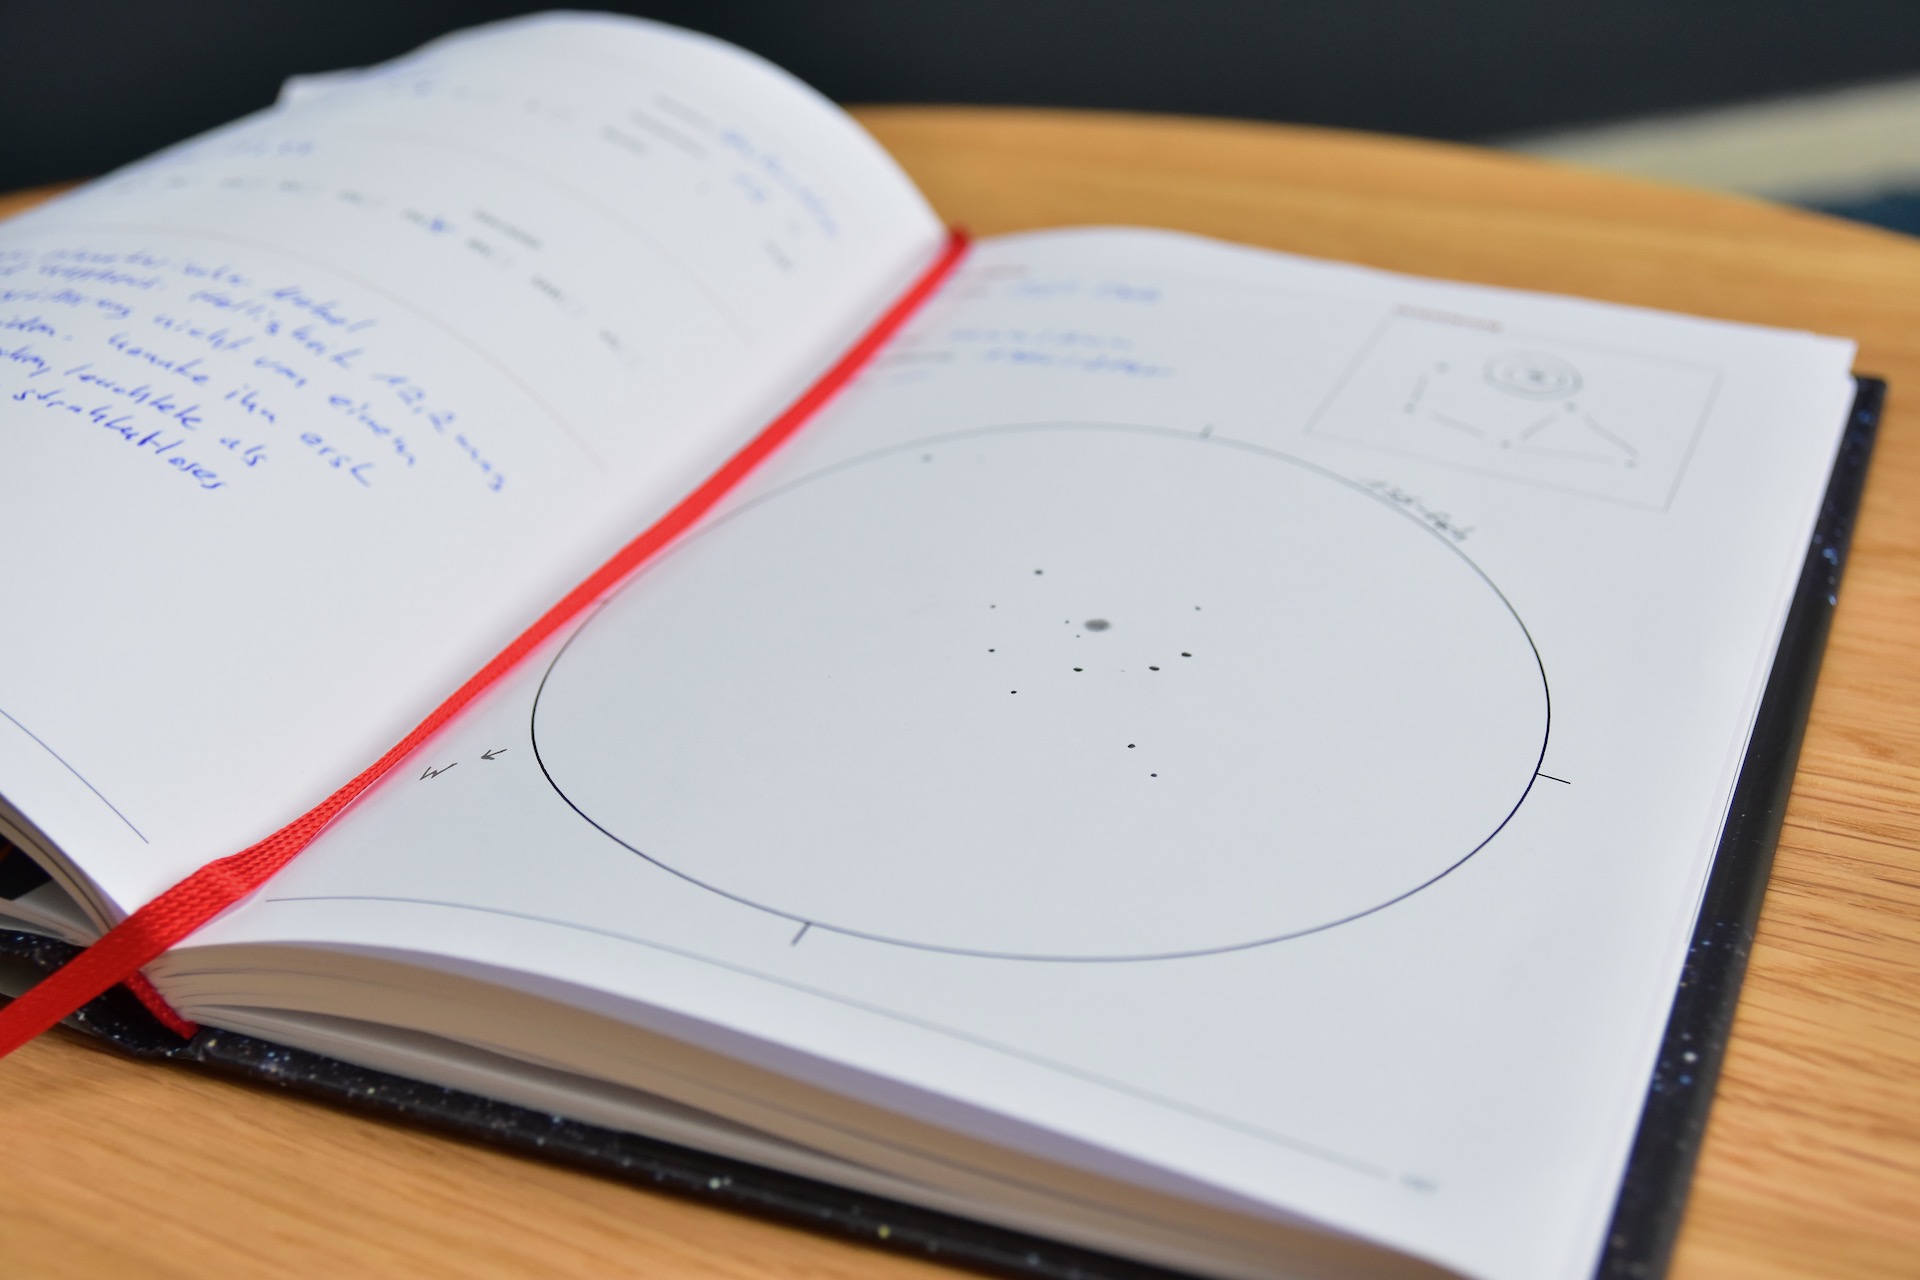
Dedicate a separate (double) page to each object and use the space for free-form notes and sketches. For more structure, simply complete a pre-printed observation sheet with the most important points. You can then file the sheets into a folder or scan them to give you an overview.
2. For ambitious observers: astrophotos
Documenting your observations with astronomy photos is, of course, particularly comprehensive. In this way, you can not only record the key data, but also your exact field of view, and you can study objects in more detail later. Form and brightness are accurately documented. However, astrophotography requires practice and extensive equipment, especially for deep sky objects. Here, using an adapter, the telescope serves as a telephoto lens for your DSLR camera. With the help of a tracking system, several long-term exposure images of stars, planets or other galaxies can be captured.
Don't be discouraged if the photos appear washed out. You need to stack the individual images of the object using image processing software in order to reveal as much detail as possible, and then enhance the contrast. Supplement your photographs with bullet points about camera settings and other information. With this type of documentation, you will not only perfect your observing techniques, but also the art of photography, and you will be able to record your progress in both. Find out more about astrophotography here.
3. For observers who love structure: digital spreadsheets
Those who do not want to keep a handwritten observation journal, or who use a notebook only for field notes, can also digitise the key points afterwards. A simple Excel spreadsheet is a good way to do this. The notes may be more concise, but they’re clearer. You can then sort your data by observation date or object, and enter your information in the columns to document the features that are important to you. Links can also be inserted to image files. A nice feature is the keyword search, which allows you to find specific data or objects more quickly.
4. For mobile observers: a voice recorder
A slightly different way to document information is with a voice recorder. It can be practical to be able to capture your thoughts while observing through your telescope. No headlamp, no notebook and no writing smudged by dew. Small details that would otherwise be lost on the way home are secure. However, finding individual recordings later can be a bit more difficult.
Therefore, structure your audio recordings in the same way as you would a written entry. Always start with the date, location, and time so you can easily refer to the information that follows. It also helps to start a new recording for each object, and not just pause an existing one. Some people use the voice recorder only for field notes, and write them up later. If you have enough free storage space, the recording function on your smartphone is actually all you need. But you also don't have to dig deep into your pocket for a voice recorder - even for a good one. Be sure to select one with a red light, or ensure that you have adjusted your smartphone screen brightness before recording.
5. For creative observers: astronomy sketches
Similar to astrophotography, astronomy sketches are a particularly detailed way to document your observation. They also require time and practice, but you can learn more with them. Last, but not least, you will practice your telescopic vision and your attention to detail. The drawings are made on site as you look through your telescope and reflect the view you see through the eyepiece. Your equipment should include a red light torch, a clipboard as a base, pencils of varying hardness and an eraser. A circle with a diameter of 8 to 12 cm depicts the field of view.
Sketches work well for the Moon and planets, as well as for deep sky objects such as nebulae and clusters. Look out first for prominent features such as bright stars or noticeable shadows. It helps to draw the brightest stars first, then work around to the target object, and then to add the details. You would normally draw black on white, in other words, working in negative. The drawings can then be reversed later using a scanner and image processing software. It is particularly interesting to compare astronomy sketches of the same object by several observers, because everyone develops their own completely unique style.
Now it's your turn!
Just pack your pencil and paper with your telescope tonight, and give it a try. Once you have written or sketched your first few journal entries, you will quickly find a routine and format that suits you. And you’ll very quickly be reaping the rewards of your unique perception of our night sky.
