
Photographing a Solar Eclipse with ZWO Seestar: How to Take Great Photos with the S30 Pro and S50
Do you have a Seestar Smart telescope and want to photograph the solar eclipse?
This article provides detailed step-by-step instructions.
The Moon is about to pass in front of the Sun. You’ve got your ZWO Seestar telescope ready and know exactly what to do.
That’s why we’ve put together these instructions.
Here’s what it’s all about:
- What you need to photograph the solar eclipse with your Smart Telescope
- If you already own a Seestar S50, S30 or S30 Pro, or are planning to buy one
- If you want to follow the total eclipse along the path of totality, for example in Spain
- If you’re staying at home and ‘just’ want to watch and photograph the partial phase
- What steps are really important to ensure the recording goes smoothly in the end
Let's get straight to it!
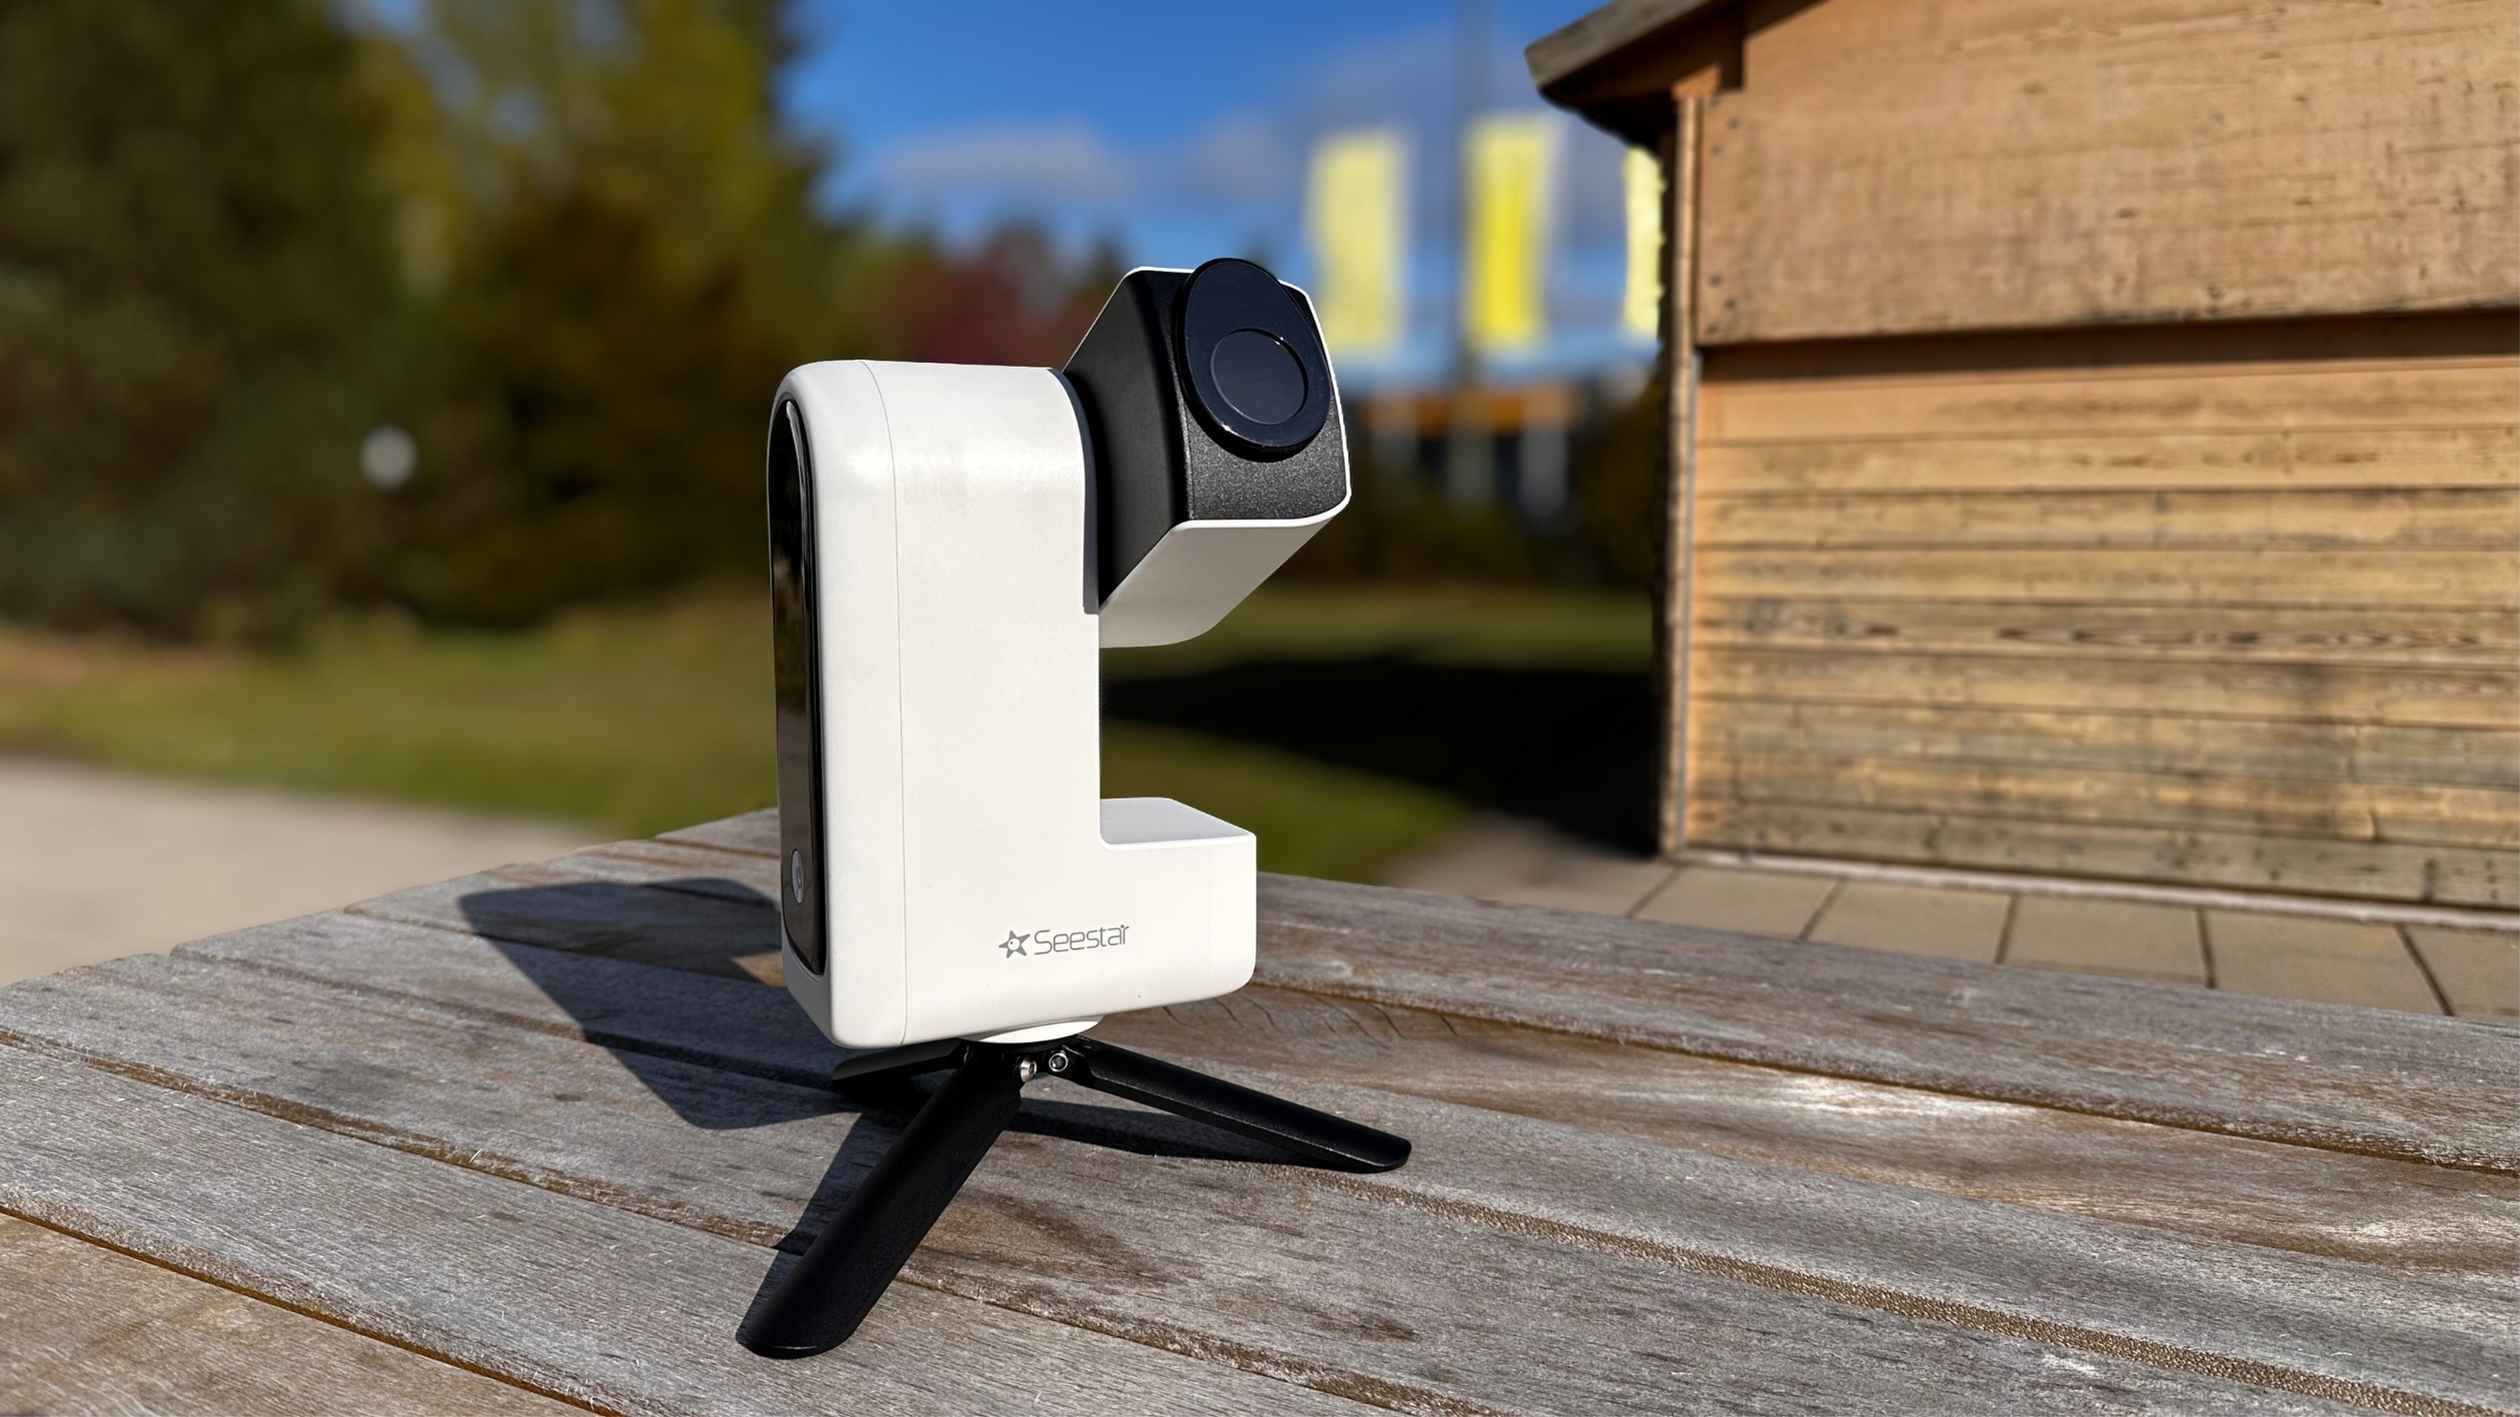
What exactly is Seestar, and why is it suitable for the sun?
The ZWO Seestar is a compact, app-controlled telescope that combines GOTO tracking and a wide range of imaging functions in a single device. The appeal of this telescope lies in the fact that many steps or pieces of equipment that would otherwise be time-consuming are already built in and automated. It is the perfect telescope for getting started with astronomy and astrophotography, whether you are a beginner or already an advanced user.
Why is this so interesting for solar observation?
All these models feature special sun modes with automatic tracking and a suitable sun filter. This not only makes it easier to locate the sun, but also allows you to keep it in the frame for longer.
After all, a solar eclipse isn’t just a brief event. No, there’s a lot going on here, often lasting several hours. That’s why the Smart Telescope is packed with smart features. As a beginner in particular, you’ll benefit from being able to focus more on the experience itself, rather than having to struggle with complicated technology. The Seestar guides you through it and makes things simple.
Nevertheless, the Seestar is a telescope, not a mindless gadget. That means you’ll need to think for yourself, prioritise safety and be prepared to get to grips with astronomy. The Seestar makes many things easier – much like AI, a Thermomix or driver-assistance systems in a car. But it doesn’t do the thinking for us. That’s 100 per cent up to you. But I have no doubts: if you’ve found us here, you’re fully committed.
“Instead of struggling with the technology, you focus on the event.”
Before you start: Safety is non-negotiable
Trick question: What is the nearest star to us? Proxima Centauri? Almost. It’s the Sun.
Yes, exactly: our Sun is, after all, a star in the Milky Way. Because it is so close to us, we cannot simply observe it without taking further protective measures.
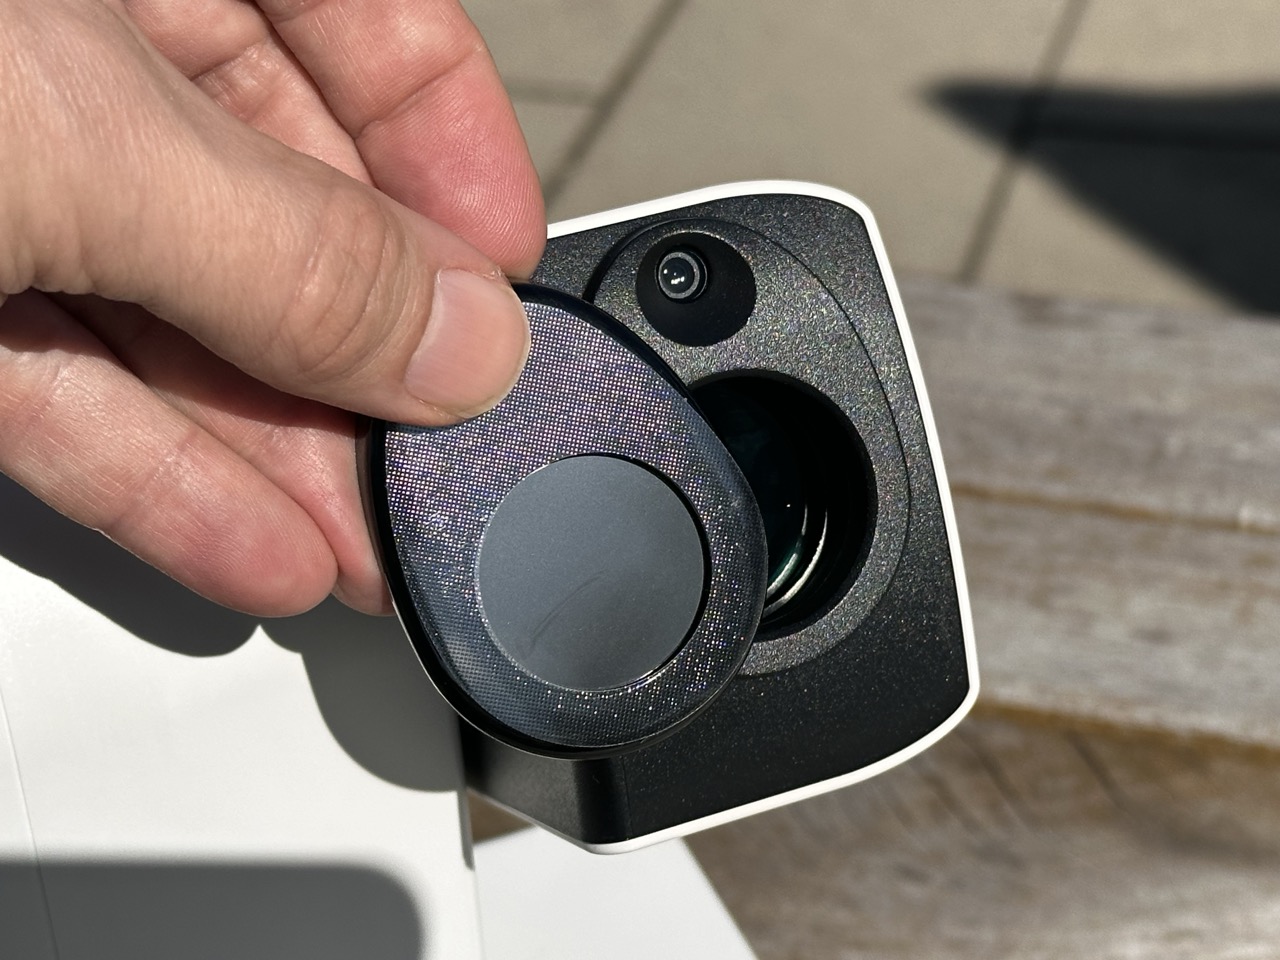
That’s why you must always use a lens hood. Or to put it more plainly: before you point the Seestar at the sun, you must attach the lens hood to the lens.
Safety comes first. Check your sun visor beforehand for scratches and to ensure it is in perfect condition.
If you have any doubts, replace it with a new one.
Important note for all solar eclipse observers!
Keep the solar filter in place over the lens or your eye. Right up until just before totality. Whether you’re using solar eclipse glasses, a camera or a smart telescope: only remove the filter in the very last few seconds. Only when the bright light has almost faded and the diamond ring flashes into view.
Looking directly at the sun without protection, even through a tiny gap in the not-yet-fully-covered sun, can cause irreparable damage to your eyes and the camera sensor in a fraction of a second. Only during the brief period of total eclipse should you look directly at the sun without a filter. As soon as the first ray of sunlight returns, the filter must be placed back over your eyes and the camera immediately. Now that we’ve clarified that, we can carry on with peace of mind.
What you should have done before the Day of Darkness
If you’re thinking of buying a new smart telescope, don’t leave it until the last minute – it’s best to do it now. The sooner you get ready, the sooner you’ll start gaining experience with the telescope, and the better.
Even NASA learnt this the hard way in 1990. The Hubble Telescope was a mega-project and the pride and joy of NASA. At last, a space telescope was to explore the depths of the cosmos – without the interference of Earth’s atmosphere.
A space shuttle launched the Hubble Telescope into a high Earth orbit. Everyone eagerly awaited the first images.
But something wasn’t quite right. The images were blurry. Can you imagine the scientists’ faces and their disappointment? The space telescope’s mirror had been ground 2.2 micrometres too flat. Later, the Hubble Telescope was fitted with ‘glasses’ – a corrective lens – which restored the sharpness of the images.
Luckily, you’ve got it easier than the NASA engineers did back then. You don’t need to grind a new mirror; all you need is a bit of time and curiosity.
What do you need to do?
Do a test run beforehand – not on the day of the eclipse, but a few days in advance. Set up the ZWO Seestar, connect it to the app and locate the Sun. Make sure you fit the solar filter first, of course, and check that the image is in focus. Start the time-lapse mode and let it run for a few minutes. If everything runs smoothly, you’re all set.
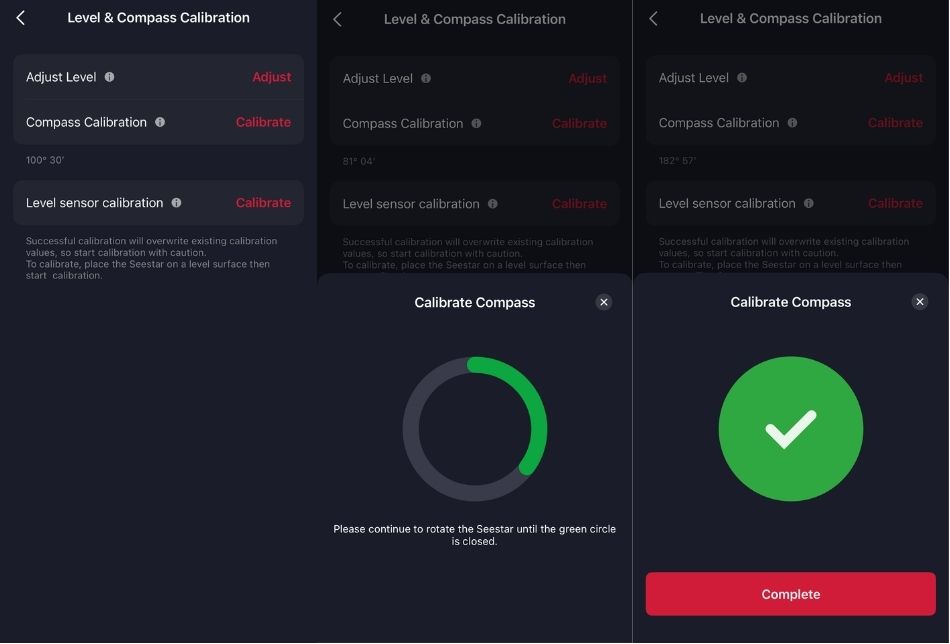
One important feature is the Goto function, which ensures that the sun is located precisely. To use this, the app includes a magnetic calibration feature, which you should carry out beforehand.
Here’s how to do it: Connect the telescope to the app – tap ‘Me’ in the bottom bar – Advanced Features – Level – Compass Calibration – Compass Calibration – Calibrate
You will then see a grey virtual circle. Now rotate the telescope in a circle until the grey virtual circle has completely turned green.
Level the tripod carefully. The app accepts values below two degrees, but for a stable, longer exposure, the more accurate the better. If the sun is not exactly in the centre of the frame after panning, use the joystick for fine-tuning.
The 10-point checklist for the day before
the necessary cables
eclipse
on your smartphone?
separate one? Check whether it fits properly. Can you adjust it
smoothly?
with a clear view to the west. Choose your spot
at least a day in advance, ideally at the same time of day.
A timeline, so you know when phases start and end
or telescopes. You can find Sofi accessories here.
PIs that all? Then you’ve got something to look forward to tomorrow.
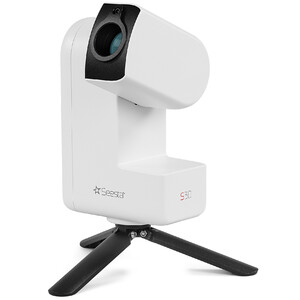
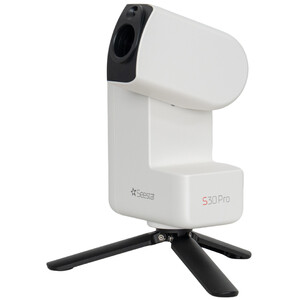
Seestar S30 Pro or Seestar S50: These differences are important in practice
Often, it’s not a question of whether you use the ZWO Seestar S30, S30 Pro or S50. You’ve chosen a model – and that’s the one you have to work with. Nevertheless, it’s important to know the differences.
The Seestar S50 has a focal length of 250 mm and captures images at a resolution of 1920 × 1080 pixels. The Sun fills the frame perfectly. This makes it ideal for the partial phase: it shows the solar disc in detail, including any sunspots.
The Seestar S30 Pro has a focal length of just 160 millimetres. However, it offers a high resolution of 3840 × 2160 pixels and a wide field of view. Naturally, this makes the sun appear smaller, but you can see more of the space around it.
That’s what makes it so fascinating when viewed in its entirety. Because that way, you can perfectly capture the extended corona surrounding the eclipsed sun. What’s more, the S30 Pro features both a wide-angle and a telephoto lens. This makes it easier to find the sun again.
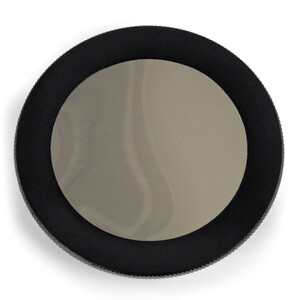
Another difference is how the filter is attached: the S30 and/or S30 Pro use a magnetic mount for this. The S50’s filter is clamped in place. Be sure to check that it fits snugly. If your filter is too stiff to fit, you can also use our special Omegon S50 solar filter. This fits the S50 lens perfectly with the appropriate O-rings.
How to photograph the solar eclipse with the Seestar, step by step
Let’s now take a look at the individual steps you need to follow to capture the solar eclipse.
Step 1: Choose a location and set up in good time
Don’t wait until the eclipse is already underway to start setting things up. Preparation is key, so everything should be ready before the first shadow of the moon touches the sun.
Find a spot with a completely unobstructed view of the sun. There must be no trees or roofs in the way. Make sure the ground is very stable and firm. Allow at least 30 to 45 minutes before the eclipse begins. This will give you time to set everything up calmly, connect your equipment and take a test shot. If you’re early, you’ll have a valuable buffer. After all, the eclipse won’t wait for you.
Keep all your equipment within easy reach: your Seestar, tripod, solar filter, smartphone, power bank and, of course, all your cables. Don’t forget your solar eclipse glasses.
Here’s another handy tip: it gets hot quickly in direct sunlight, and that goes for both you and your devices. That’s why it’s best to keep your power bank in the shade.
Step 2: Level the tripod and attach the sun filter
Set up the tripod by eye or using a spirit level, switch on your Seestar and connect it. Go to Advanced Features and select Tripod Calibration. The app will now display the deviation from level. Keep adjusting the alignment until the level is within the green range.
Step 3: Start Sun Mode and centre the sun
Let’s get started with stargazing. Yes, that’s right: with the Seestar, you get both
possible – digital observation and photography. Because you can watch as the image is being captured. In amateur astronomy, this is known as EAA: electronically assisted astronomy.
Select the third icon, ‘Solar System’; you’ll see the Sun at the very top. Click on the ‘Goto’ or ‘Go-Gazing’ button. The Seestars’ arm will extend and the app will prompt you to fit the solar filter. Do this and make sure it’s properly secured. Then continue: tap ‘Installed & Start Observing’. The Seestarr will immediately start moving and automatically swivel towards the Sun.
Is the sun really perfectly centred? Sometimes it ends up slightly off-centre, especially if the levelling wasn’t quite perfect. If so, now’s the time to correct it.
If the Seestar doesn’t automatically track the sun, you can easily adjust it manually using the S30 Pro’s wide-angle lens and joystick. With the Seestar S50, you can fit a separate sun tracker to help you locate the sun with ease.
Tip: Position the sun exactly in the centre and enable tracking so that the sun remains in the frame at all times. This is essential if you’re observing the sun for several hours.
Step 4: Set the focus and take a test shot to check that everything is working properly

The sun is centred. Now for the focus.
Start the autofocus and wait until it has finished. Then take a close look at the image: are the edges of the sun’s disc in focus? Can you make out any sunspots? If you feel that something is still missing, use the Focus Panel to make a manual adjustment. The sunspots or the edge of the sun are particularly good reference points for this.
Here comes the test recording!
Start the mode of your choice – preferably time-lapse – and let it run for a while. As it does, check: Does the sun stay in the frame? Is the image quality okay?
That might sound trivial, but it’s important. Do take a few minutes to do this.
Step 5: Why time-lapse is the right mode
The partial phase isn’t just a fleeting moment. Depending on your location, it lasts for over an hour and a half. During this time, the moon’s shadow gradually moves across the sun. The time-lapse mode is perfect for capturing this.
Later, the eclipse will unfold before your eyes – or, to be more precise, on your screen – like a film. The best part is that during the eclipse, you can mostly sit back and relax. You’ll then have the advantage of being able to view the Sun visually using a filter and another instrument.
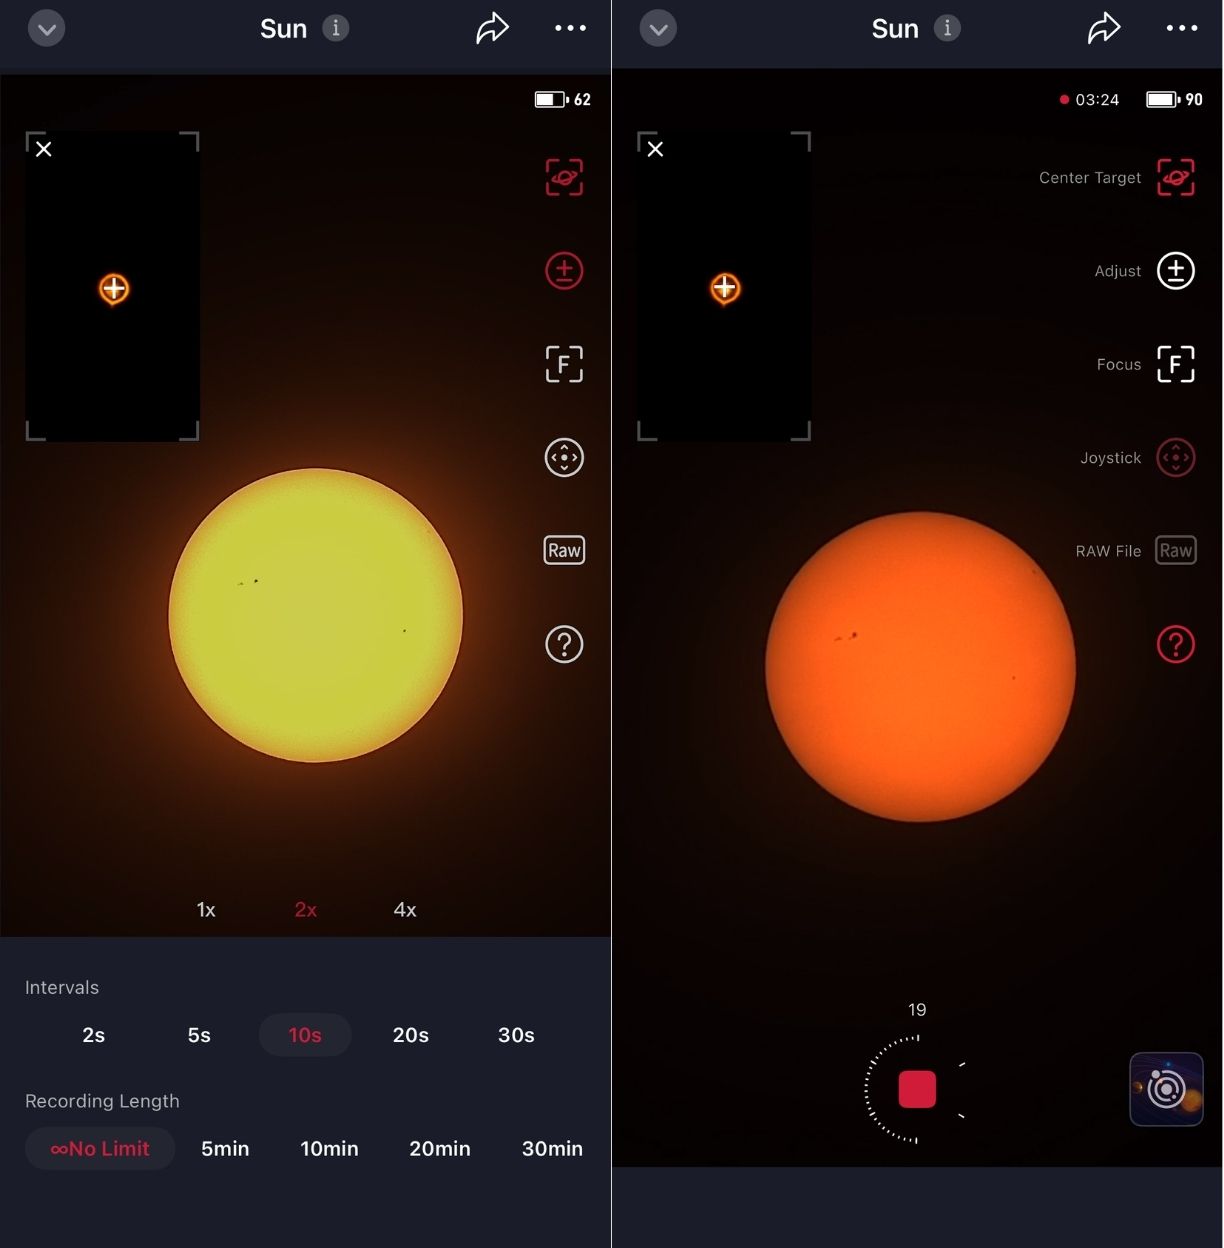
Here's how to set the time-lapse interval:
At the bottom left, you'll find a small cog icon. There, you can set the duration and the interval.
Our recommendation for the partial phase is: intervals of around 5–10 seconds and an indefinite duration, but at least one hour or more.
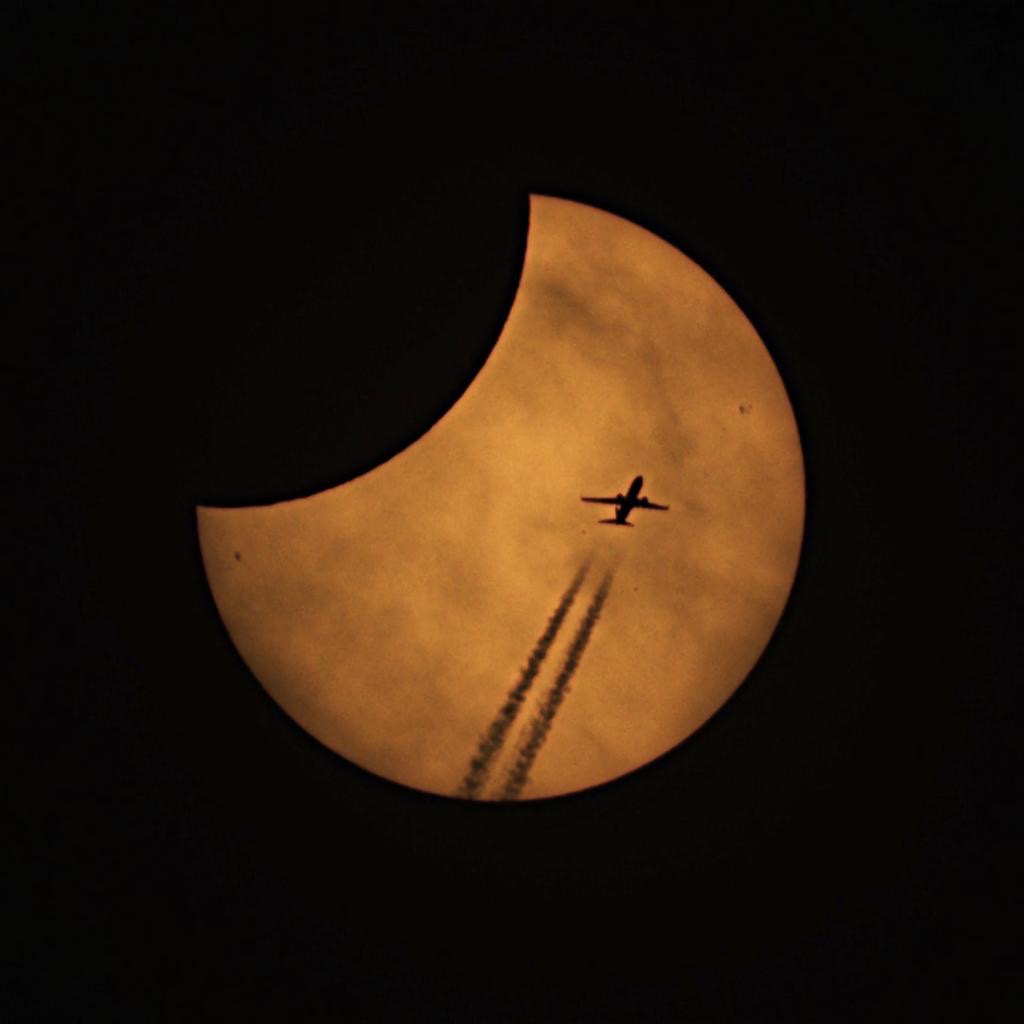
This ensures that the sun’s path is shown smoothly in the final video and it doesn’t get boring – because the moon moves only slowly in front of the sun. That’s why you don’t need shorter intervals to begin with. With an hour of recording time, you’ll end up with a video of the sun lasting about 15 seconds. With a 5-second exposure time, you also have a better chance of capturing objects in front of the sun, such as aeroplanes or birds. The time-lapse will also be smoother, although this does increase the amount of storage required.
What you see on your mobile: the sun in the centre and the capture button at the bottom, with a circular slider for the exposure time showing the number of frames captured.
What will you do when the sun starts to darken or the total phase begins?
Then you have three options:
1. Under ‘Adjust’, adjust the exposure time and gain – whilst the recording is still in progress.
2. Stop the time-lapse and select a shorter interval.
3. Stop the time-lapse and take individual photos during this phase.
However, if you choose option 2 or 3, your ‘film’ will be interrupted and you’ll need to edit your clips together later – if you wish – to create a continuous film. Individual clips are of course also possible, but you’ll then literally be in control.
Step 6: Keep an eye on things during the partial phase
Your recording is running. So everything’s fine? Almost! You can mostly sit back and relax now, but your smart telescope still needs regular checks.
1. The sun is beating down – and heating up your telescope too. This means the focus may shift over time. So make sure to reset the autofocus every 20–30 minutes.
2. Don’t minimise the app. Otherwise, the time-lapse recording might stop, and that’s exactly what you don’t want.
3. While you’re at it: check the battery or power bank regularly too.
Fun fact: Just as I was writing this, my laptop shut down because the battery was running low. I wonder if that means anything?
Step 7: Partial viewing or totality path
At this stage, one thing is clear: either you’re outside the path of totality and will experience the partial phase, or you’re right in the middle of it and will be able to admire the totality. In that case, you’ll also want to capture the solar corona.
.jpg)
Outside the whole
If you’re watching the solar eclipse anywhere in Europe, leave your solar filter on the telescope the whole time. Your time-lapse recordings or individual photos will simply continue. The good news is that you hardly need to change a thing. Apart from perhaps making minor adjustments to the exposure time. Otherwise, you can follow the eclipse until the Sun disappears below the horizon.
It’s different in the totality film …
Right at the heart of the action
Are you in the path of totality? Congratulations. You’re about to witness an impressive natural spectacle. It’s also going to get a bit more complicated. But only a little.
Don’t stick with time-lapse mode; switch to video or RAW mode and set the exposure time manually. It’s best to leave the automatic settings out of it here. When the crescent sun disappears, the camera will increase the exposure and blow out precisely the fine details that matter most. Start with an exposure time of around 1 ms and a gain between 10 and 22. These are rough guidelines, not a set formula. You’ll only know what really works by looking at the image on the spot.
Filter removed, but planned
Before the partial phase ends, remove the filter from your telescope. This step is a bit tricky, as you mustn’t remove the filter too early. A good indicator is the diamond ring effect. As soon as the sunlight passes through the last lunar craters, you can remove the solar filter from the lens, photograph the totality, and put it back on shortly after the second diamond ring effect.
If you take the filter off for a moment, be aware of the risks!
Step 8: After totality
The critical phase is now coming to an end. Return to the process now, ensuring you follow the path back to the normal workflow.
If you were standing outside the path of totality, your workflow continued smoothly and without any issues during that time. Your time-lapse continues, the filter protects the lens, and everything is fine for your shots.
Have you photographed the totality? Then make sure your filter is securely back on the lens. Check the framing so that the Sun remains in the centre of the frame for the rest of the eclipse. Is the tracking accurate? The eclipse will last a little while longer, but the Sun will set soon – at least during the 2026 solar eclipse.
Step 9: Stop recording
It’s getting dark. Or the sun has set. Stop the time-lapse or video recording and save the data before you pack up. The app usually does this automatically. If you like, you can export individual video clips to your smartphone now, so you don’t have to watch them only within the app. Now you can check whether everything went smoothly and whether you’ve got something nice to show for it.
And you most likely have! After all, you prepared for the eclipse days in advance and did a dress rehearsal.
FAQs: What problems might arise during the solar eclipse?
1. Neglecting the focus: Autofocus isn’t a one-and-done system. It can shift due to changes in temperature. Re-focus the camera roughly every 30 minutes.
2. Minimising the app: This can be risky, as it may interrupt the time-lapse recording. It might, but it doesn’t have to – it’s still a risk.
3. Inaccurate levelling: If you simply set the tripod up roughly level, you risk inaccurate tracking. The sun may repeatedly move out of the centre of the frame. Make sure you level the tripod precisely beforehand and also carry out a compass calibration.
4. Trust the automatic settings: Automatic exposure tends to overexpose details in the overall shot. Set the exposure manually during this phase.
5. Rushing: How does this fit into the list? It’s simple: the human factor plays a role. Ideally, you should have practised beforehand. Familiarise yourself with how it works, and when you fit and remove the filter: do so carefully and calmly.
Using the Smart Telescope to capture the solar eclips
With the Seestar S30 or S50, you can capture wonderful memories of the solar eclipse, whether you’re watching the totality or the partial phase. The equipment is relatively easy to use, making it ideal for beginners or those new to the technology.
The most important thing is that you have the chance to create something special – something you can look back on time and again.
If you don’t have a smart telescope yet, why not have a look around our shop? You can also use smart telescopes from other manufacturers, as they often work in a similar way.
I hope you have a wonderful time and enjoy the solar eclipse! And, of course, I hope for a cloudless sky.
Author: Marcus Schenk
Marcus is a stargazer, content creator and book author. He has been helping people to find the right telescope since 2006, nowadays through his writing and his videos. His book "Mein Weg zu den Sternen für dummies Junior" advises young people, and those who are still young at heart, what they can discover in the sky.
As a coffee junkie, he would love to have his high-end espresso machine by his side under the starry sky.