

Colour fringing on low-lying planets
Hurrah, it’s planet season! Unfortunately, your expensive apo reveals psychedelic colour fringing. The atmosphere is to blame – but an ADC offers a remedy.
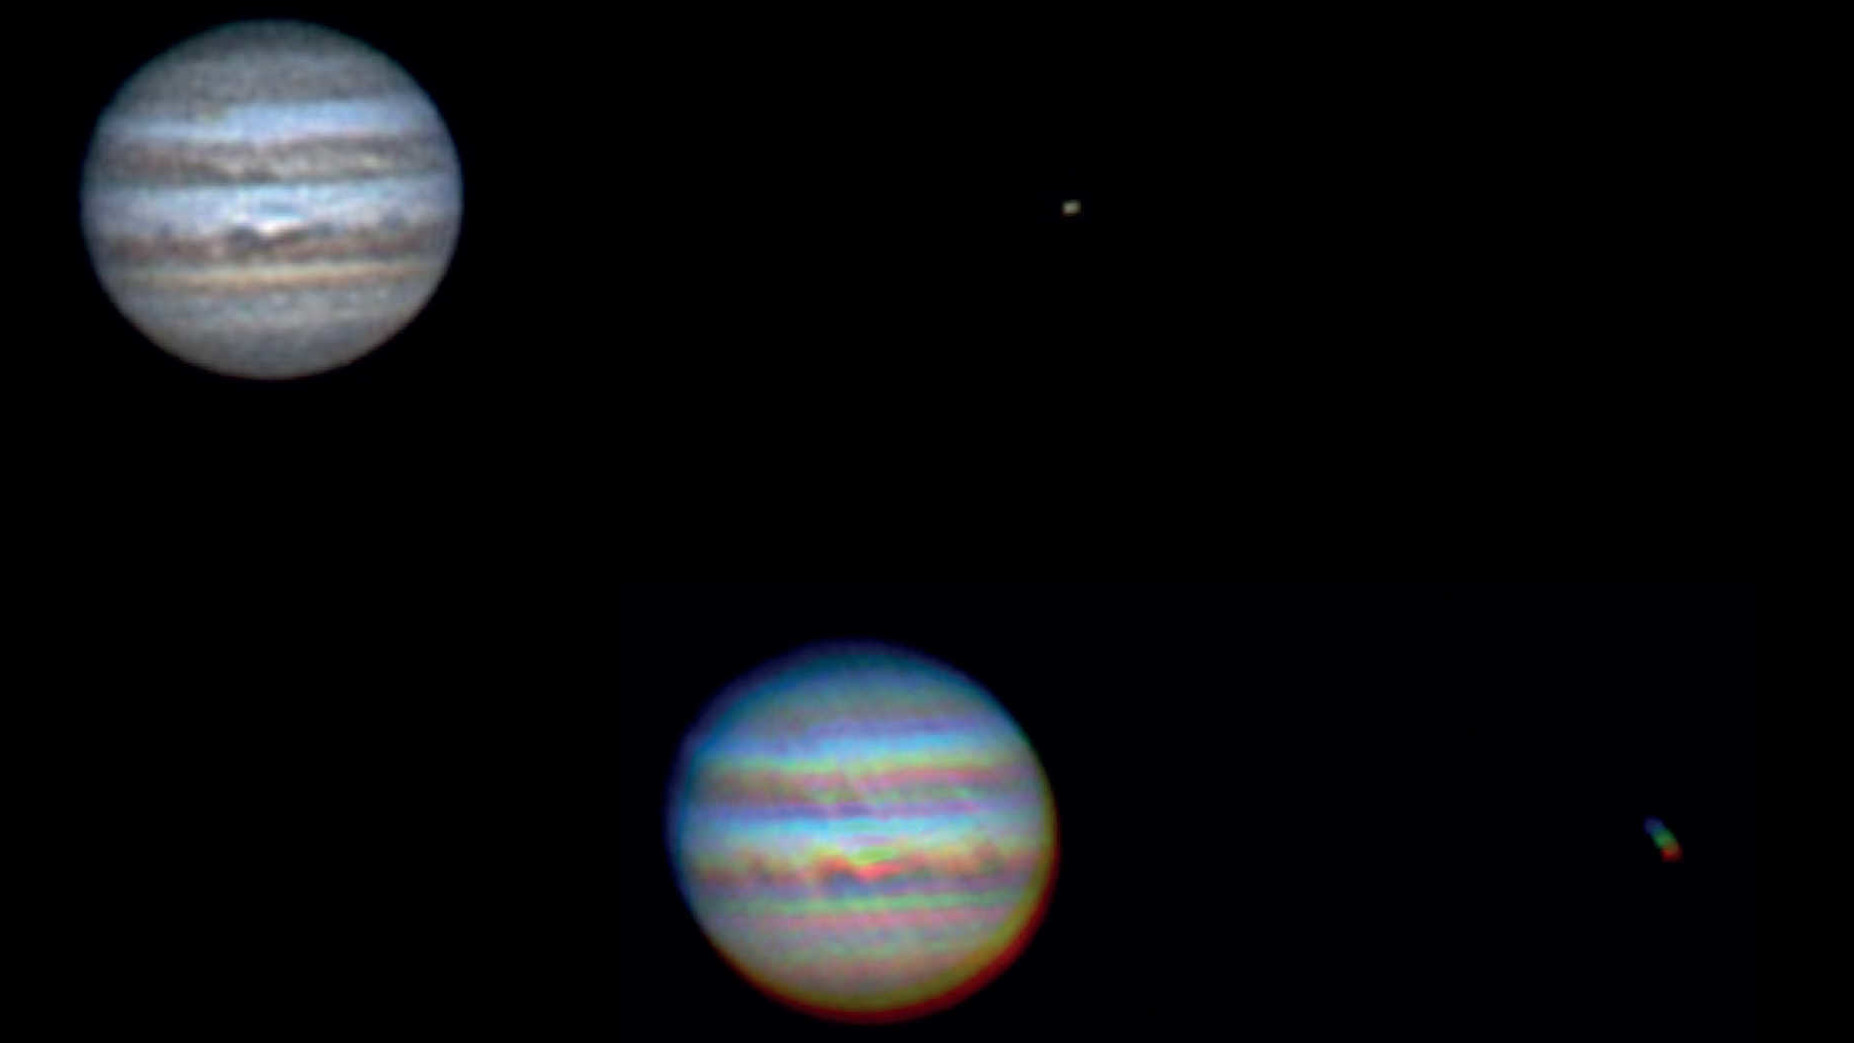 The closer a planet is to the horizon, the stronger the rainbow effects visible in the image. P. Oden
Finally, the lean period for planetary observers has come to an end. Unfortunately, Jupiter, Saturn and Mars are relatively low in the sky this summer. This means that colour fringing on planets is very common, even with expensive telescopes. The reason for this and the appropriate solution can be found in the first article in the Peter's Problem Solvers series.
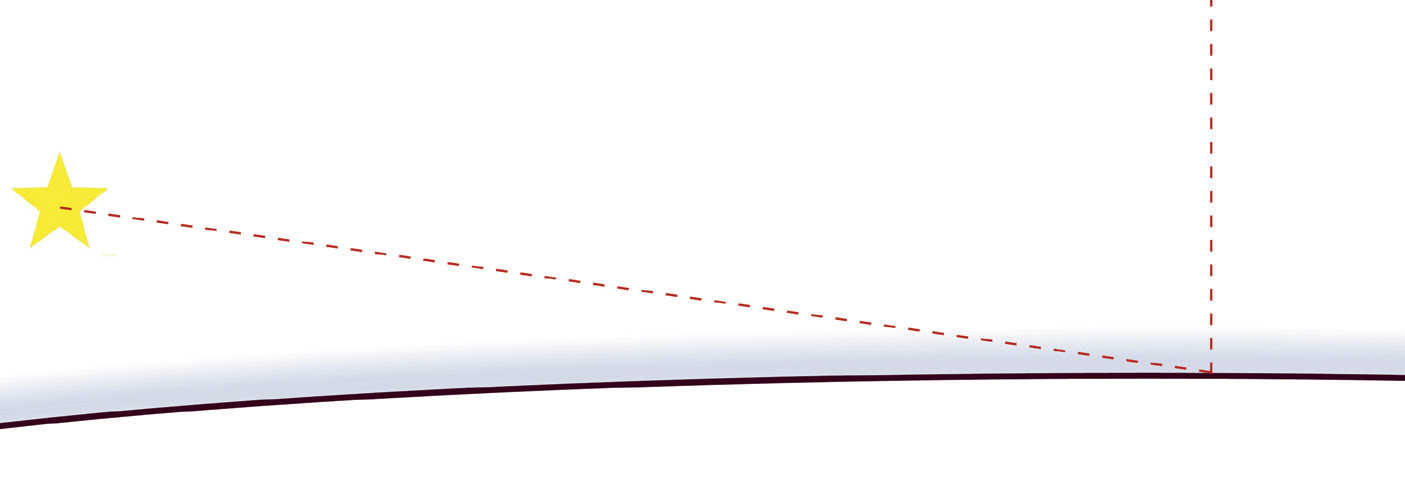 The lower a star or planet is in the sky from the point of view of the observer, the more obliquely the light rays hit the layers of air and the longer their path through the atmosphere becomes.
This summer, the planets are comparatively low in the sky: In Bonn, Jupiter rose only 23° above the horizon, Mars just under 14° and Saturn just under 17° above the horizon. And this will not improve in the years to come. This causes three problems: you need a clear view towards the southern horizon, because the planets are all more or less two fists (of an outstretched arm) high above the horizon. In addition, at higher magnifications, extremely still air is required, as the low position means that the light has to travel much further through the atmosphere. In the case of Saturn, it is about 2.5 times the distance, and for Mars, it is even about 4 times the distance compared to when observing at the zenith. With a bit of luck, however, you will still find good opportunities for observation, but you still have a third problem to deal with.
The accursed colour fringes
Even if you observe planets with the most expensive apochromatic telescope, you will see very clear colour fringing on the planets, bluish on one side and reddish on the other. What causes this? The lower in the sky the observed stars or planets are, the more obliquely their light hits the layers of the Earth's atmosphere. Not only does the distance that light has to travel to the observer lengthen, but the atmosphere acts like a prism on the light.
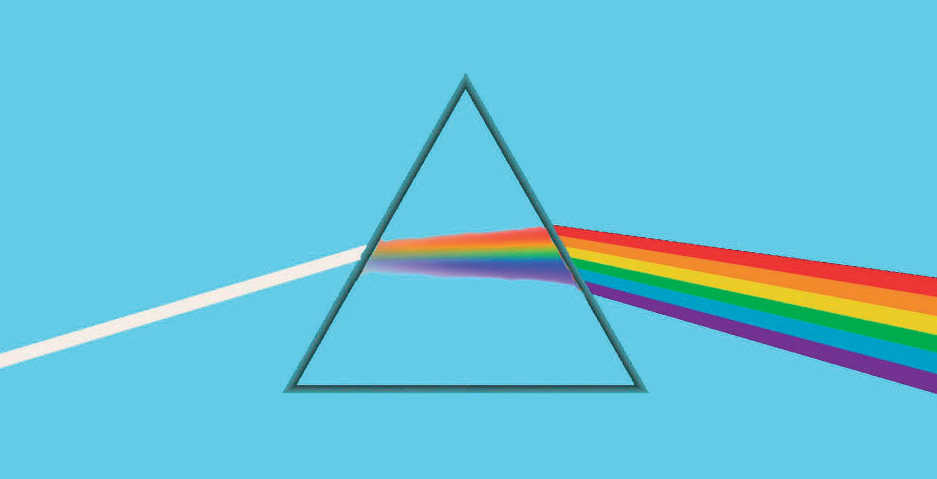
The transition from one optical medium to another results in what is known as dispersion. Light of different wavelengths is refracted at different angles. Blue light is refracted more strongly when it is transferred to an optically denser medium (in our specific case from a vacuum to the layers of air).
The play of light through a prism in bright sunlight may be beautiful, but it’s very disruptive in our case. But there is a simple remedy! If a prism is placed in the telescope’s optical path, this effect can be reversed and the different light beams can be superimposed correctly.
 If light hits another optical medium at an angle, the individual colour components of that light is deflected to varying degrees.
A prism helps
Of course, you’ll need three different prisms for the three planets mentioned above. And even these only work correctly at a certain point in time (in other words altitude above the horizon). Ultimately, a whole collection of prisms would be needed for different positions of the stars and planets above the horizon, which would have to be inserted into the optical path in the correct position.
Fortunately, there is a solution that greatly simplifies the life of amateur astronomers: a variable prism that can be individually adjusted to the observing conditions. However, glass is not malleable to allow us to adjust the angle of the prism. The solution is simply to arrange two rotating prisms together.
If the prisms are arranged opposite to each other, they act like a plane-parallel glass sheet and the prism effect is negligible (or they cancel each other as light enters and exits). Conversely, in the reverse position the effect of a single prism is doubled and a strong dispersion occurs.
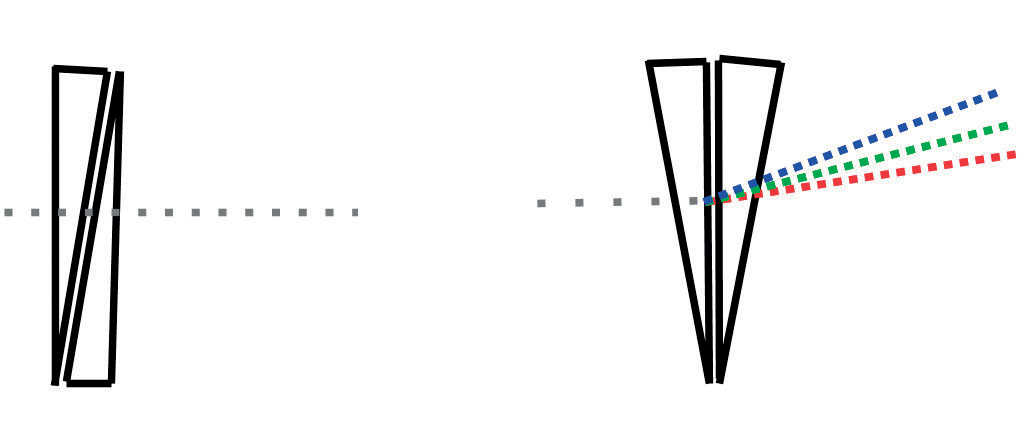 Two identical prisms arranged opposite to one another will cancel each other out, or the effect will be doubled if they are arranged in the same position.
Der Atmospheric Dispersion Corrector
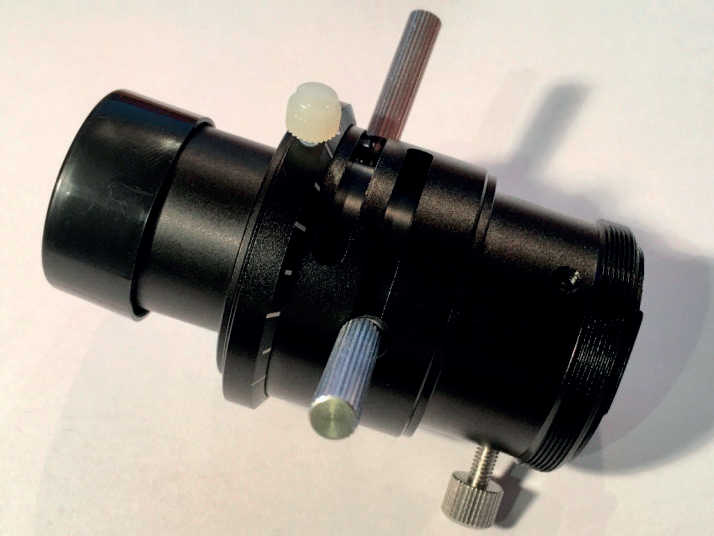 An ADC (atmospheric dispersion corrector) with its various settings. P. Oden
This option is exactly what a commercial atmospheric dispersion corrector or ADC offers. Of course, an ADC needs to be set correctly to achieve the desired reduction of the disturbing colour fringing and, indeed, not amplify them. We therefore cannot offer a general guide for every available ADC and for every telescope in combination with secondary mirrors, zenith mirrors, and so on. You also need to bear in mind that an equatorial mount also results in an effective rotation of the telescope relative to the horizon during its continual motion.
The interfering dispersion during observation is always perpendicular to the horizon. For a telescope in combination with an alt-AZ or AZ mount (e.g. a Dobsonian) it is simple. The telescope follows the direction of the horizon and so the corrector can be aligned accordingly.
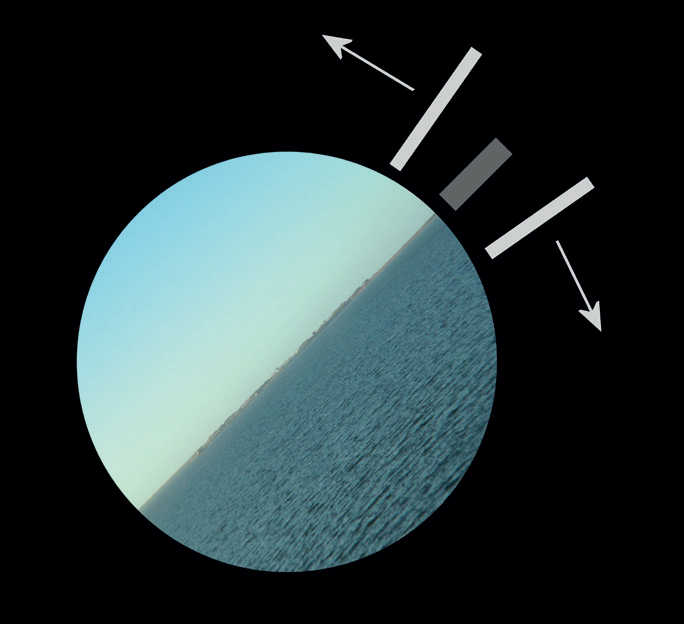 If the horizon is visible when looking through the eyepiece, then the zero-point screw can be directly aligned with it. The two adjusting screws can then be adjusted symmetrically. P. Oden
However you can generally can orient yourself to the fact that the ADC zero setting, which is marked in the illustrated ADC by the small plastic screw, must run exactly through the line of the horizon. The other two larger adjusting screws that move the two prisms must be moved symmetrically and opposite to this zero position. Start at the zero position where all three screws are in line, and then slowly move the two larger screws outwards in opposite directions. When looking through the eyepiece, you will quickly notice very clearly, especially at higher magnifications, where the disturbing rainbow effect is minimised.
But the alignment of the marking screw for the zero point is very important. If the position of the ADC is not correct, the colour defect cannot be zeroed and indeed may even worsen in some situations.
Author: Peter Oden / Licence: Oculum Verlag GmbH