
A standalone autoguider: the easy path to good astronomy photos?
Great astronomy photographs with neither a laptop nor cable clutter: this is the promise of stand-alone autoguiders. We tested two models.
Andromeda Galaxy, Pleiades or the Hercules Cluster: we all love beautiful astronomy photographs. Especially when their long exposure times give them a delightful depth of space - something that we could never see with the naked eye.
There is one thing that such images have in common: they were all created with a perfectly tracked telescope. This is because perfect tracking is the first requirement for success.
In this article you will learn:
- How to professionally shoot deep sky photographs
- The difference between normal and standalone autoguiders
- How the Lacerta MGEN and StarAid Revolution acquit themselves in our test
The article is for you if you:
- Want to use your DSLR camera to photograph the night sky
- Are a newcomer to astrophotography
- Want to keep your kit to the absolute minimum
Why you may need an autoguider and what are the differences between them?
Even when precisely aligned, no mount will work accurately over a longer period of time. This is due to periodic deviations caused by tolerances in the worm gear. Therefore, you need to manually correct any shot that has an exposure time of several minutes or more.
This was done manually in the past by ensuring that a guide star remained centred in the eyepiece crosshairs. However, with digital photography we need to track more precisely and, where possible, with pixel-perfect accuracy. Chuck Norris may be able to do this with the little finger of his left hand while he drinks a cup of coffee with the other. But we prefer to leave it to an autoguider.
What is that?
It is a camera that automatically tracks one or more guide stars. If there is a deviation, the camera sends correction commands to the mount. As a result, you get a perfectly tracked astronomy photographs and point-shaped stars with no smears left by star trails.
But is it really that simple?
The difference between classic and standalone autoguiders
The answer is: yes and no. Classic autoguiders need a laptop, cables, software and perhaps an additional table to rest everything on. This is a lot of equipment that you would need to carry with you and set up. Plus you will need a car boot that you can pack full of accessories. This effort is necessary if you are photographing with an astronomy camera. Signals are constantly being exchanged between the computer and the mount.
However, if you use a DSLR or system camera, you can minimize the effort. At least a little. The solution is a stand-alone autoguider. You don't need a laptop and therefore save on equipment. After all, at night and under a dark night sky you want everything to be convenient and straightforward.
We looked at the Lacerta MGEN and StarAid Revolution standalone autoguiders in practice. Which performs better?
This what a setup for astrophotography with guiding looks like
In order to create successful astronomy photographs with long exposure times, you need some additional equipment besides your telescope:
- A mount with GoTo control and a ST-4 connection
- Guidescope or off-axis guider
- Autoguider
- SLR or system camera with a cable shutter release
- T-ring and adapter to connect the camera to the telescope
- 5V power bank
Plus a few screws, rails, and of course all the other accessories that visual observers also require: stool, red light lamp, star chart.
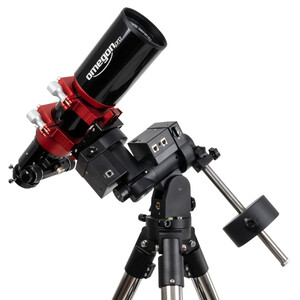
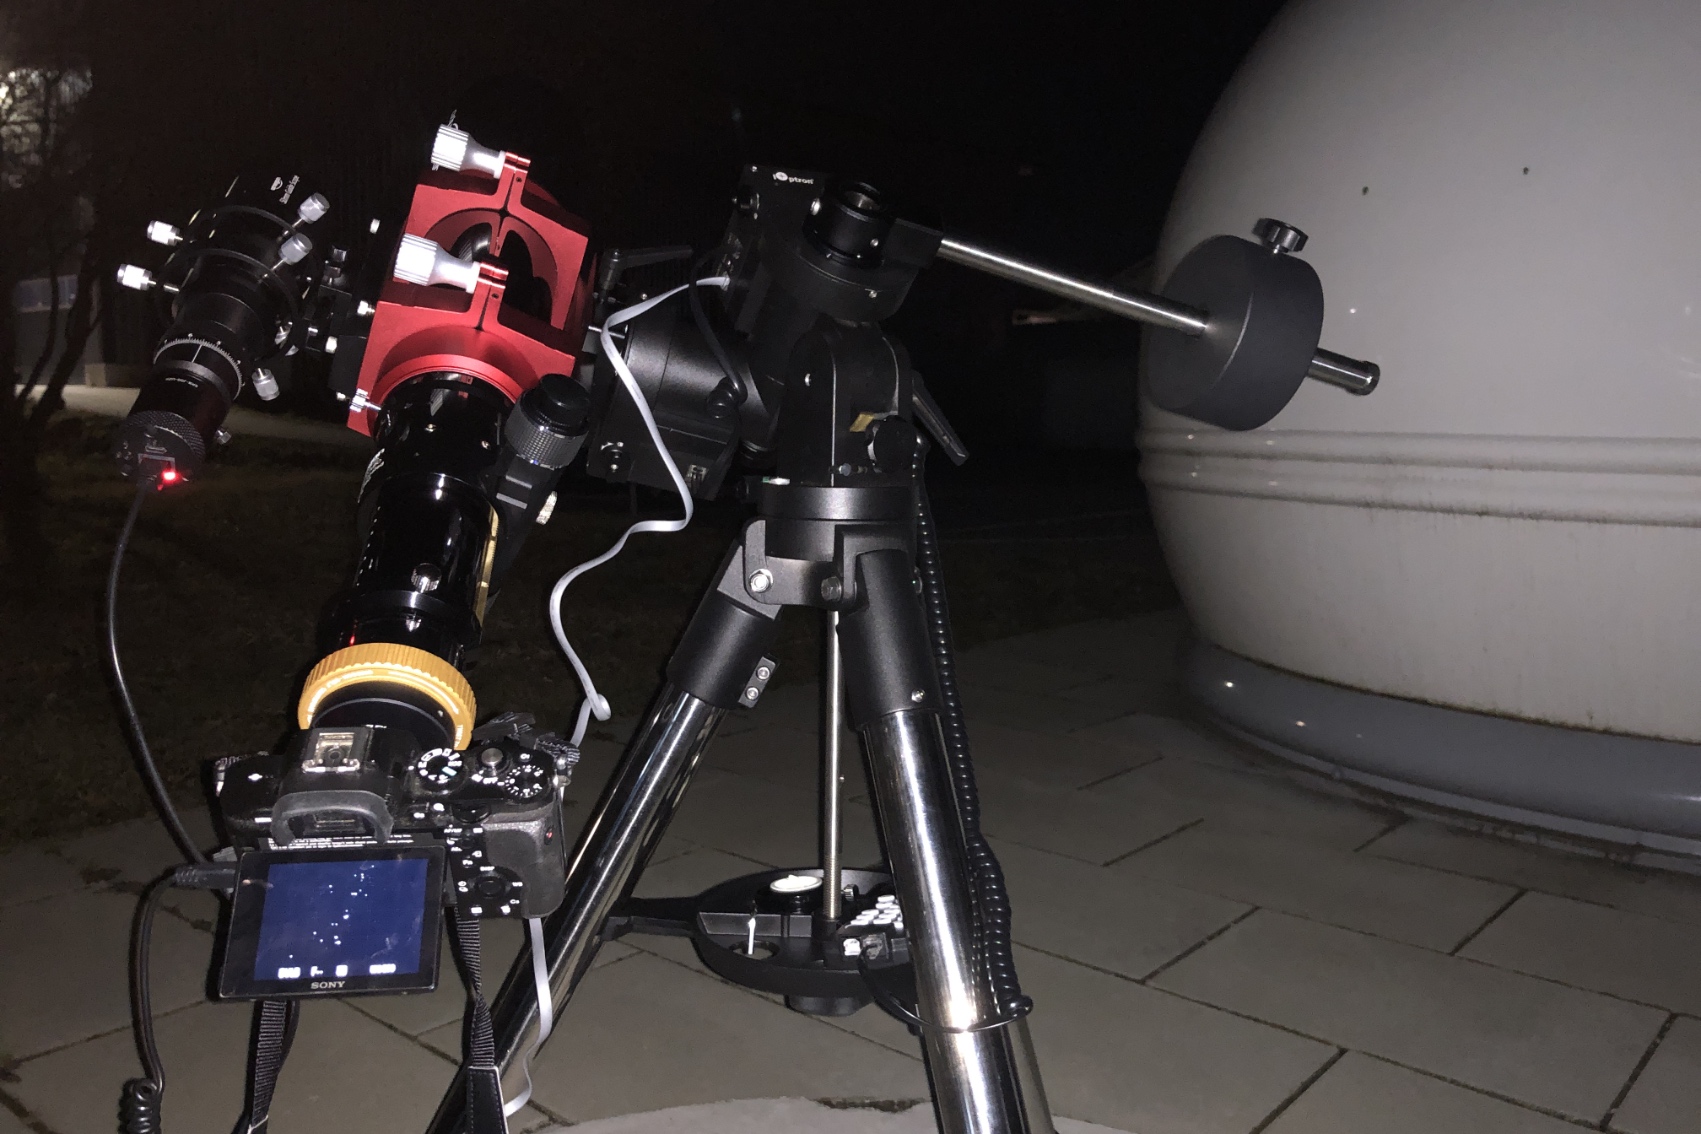
On a clear night, at the Astroshop observatory, we took a look at the two autoguiders combined with an Omegon Pro APO 85/560 ED triplet apochromatic refractor on an iOptron CEM26 LiteRoc mount.
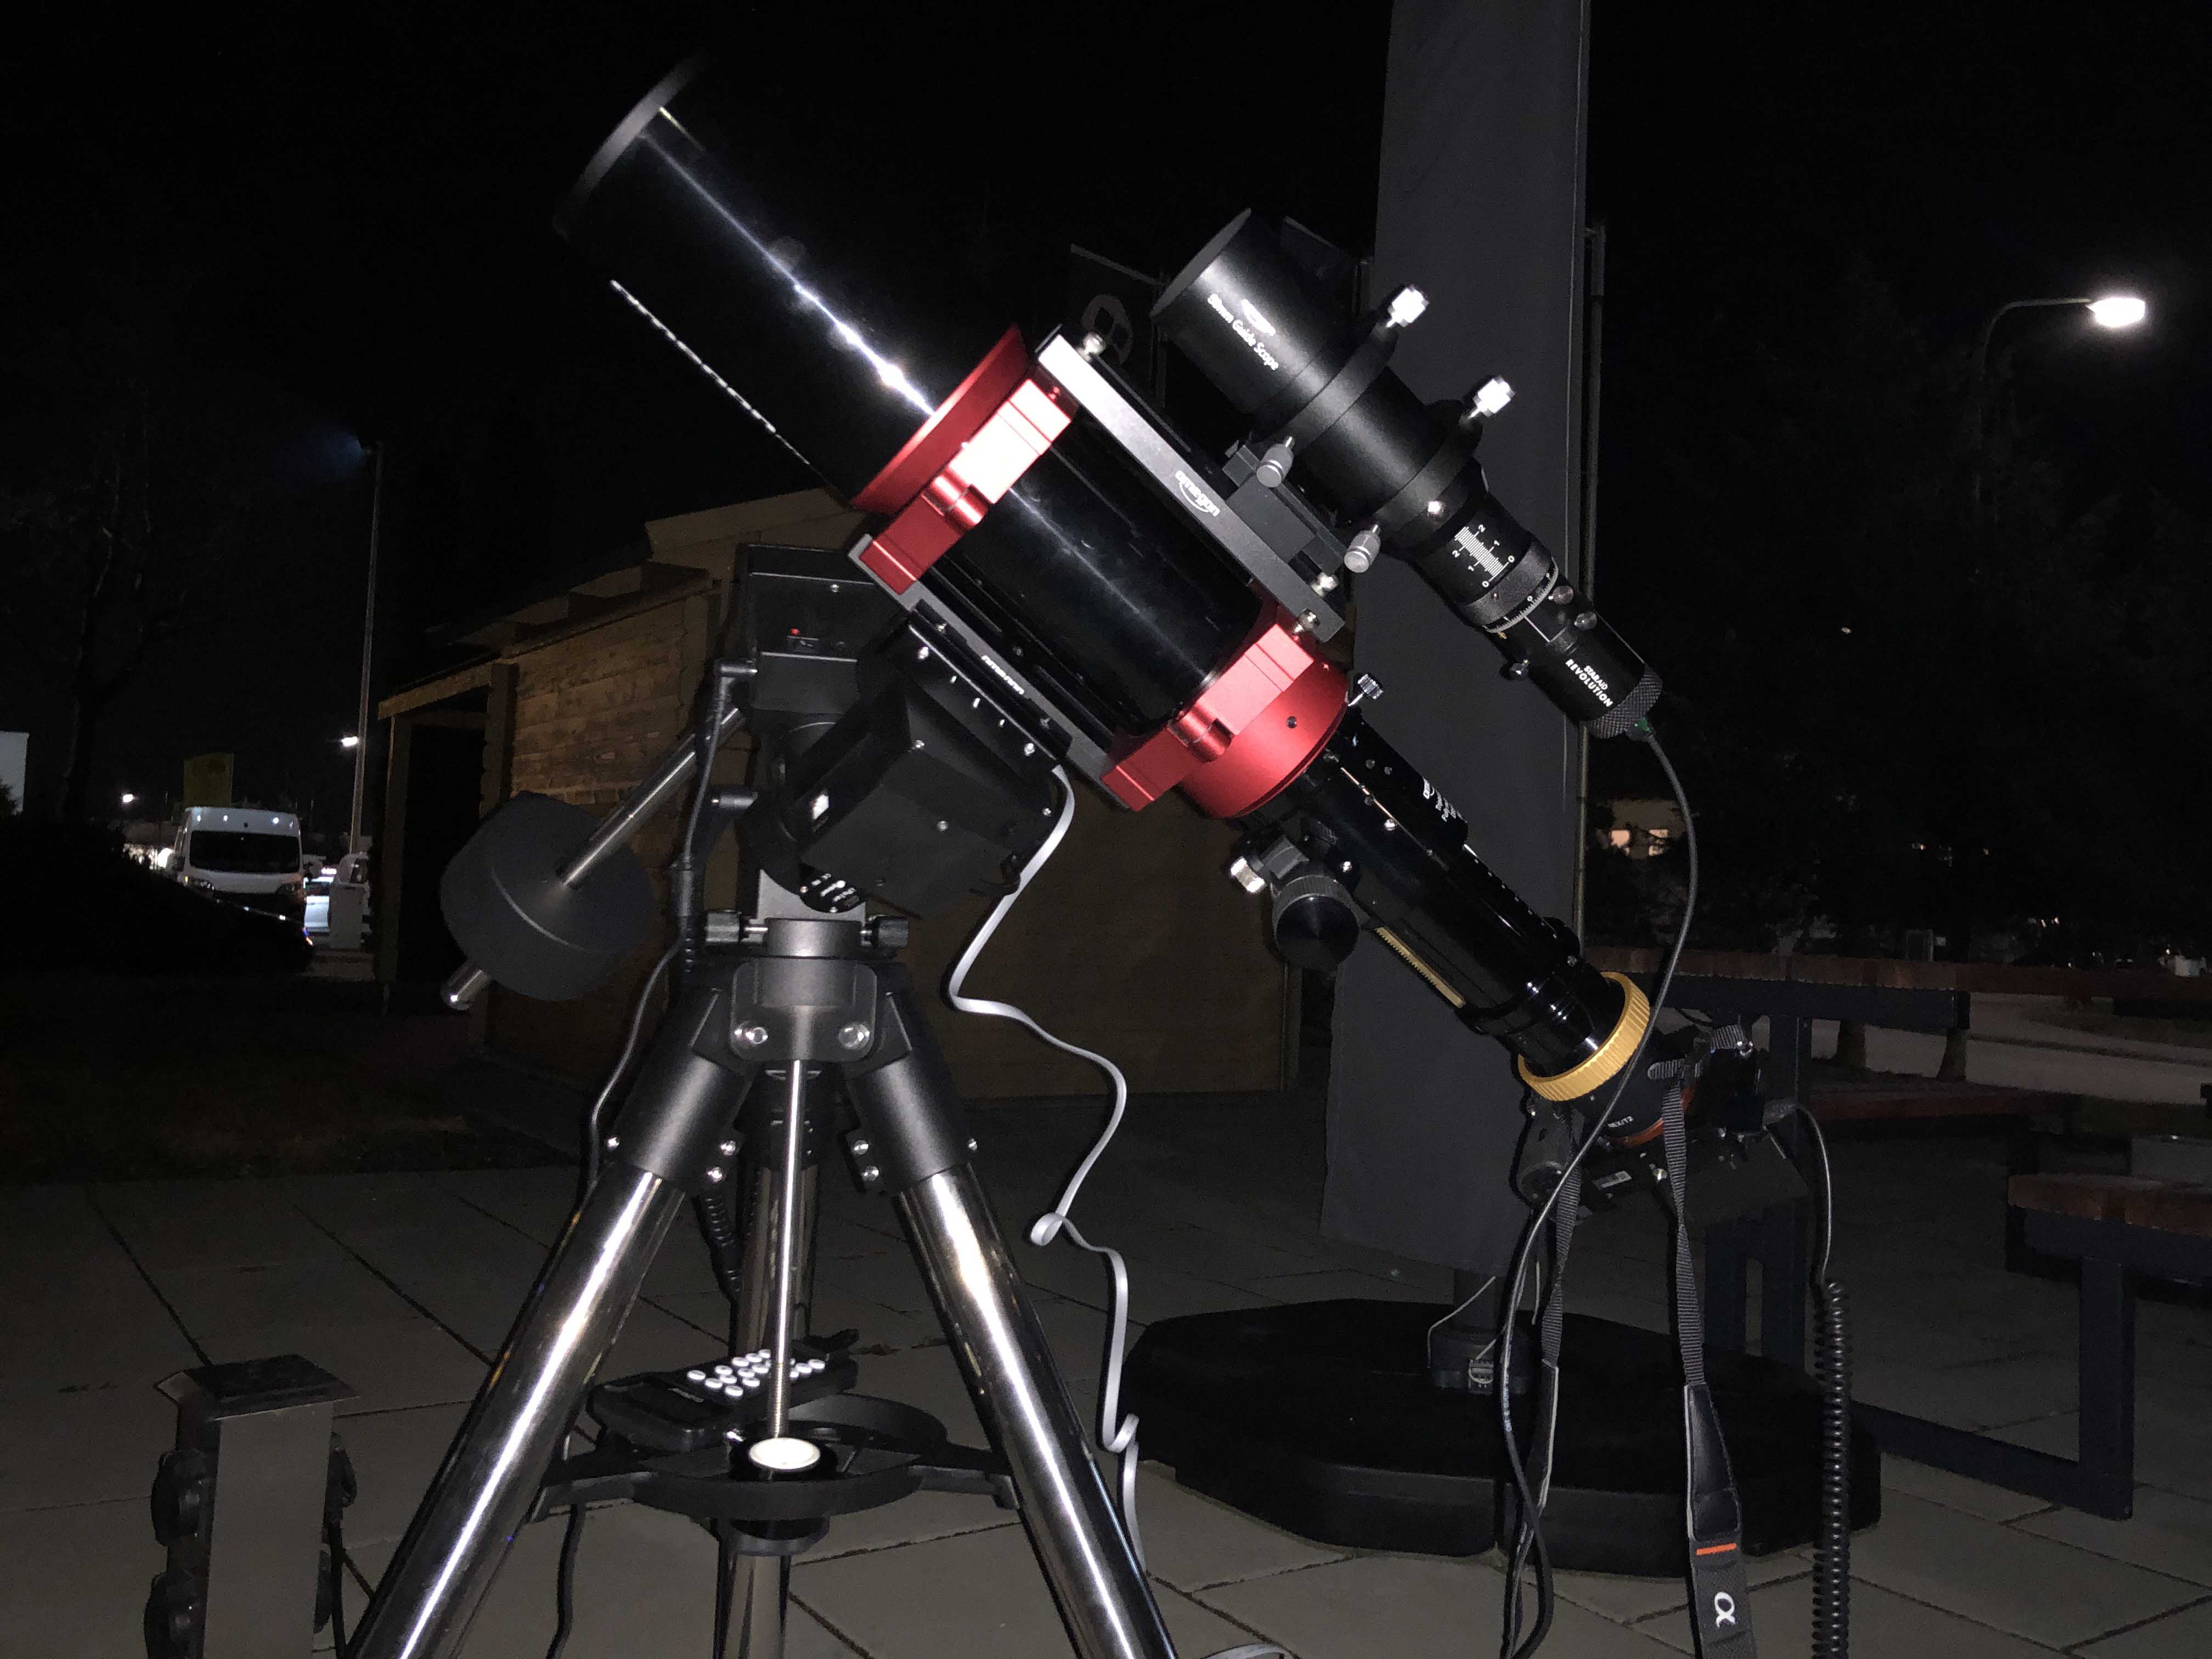
This is what our setup looked like: the iOptron CEM26 mount with the 85mm apochromat and a parallel-mounted Omegon Guidescope on a 180mm Omegon prism rail with finder shoe. We used a Sony Apha 7 camera with an extension tube and a Novoflex T2/Sony adapter.
So now we’re all set, let's go.
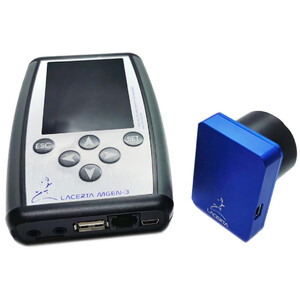
1. 1. Lacerta MGEN: a box of tricks full of stars
"One box to find them all, one box to bring them all and in the darkness to bind them." This sentence may be borrowed a little from Mr. Tolkien, but that's exactly what the Lacerta MGEN standalone autoguider does. It will find not just one or two but, according to the manufacturer, up to 100 stars. This allows it to track more accurately than by using just one star. This is how a magical or rather a modern autoguider should work.
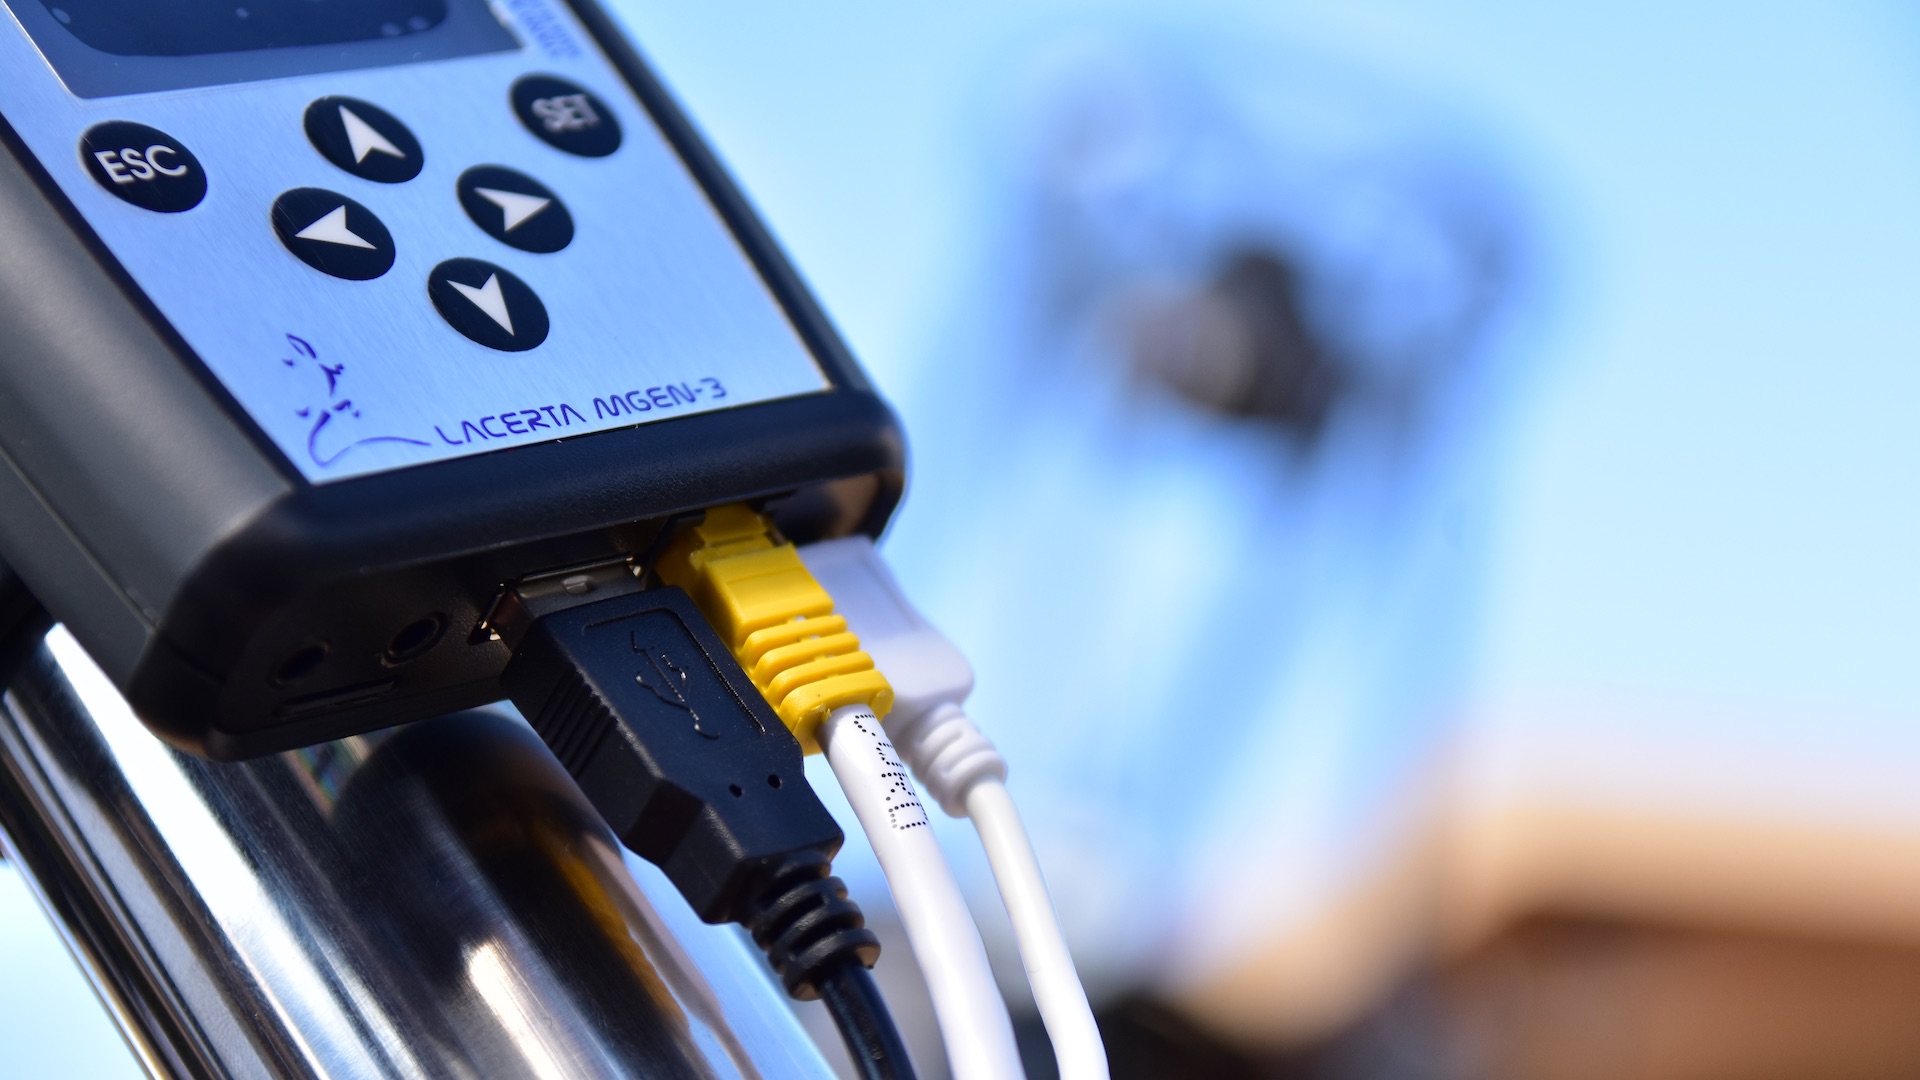
Connecting the guider
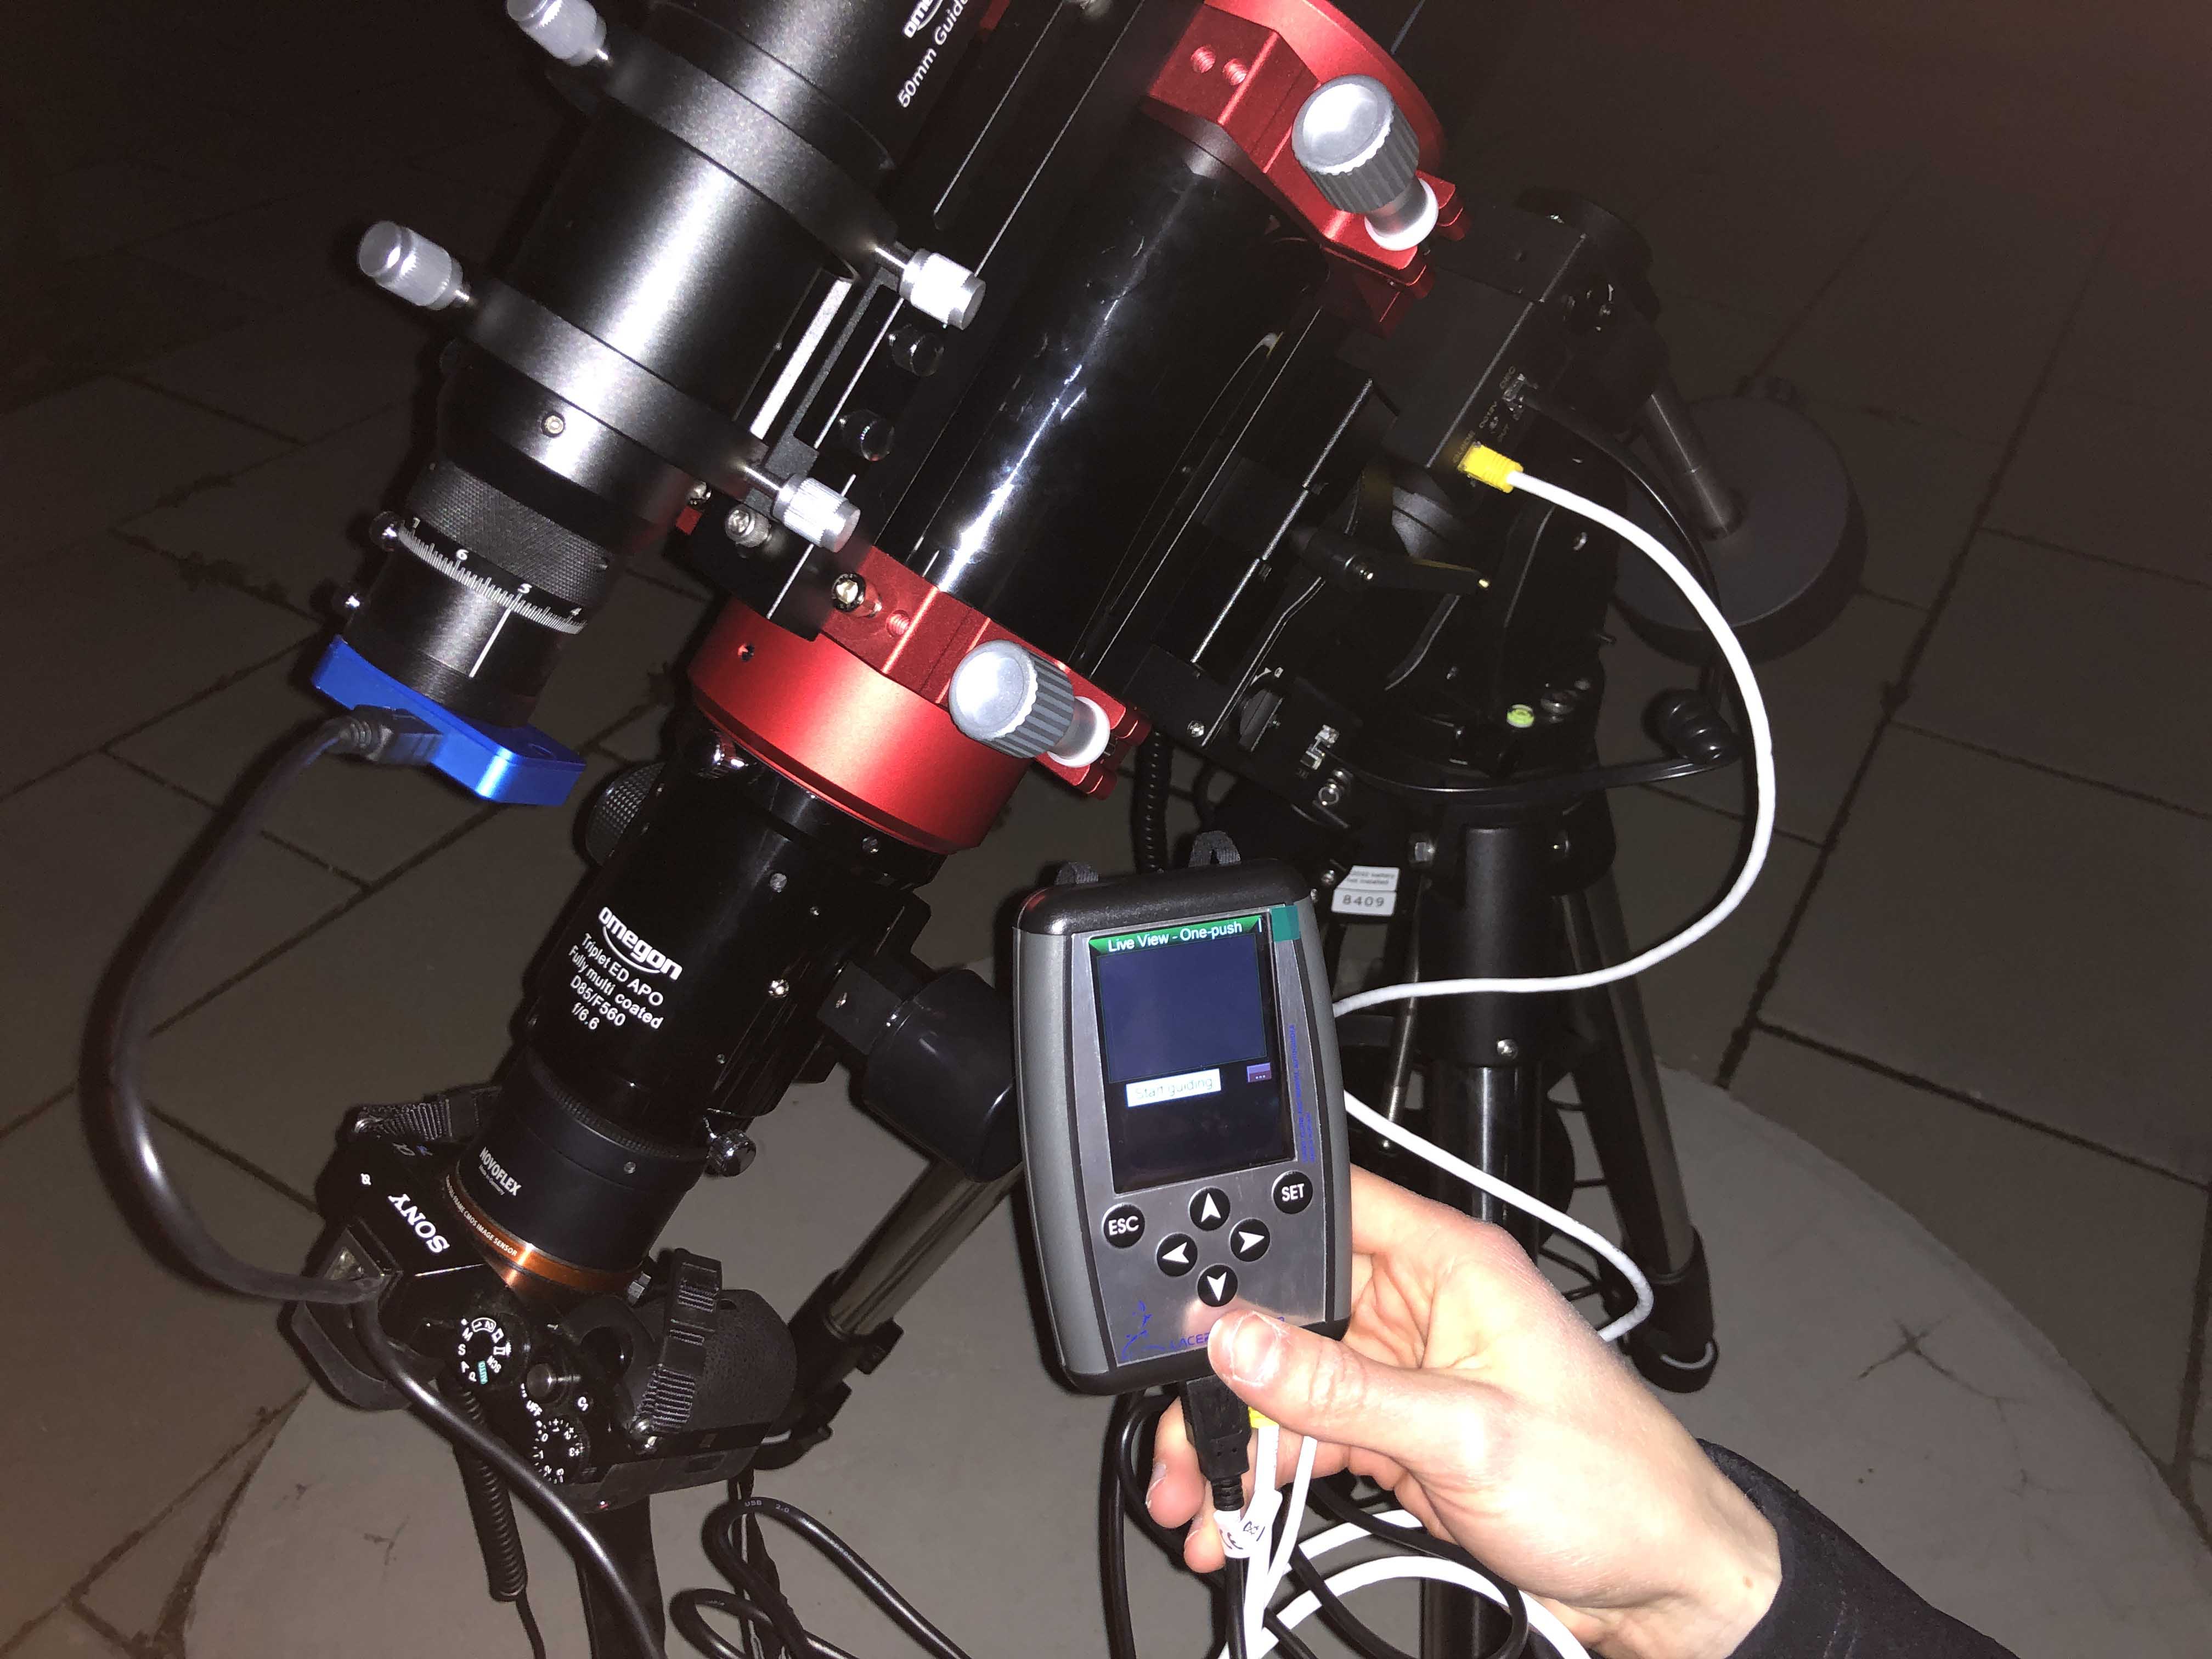
The MGEN autoguider consists of a camera and a separate hand control with display and cables for its power source and guider connection (ST4).
The connection of the cables is not entirely clear at first glance and reminds us a little of a puzzle. So a case for the Three Investigators maybe? Not quite, because latest when you consult the instructions, you will quickly find out which cable you need to plug in where.
Once you supply the guider with power and attach the camera to the guidescope, you're ready to go. The “Imaging” menu option allows you to activate the live view and focus the image. When focusing, you need to experiment a little, because stars only become visible shortly before they are in focus. Important to know: this is a normal behaviour for an autoguider and should not confuse you.
Then go to the "One Push" menu option and select "Start Guiding".
Guiding
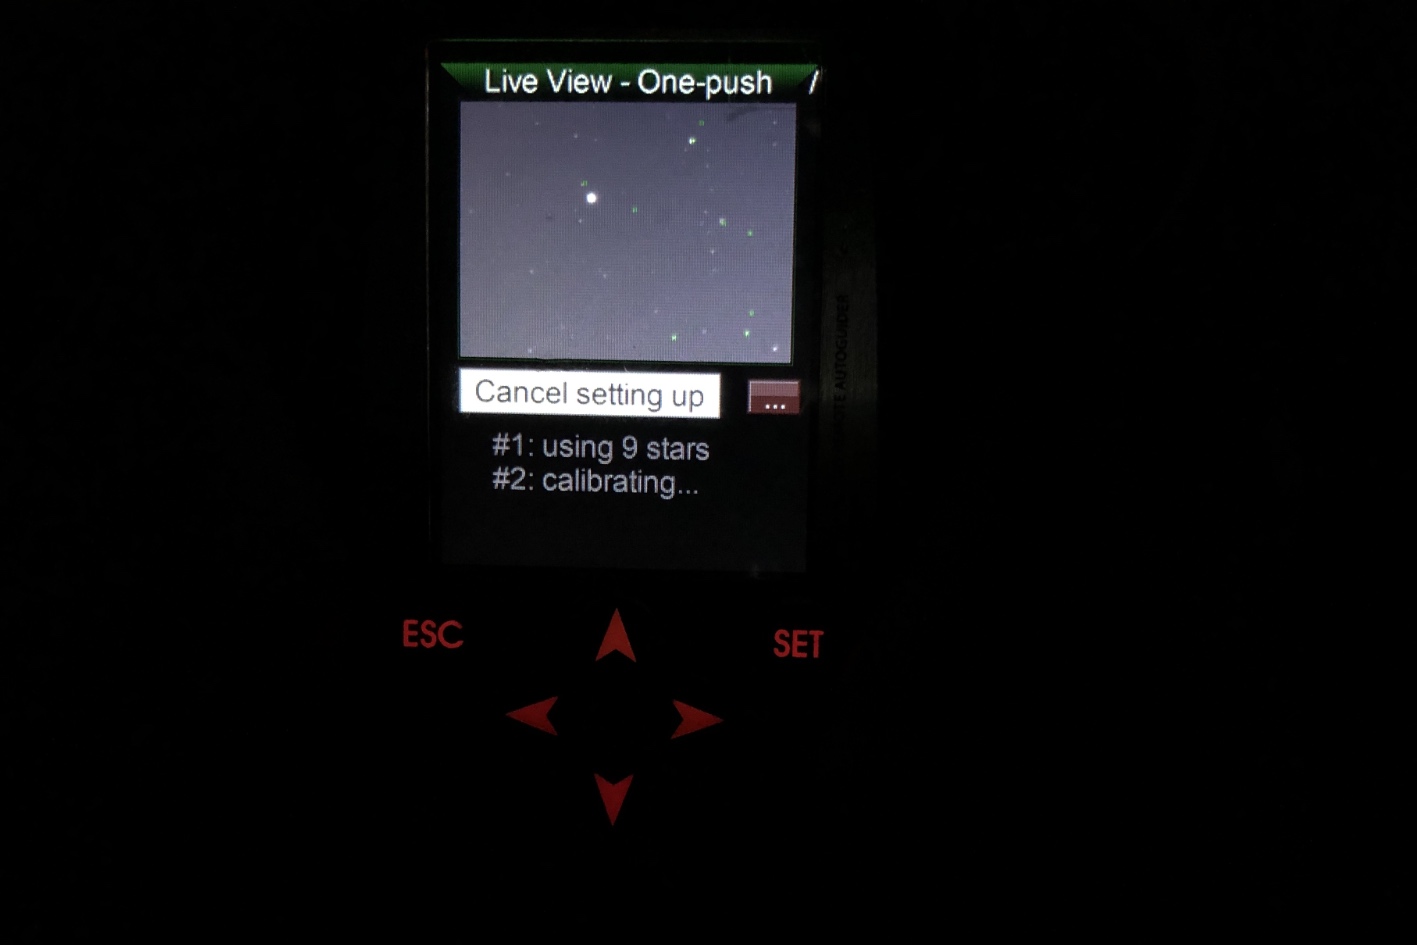
Guiding does not start instantly. The MGEN records the stars it detects and tries to correct any deviations it detects in the mount’s axes. The display shows that the calibration process is currently underway. Directional arrows on the display illuminate to indicate which axis is currently being checked. This process took us around five minutes. If everything works, star guiding starts automatically. Before you ask: of course, you are immediately aware of any variations in the process, because you can see every change on the info screen.
The MGEN Autoguider delivered a strong performance in our test. It continually and reliably delivered corrections according to the guide stars. The illuminated arrows allow you to see precisely which axis and in which direction corrections are currently being conducted. This gives us a reassuring sense that everything is working correctly. If you wish, you can even call up a graph of both axes on the screen. You will then see how far your mount is from the perfect position.
Our personal impression
The many cables meant that the setup seemed a bit complicated to us. At first glance the menu navigation was not intuitive, and we had to learn where the functions that we needed were hidden. The guiding did not start at our first attempt and we had to repeat the setup process. This took some time.
The MGEN performed very well in practice, and the guider had no problems tracking the iOptron CEM26 mount accurately and delivering a clean photo with point-shaped stars. That is what matters in the end. If you don't like grappling with your smartphone at night and prefer a hand control, the MGEN will certainly make you happy.
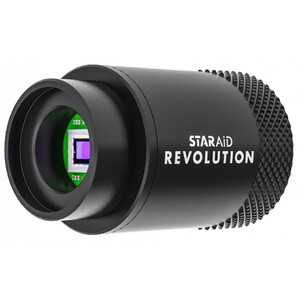
2. StarAid Revolution: a smart guy with some clever tricks
The StarAid Revolution is something of a secret agent among autoguiders. The one with a double zero, one who plays in the premier league. He has a weakness for beautiful mounts and made friends with our CEM26 right away. As with MGEN, he does not work alone in his professional life, but offers multi-star guiding.
Connecting the guider
Here, too, you must first connect the guider to the mount with cables. Next you connect the camera to a splitter with an Ethernet cable, and then connect this to the guider cable and power connection. Then connect the camera with the guidescope.
You control the StarAid autoguider with your smartphone. They simply connect to the wireless LAN network and are routed to a web interface. You will now see several menu items. You focus on the reference stars by selecting the "Live View" option.
Guiding
Now tap "Autoguiding" and the "Calibrating" screen will appear and the star alignment process will start. You can see how many stars are being used for calibration and which axes are currently being assessed. Then the autoguiding starts automatically. This took around one or two minutes in our test.
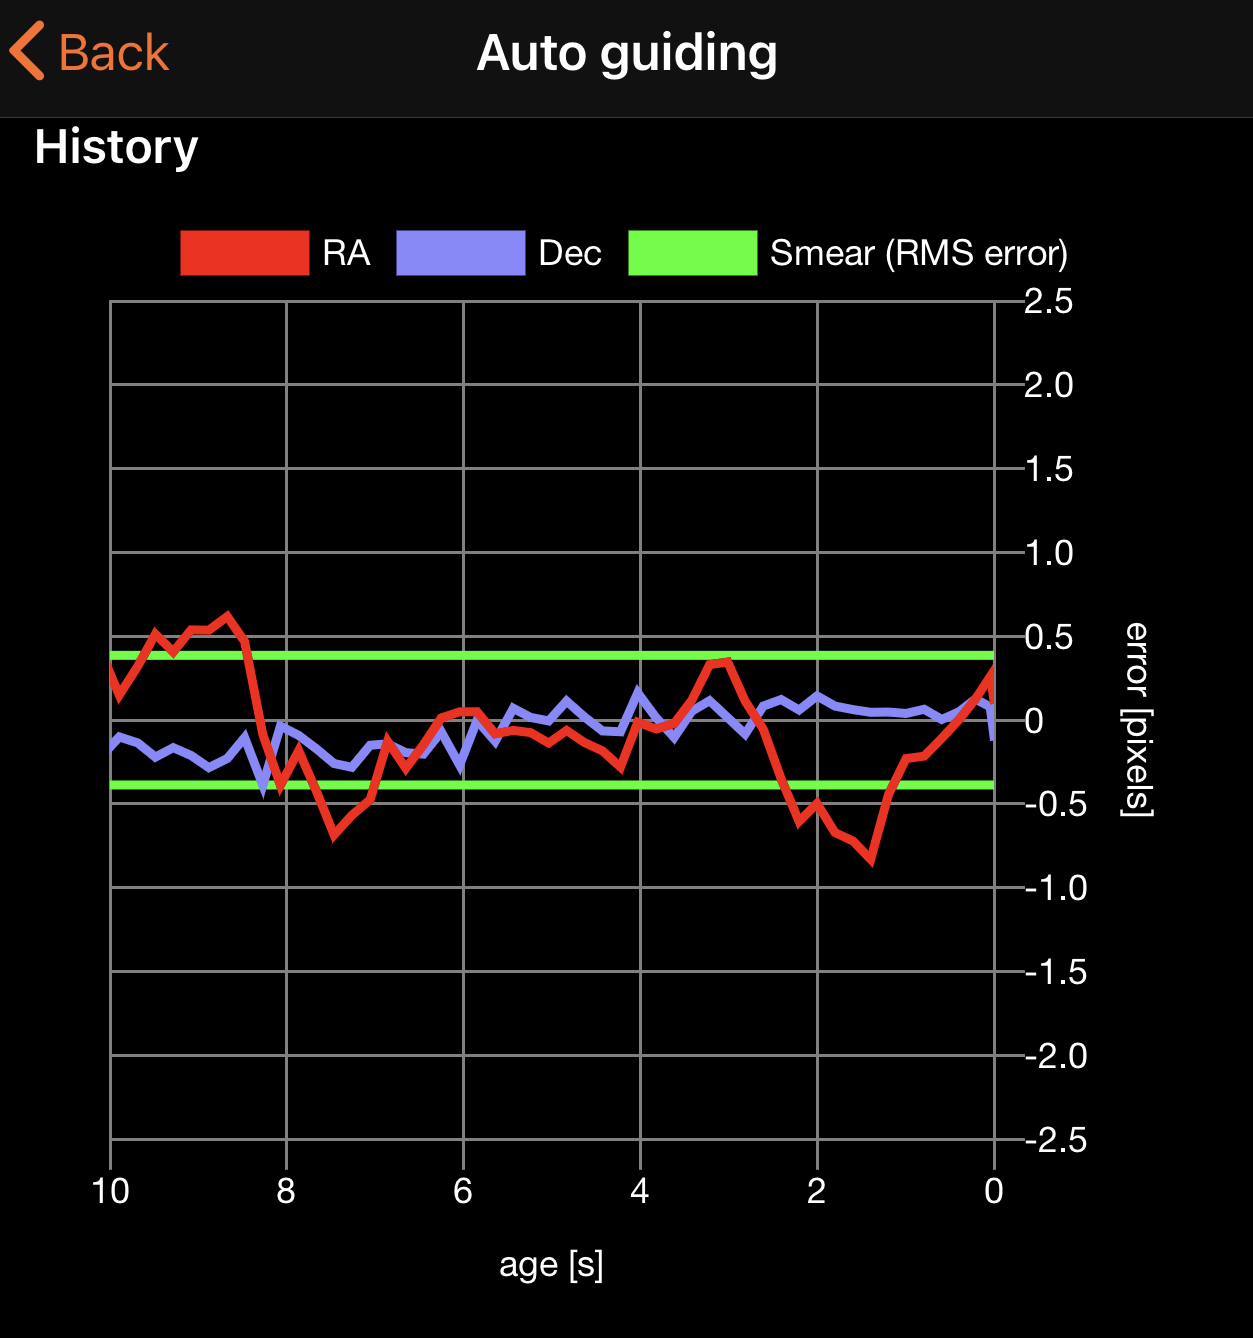
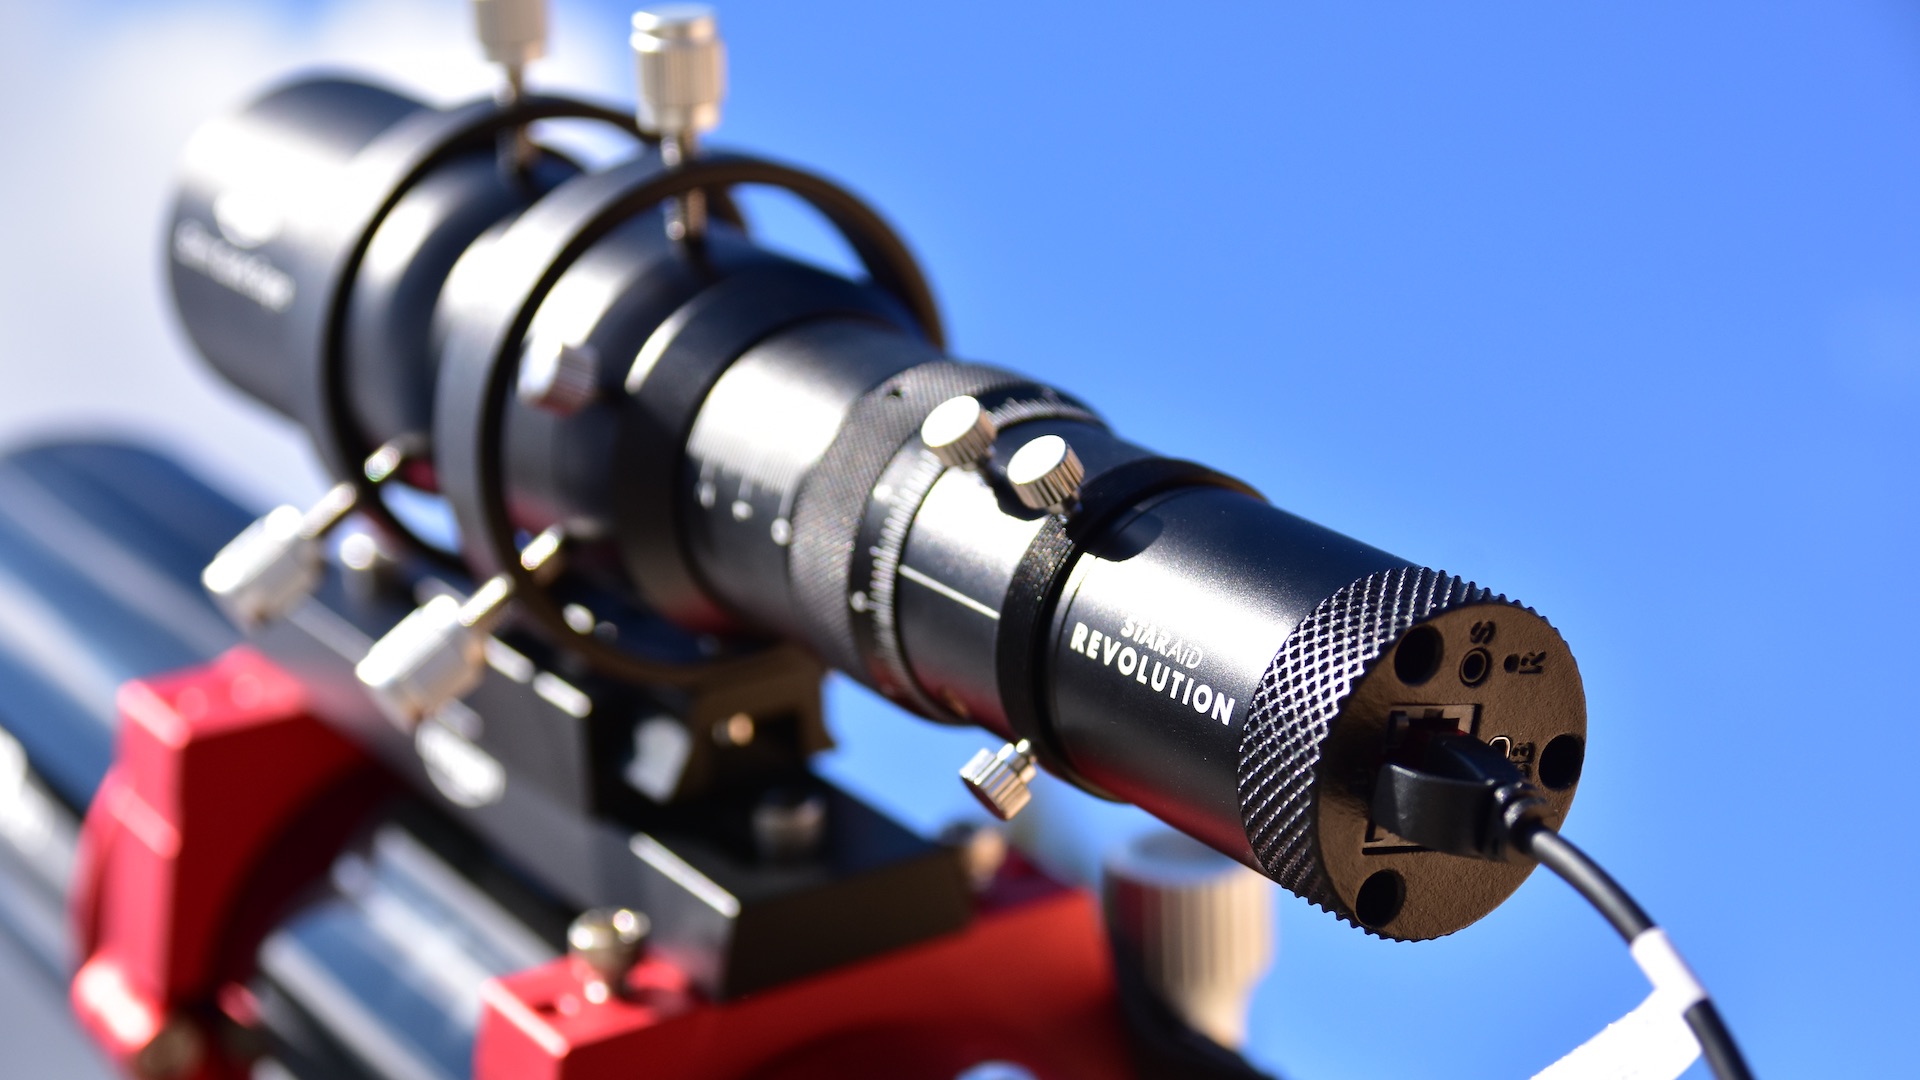
This picture shows the setup for astrophotography with the StarAid Revolution in operation.
Two graphs on your smartphone display show you tracking errors, something you will already be familiar with if you use programs such as PHD guiding. You can even take a closer look at the data and view the development over different time periods. For example, for the last two seconds or the last two minutes. The function that allows you to view the deviation in pixels is also interesting.
Do you want to adjust something on your telescope between two images? Here you have the ability to pause guiding and then re-start without confusing the guider.
Our personal impression
A standalone guider that lives up to its name. Why? Because you initialise the guiding process from your smartphone, but once you've set everything up, StarAid Revolution works completely independently - and doesn't need any further connection to your smartphone. Setup and menu navigation are intuitive, simple and fast.
This autoguider also delivered a very good performance and tracked our mount precisely.
Additional features of the MGEN and Revolution:
MGEN 3
- Easy polar alignment using the autoguider
- Dithering and pixel binning capability
- Camera control (requires a 3.5mm to 2.5mm adapter cable)
- Dark frames to reduce camera hot pixels
StarAid
- Object guiding to track comets, for example
- Easy polar alignment using StarAid
- Dithering
- Camera control
So which one will it be?
Standalone autoguiders are a blessing for photographers with SLR and system cameras. Unlike a normal autoguider, you don't need a laptop and save on additional accessories, additional cables and separate power supplies. This simplifies astrophotography.
Both the Lacerta MGEN and the StarAid Revolution standalone autoguiders impressed us. So which is the right one? It all depends. Are you a fan of independent technology with your own hand control, but more cables? Or do you prefer using your smartphone with wireless control? You decide which device may be the right tool for your next beautiful astronomy photograph.