

Solar photography: professional H-alpha images
In this magazine article, you’ll learn how to capture spectacular images of solar storms and the Sun’s surface.
This guide is a follow-up to a previous post. If you are not yet sure how best to point your telescope at the Sun, what safety precautions are essential, and which imaging and stacking programmes you will need, we strongly recommend that you read this article first: https://www.astroshop.eu/i,1754
After that, you can pick up right where we left off. Are you familiar with the basics? Then let’s dive into the fascinating world of H-alpha photography together!
What exactly are solar prominences, and why are they so difficult to capture?
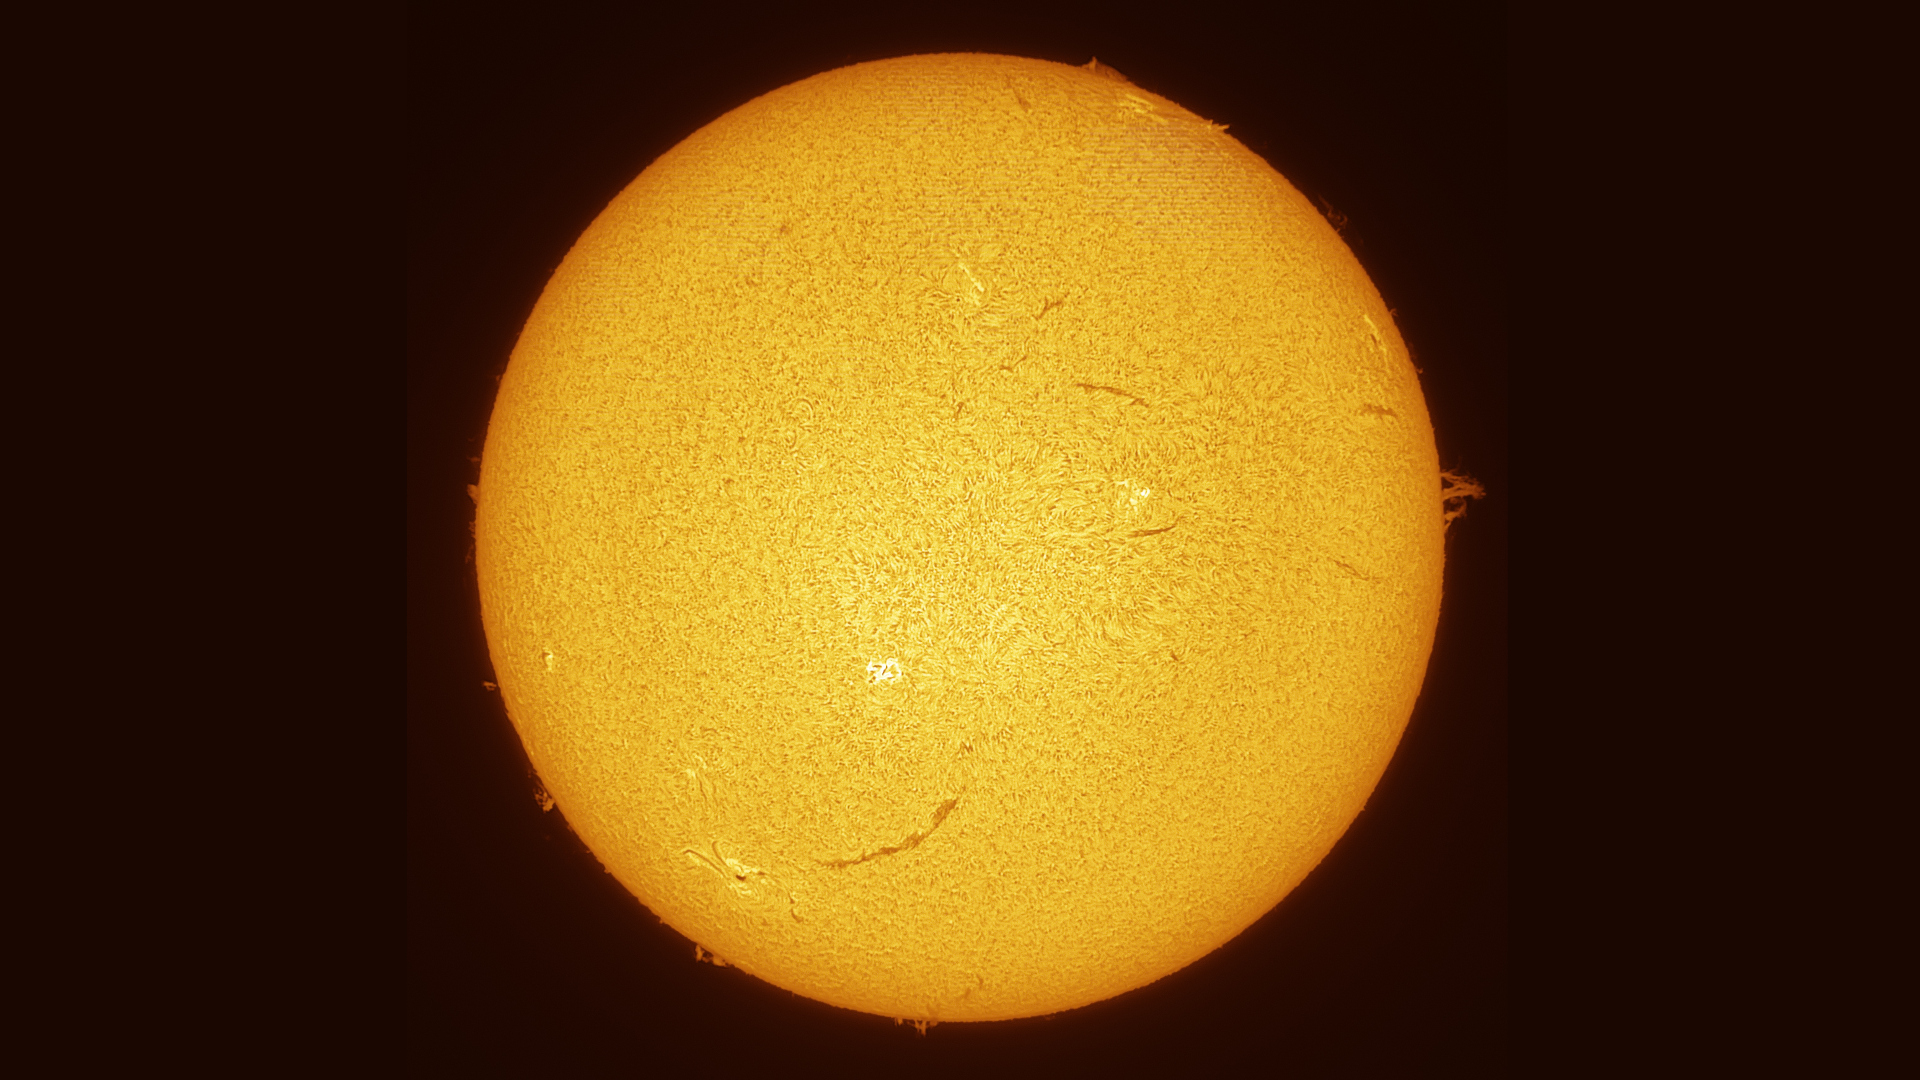
These massive ejections of matter, also known as solar storms, are referred to in technical terms as prominences. These are spectacular arcs of plasma that are literally hurled into space by the Sun. They can reach a size several times that of the Earth’s diameter and move at a relatively high speed – which is what makes them so unique in astronomy.
However, due to the Sun’s immense brightness, these eruptions are quickly overwhelmed by the light and have very low contrast. Protuberances can mainly be observed at a very specific wavelength: 656.28 nanometres. To subdivide this extremely narrow spectrum, the unit of measurement known as the angstrom (Å) is used. The rule here is: the smaller the Ångström value, the higher the contrast of the prominences. Some top-of-the-range instruments operate at just 0.5 Ångström – an unimaginably narrow range of light.
This is also why conventional H-alpha filters used in deep-sky photography are not an option for solar photography. Whilst it is theoretically possible to capture very bright prominences using a 3-nanometre H-alpha filter and an additional solar filter film, this results in very long exposure times and the image remains low in contrast and blurred.
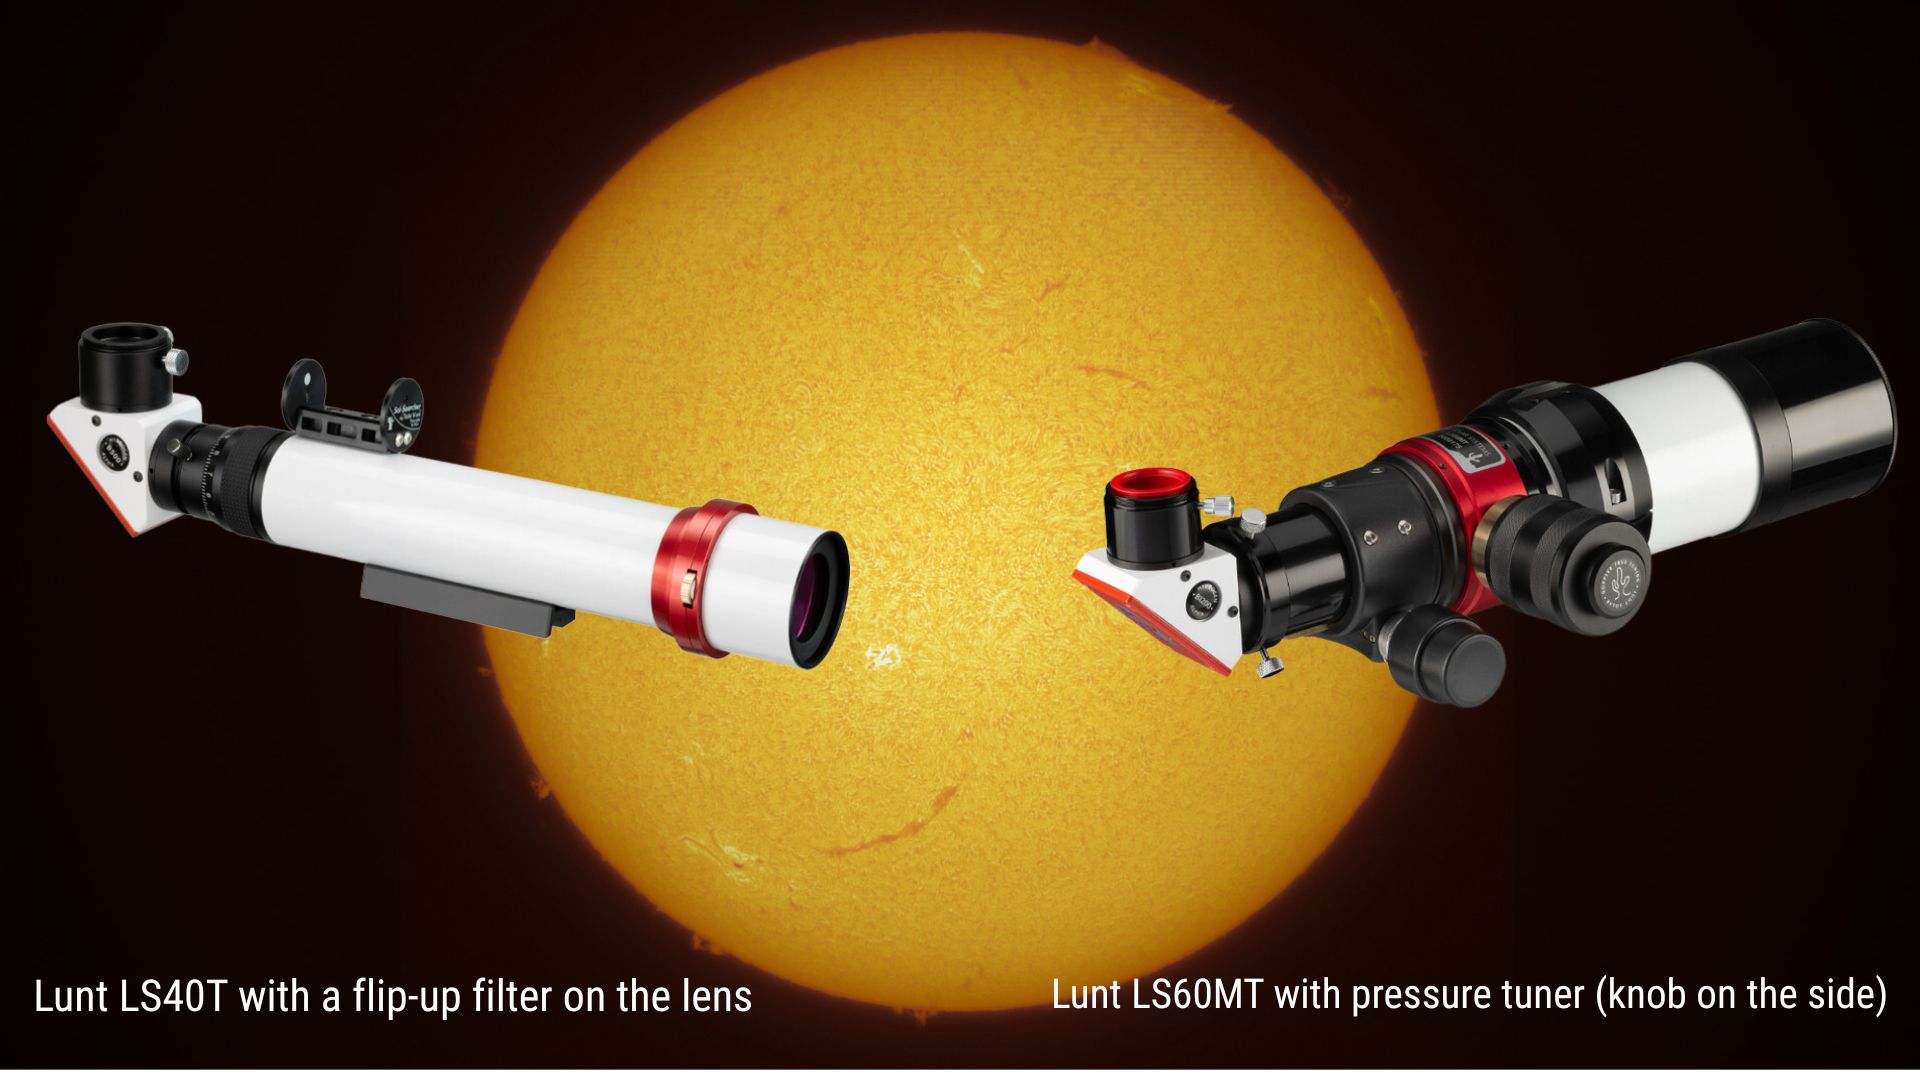
H-alpha filters for solar observation are extremely complex to manufacture and have a very high reject rate: out of around 100 filters produced, only one or two pass the strict quality control checks. The larger the filter diameter, the more expensive and difficult the production process becomes.
To achieve exactly the right wavelength, many devices feature a mechanical tuning tilt mechanism that tilts the filter by a few millimetres. This causes a minimal shift in the light path, making the H-Alpha structures visible. Other high-end devices, by contrast, use a so-called ‘pressure tuner’, which uses air pressure to adjust the filter precisely to the correct wavelength. The major advantage of this method is significantly more uniform sharpness and illumination across the entire field of view.
For H-alpha solar photography, we strongly recommend using a black-and-white (monochrome) camera. Due to its design, a colour camera is less light-sensitive; furthermore, valuable resolution is lost as a result of the integrated Bayer filter array. Another disadvantage is that the image produced by a colour camera is extremely dark red, which makes subsequent image processing considerably more difficult.
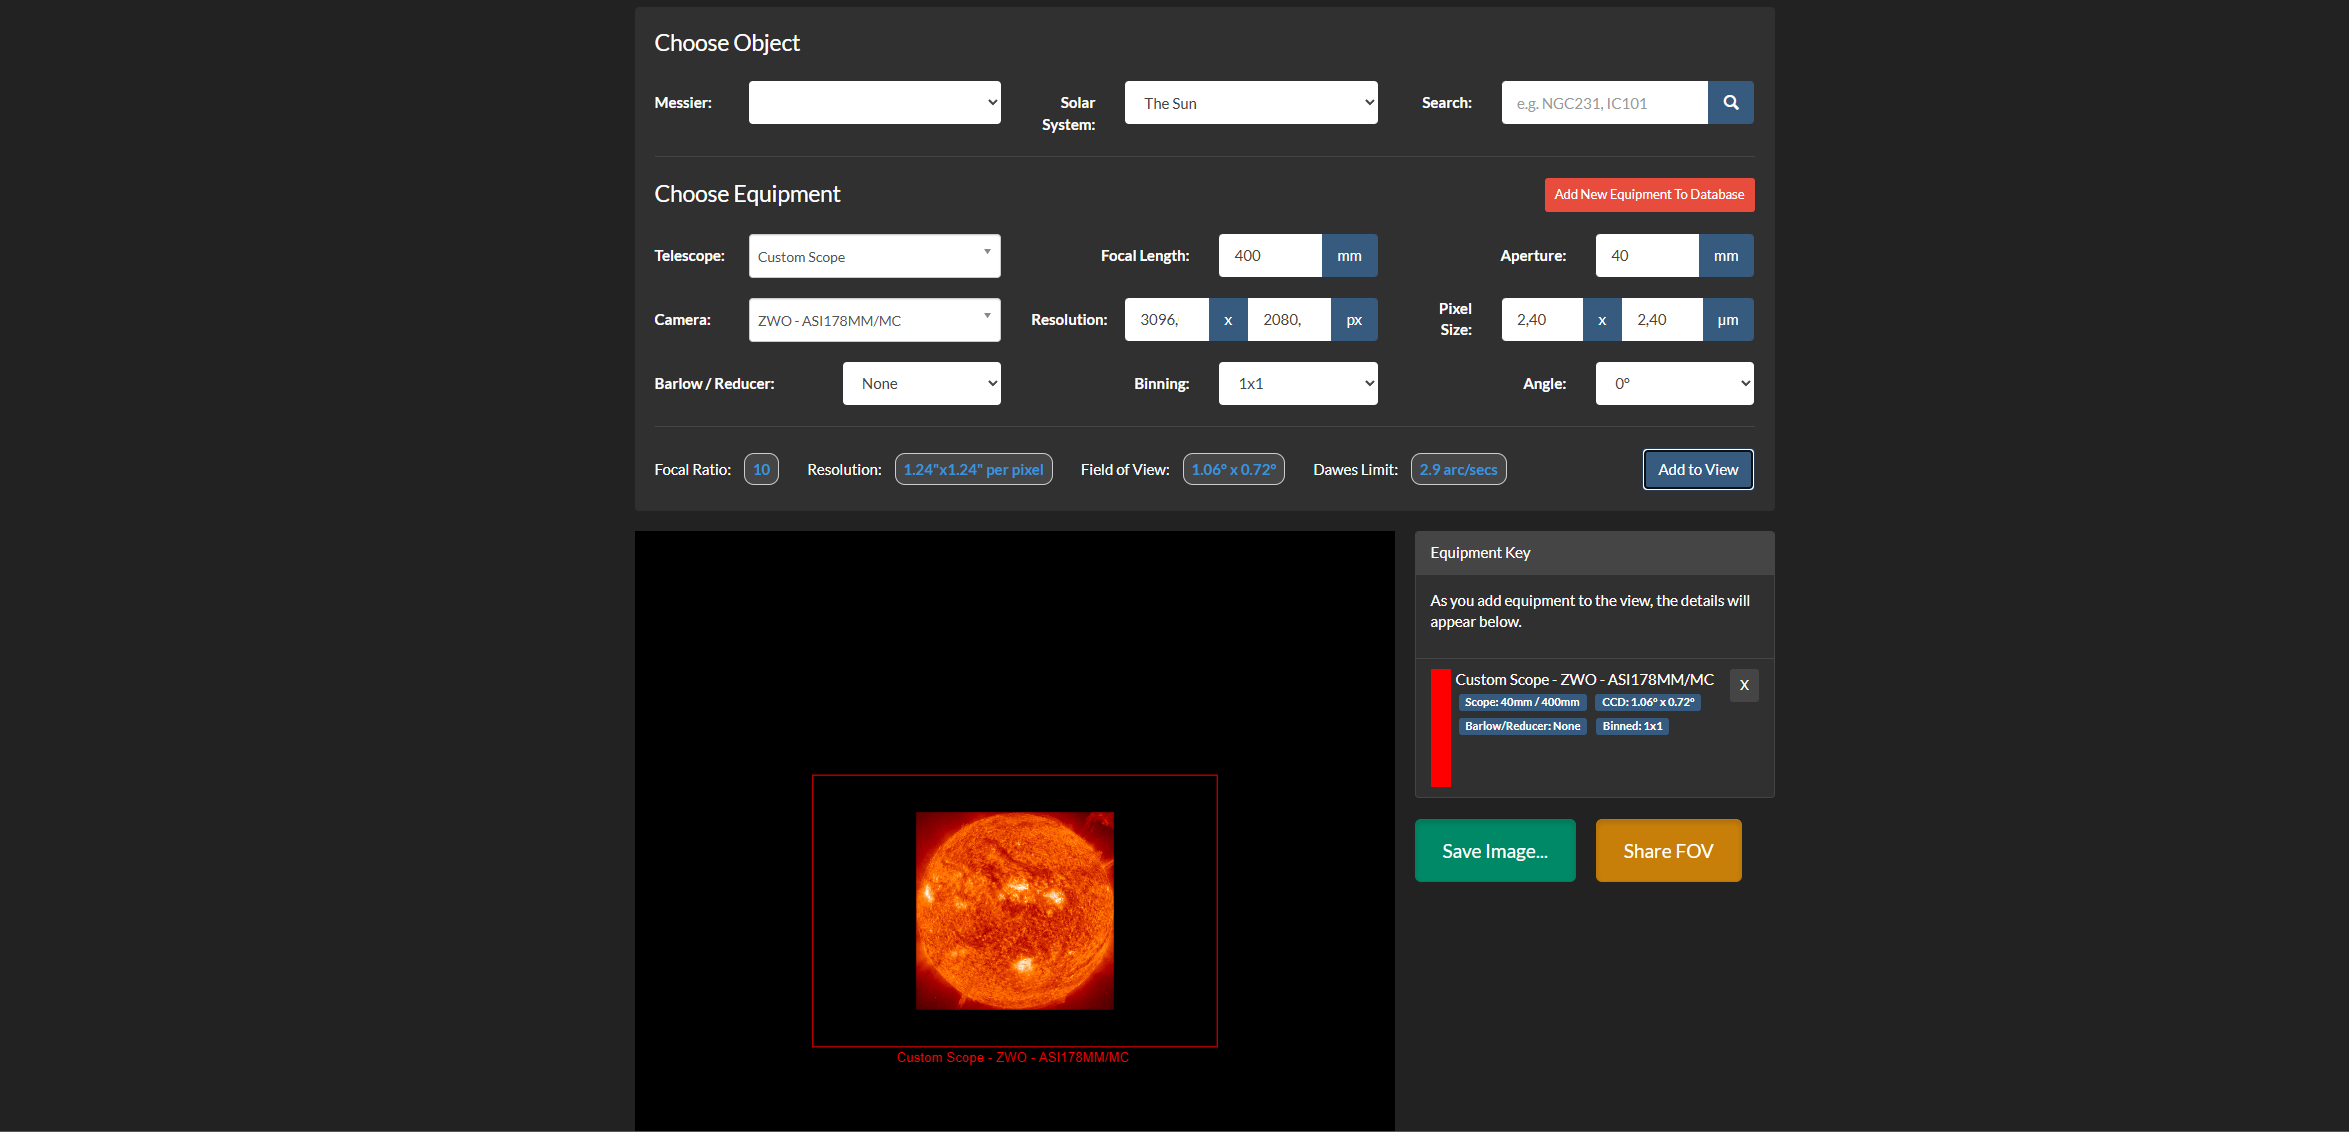
Before making a purchase, you should check which camera best captures the Sun when used with your H-Alpha telescope. The sensor size and focal length determine whether the Sun fits entirely within the frame or whether only a section of it is visible. It is best to use this tool to calculate your desired image section in advance: https://astronomy.tools/calculators/field_of_view/ Switch to “Imaging Mode” at the top and select “The Sun” under “Solar System”. Then enter the specifications of your H-Alpha telescope (e.g. 40 mm aperture and 400 mm focal length). You can now either select your camera model or enter the data manually from the datasheet.
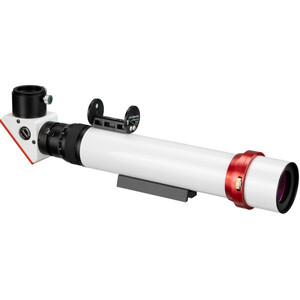
Here are a few models we particularly recommend:

So the question is: how do I expose the sun correctly?
You will soon notice that if you set the exposure time so that the surface is perfectly exposed, the prominences are barely visible. If, on the other hand, you expose the prominences correctly, the sun’s surface will be completely blown out. To make both elements visible at the same time, we recommend exposing the surface just bright enough so that it is not yet overexposed (blown out).
Very important: Do not capture a single frame, but record a video in the .ser format. In this file format, the raw data is stored as uncompressed, linear frames in a single file (similar to the .fits format, but in video form). This gives you much more flexibility during post-processing. The SharpCap software is ideal for this type of recording.
Film for a maximum of 60 seconds at your camera’s highest possible frame rate (FPS). As the Sun exhibits a high dynamic range, the first signs of movement in the prominences will become visible after just one minute – so do not record for longer than this in a single take to avoid blurring. The resulting .ser file is then loaded into AutoStakkert! and stacked.
Create stunning time-lapse videos
If you want to capture the movement of solar flares in time-lapse, the best approach is as follows: for example, record 60 videos, each lasting 60 seconds, with a 30-second pause between them. This will give you footage of the Sun over a period of around 1.5 hours. Important: during this time, your mount’s tracking must be absolutely precise!
After the session, you will have 60 large video files on your hard drive. It is therefore essential to ensure you have sufficient storage space, as these files can quickly add up to several gigabytes. AutoStakkert! can then perform a handy “batch stacking” process, in which all 60 files are automatically stacked one after the other. You can then combine the 60 finished composite images into a smooth video using the PIPP programme. At a playback rate of 20 frames per second (FPS), this will give you a spectacular time-lapse video lasting around 3 seconds.
Would you like to create an even longer time-lapse and show the sun’s slow rotation? In that case, you’ll need more footage. We recommend taking around 300 shots, each lasting 30 seconds, with a 30-second pause between them. This will allow you to capture around 5 hours of solar activity, resulting in an impressive video lasting about 15 seconds.
The sun's movement over 90 minutes. ©Abbey Road Observatory
Which software do you use to get the most out of your photos?
To ensure that both the prominences and the Sun’s surface are shown to their best advantage in the final image, some image processing is required. The most popular tool for this at present is the PixInsight software in combination with the Solar Toolbox. Astrophotographer Daniel Nimmervoll demonstrates how to install and make the most of these in this excellent and detailed video: https://www.youtube.com/watch?v=pyYM9l3NCKE
Here is a quick guide:
- Paste the URL: https://www.cosmicphotons.com/pi-modules/solartoolbox/ into the PixInsight Repository Manager
and restart the programme. - Load your stacked .tif image of the Sun.
Open the toolbox via the menu under “Process” -> “Solar Toolbox”. - Set the "Image Type" to "Surface and prominence".
- Play around with the controls and adjust the image to suit your personal taste.
- Save the result as a .tif file. You can now make the final adjustments (e.g. colour correction or Camera Raw filters) in Photoshop.
Tip: You can also use the batch edit function to apply the same adjustments to all 60 (or more) frames of your time-lapse in one go. Then simply merge the colour-corrected and sharpened frames together in PIPP. That’s exactly how professional sun photographers do it!
We hope this guide helps you successfully overcome the initial challenges of solar photography. If you have any further questions or need advice on suitable telescopes and cameras, please don’t hesitate to contact our team of experts – we’ll be happy to help!
Author: Marc-Antonio Fischer

Marc-Antonio, also known online as astronomical_horizon, is a passionate astrophotographer who specialises in fast reflector telescopes. His speciality: small planetary nebulae. When he’s not gazing at the stars, his heart lies with botany. He knows the local flora like the back of his hand. If he has any time left over, he picks up his electric guitar.