

ISS transit in front of the Sun and Moon. Procedure and image processing.
The pictures are taken, now it's time to process the images. This is when you really see that every transit is unique.
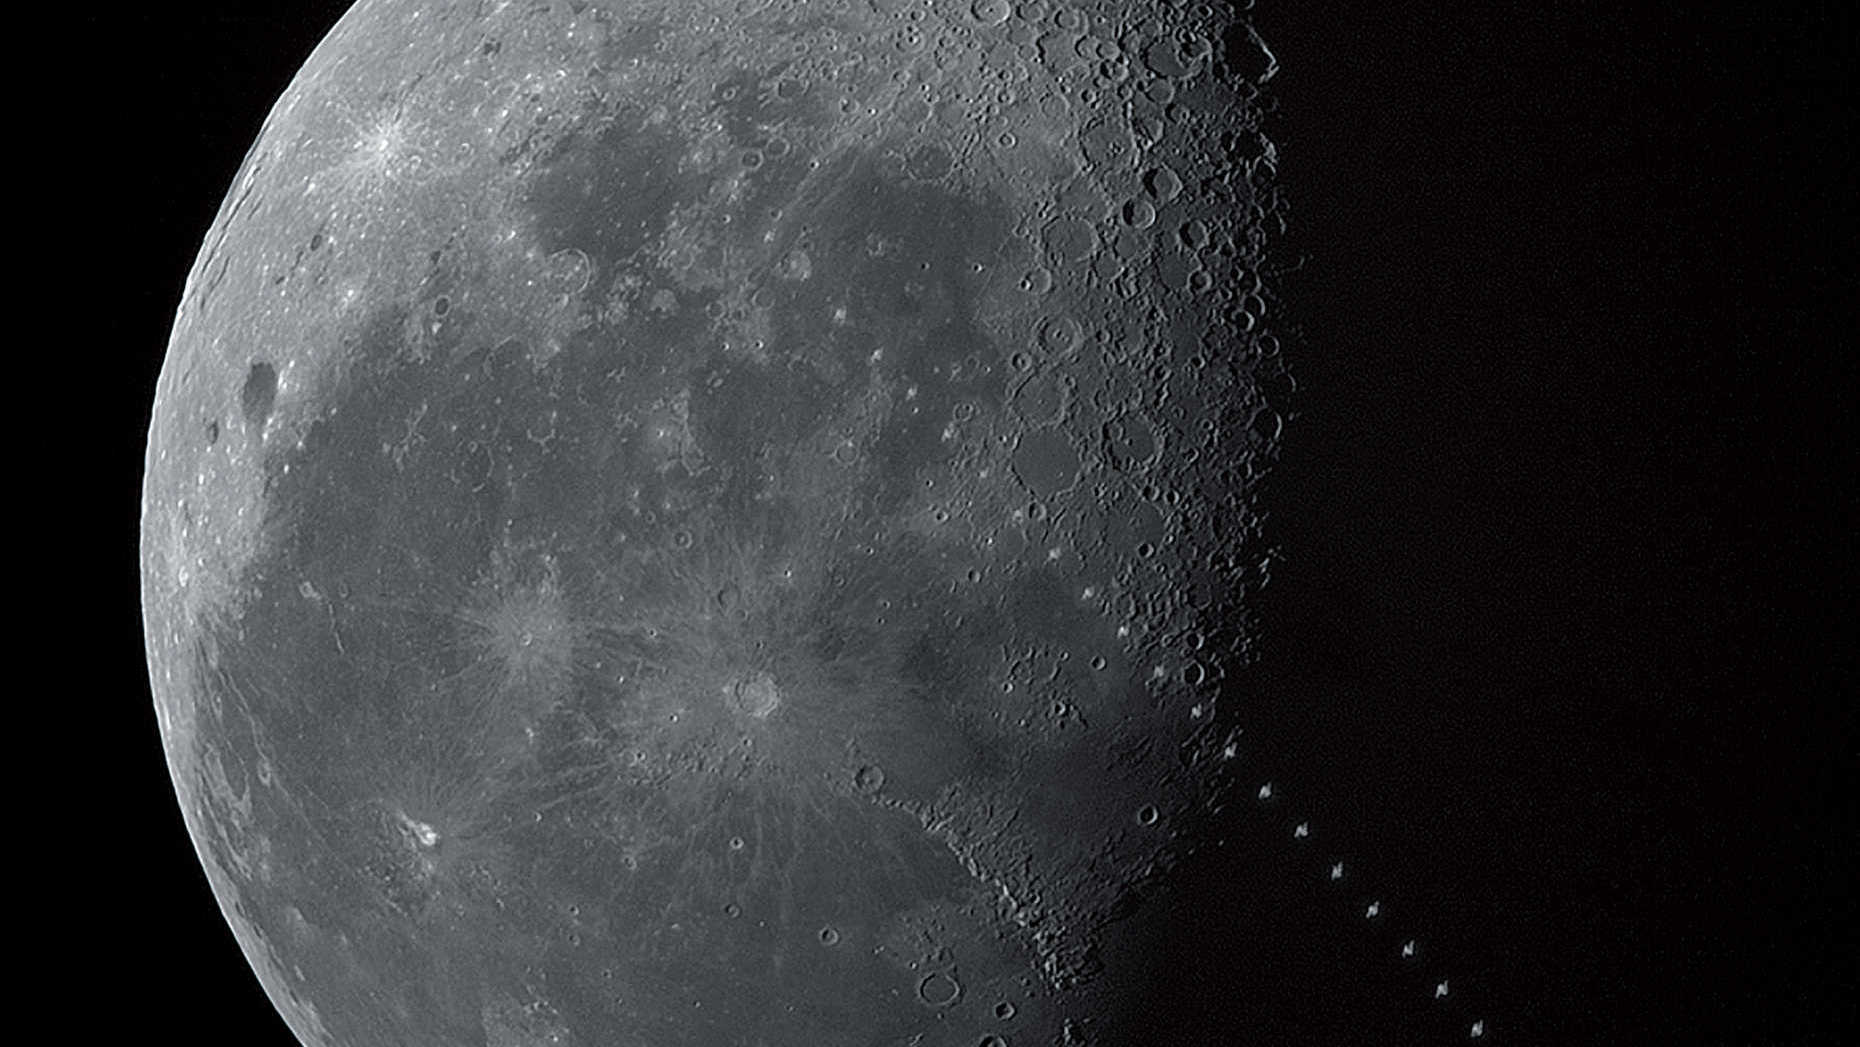 In the early morning hours of 17 May 2017, on a clear early summer morning, the transit of the International Space Station (ISS) in front of the waning Moon over Todtnau in the southern Black Forest was captured: the transit took place at 8:05:49 CEST, when the Moon was 19.4 degrees above the SSW horizon. The distance between the magnitude 2.3 ISS and the observation site was 1,016.7 km, so the transit took 1.2 seconds and the space station seemed relatively small. The picture is a composite of 51 images combined in Photoshop. U. Dittler
In practice: how to capture a transit of the International Space Station (ISS) crossing in front of the Sun or Moon
Even though the International Space Station (ISS) only takes between 0.6 and 3 seconds to pass in front of the Sun or the Moon, photographing the transit is an exciting challenge for amateur astronomers.
Due to the trajectory of the ISS, there are periods in which you can observe or photograph the ISS passing in front of the Sun or the Moon several times over the course of a few days – providing you are prepared to drive a few kilometres in order to be able to observe on the centre line of the overflight. We already mentioned the importance of a fast camera with a high frame rate. Now it's all about the actual shots and the subsequent image processing.
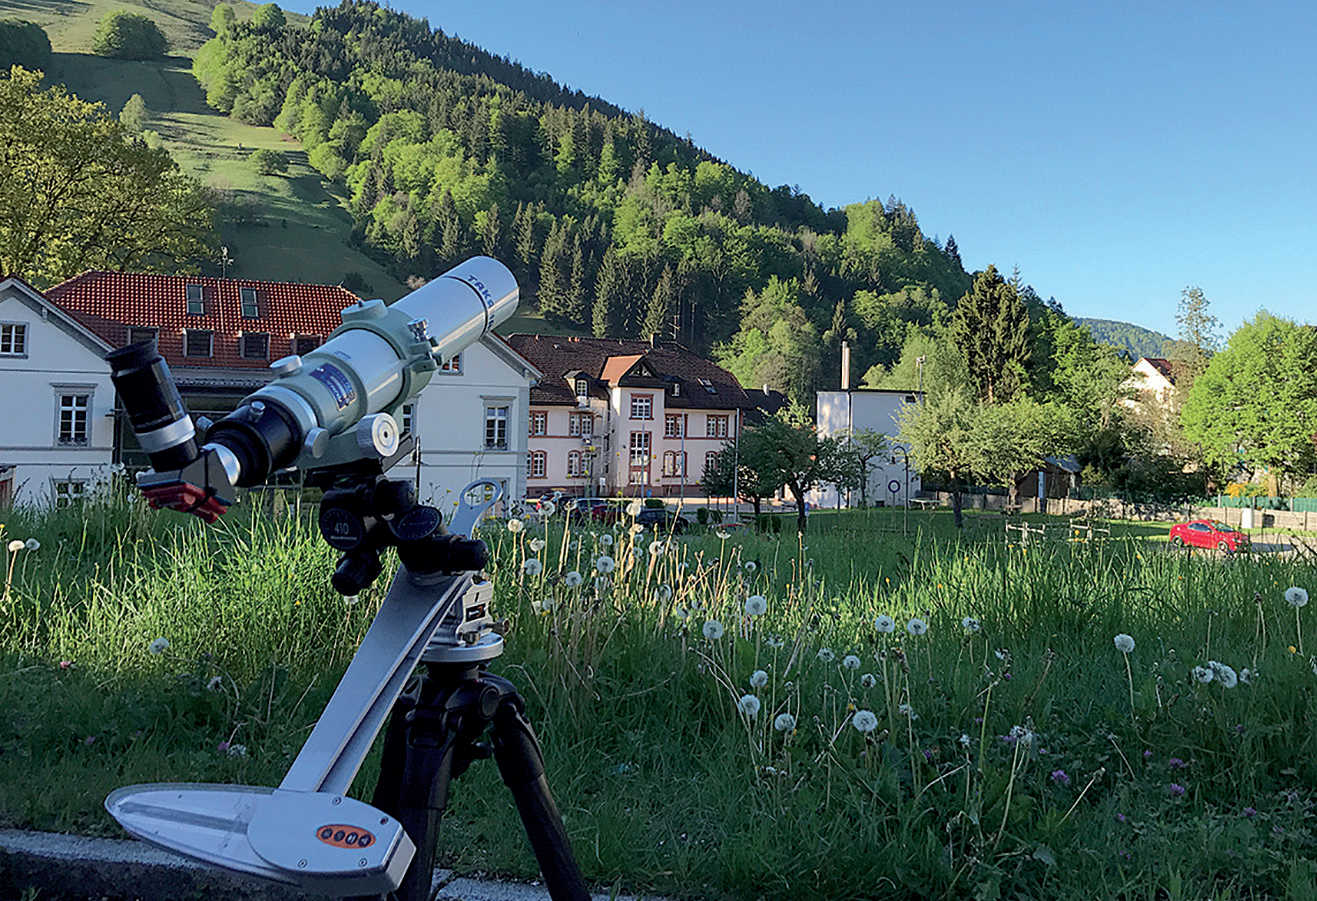 The equipment used to create the first picture: a Takahashi FS-60Q with a focal length of 600 mm on an AstroTrack travel mount, the camera is a Point Grey Grasshopper3 GS3-U3-28S5M. For exact alignment, an eyepiece is inserted into the telescope where, later, the camera will be positioned. U. Dittler
Off to the centre line
Once you have determined the centre line of the overflight, you should be careful not to be fooled by the distance information in the data calculated by CalSky.com, since this information relates to the linear distance. The coordinates of the planned observation location should be entered into a navigation program the day before the observation, in order to see how long the journey to the observation location will actually take. After a final examination of the weather conditions to be expected there, you can pack your equipment. Besides a stable tripod and a capable mount (with electric tracking), you’ll need your telescope, camera, a notebook for controlling the camera, a compass (usually already present in your smartphone) and a clock that is accurate to the second. Here too, a smartphone is a good choice, because it uses GPS satellites to synchronise the time.
In order to have enough time to get your bearings at the planned observation site and to calmly set up your equipment, it is advisable to plan your trip so that you arrive 30 to 60 minutes before the transit. Even though the actual transit takes only a few seconds, the usual care should be taken when setting up and aligning the equipment. An eyepiece helps to centre the Sun or Moon in the telescope before attaching the camera. Careful focusing of the Sun is much easier if you use a cloth (or jacket) to avoid the light from the Sun falling directly on the display. Moonlight, on the other hand, is usually so faint that you don’t need to darken the display in order to focus.
Since the calculated time of transit refers to an exact point on the centre line, a deviation from this point by even a few metres (or a correction of the ISS trajectory since the calculation) may shift the transit time by a few seconds. Therefore it is advisable to start the series of exposures approximately 30 seconds before the calculated time, and track the transit on the notebook display. Once the completed ISS transit has been seen on the notebook, the recording sequence can be stopped; no further action is necessary.
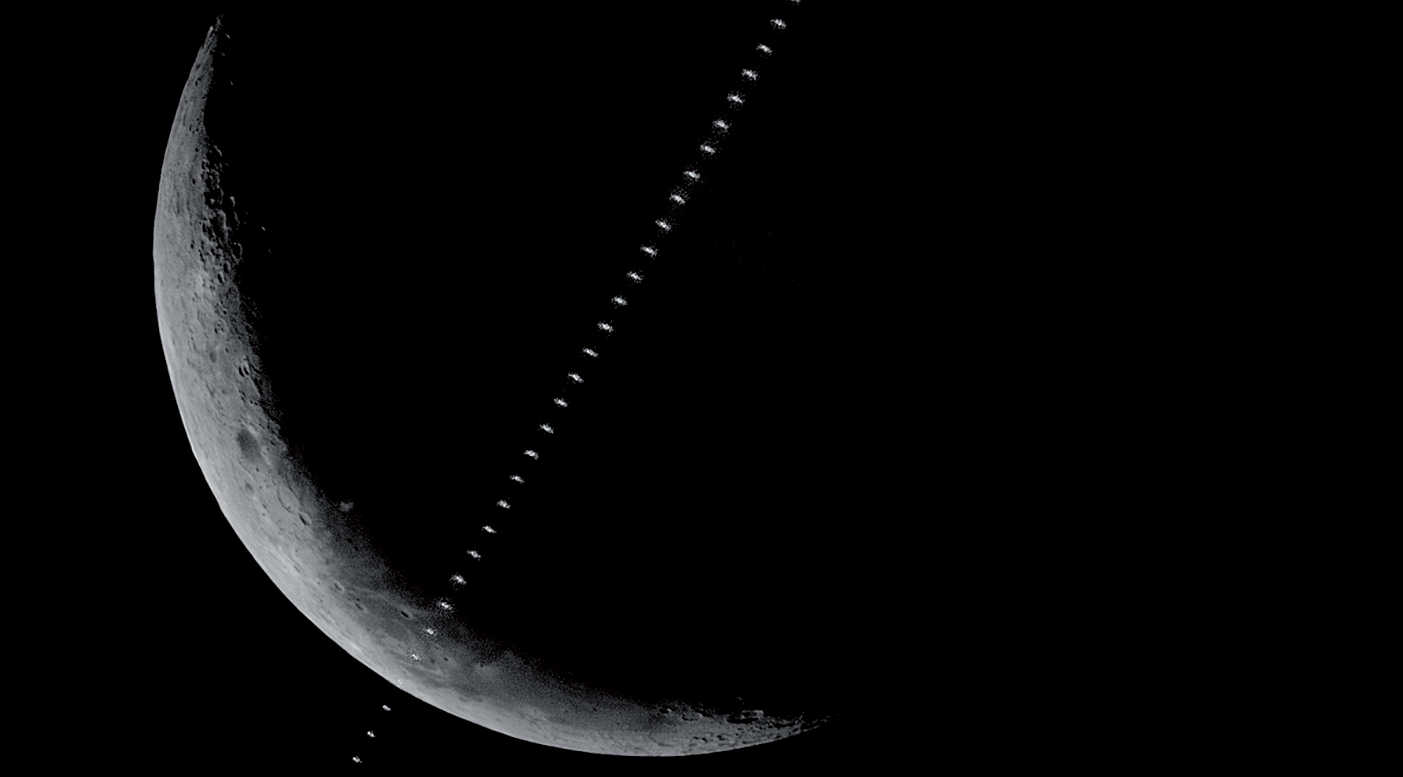 In the early afternoon of 20 June 2017, the transit of the International Space Station ISS in front of the waning Moon over the Black Forest was captured: the transit took place at 13:56:09 CEST, when the Moon was 36 degrees above the SW horizon. The distance between the magnitude 1.9 ISS and the observation site was 662.8 km, so the transit took 1.3 seconds and the space station seemed relatively small. The conditions at the observation location were very unfavourable: high humidity from the increasing cloud cover and gusty wind made the observation even more difficult. The picture is a composite of 51 images combined n Photoshop. U. Dittler
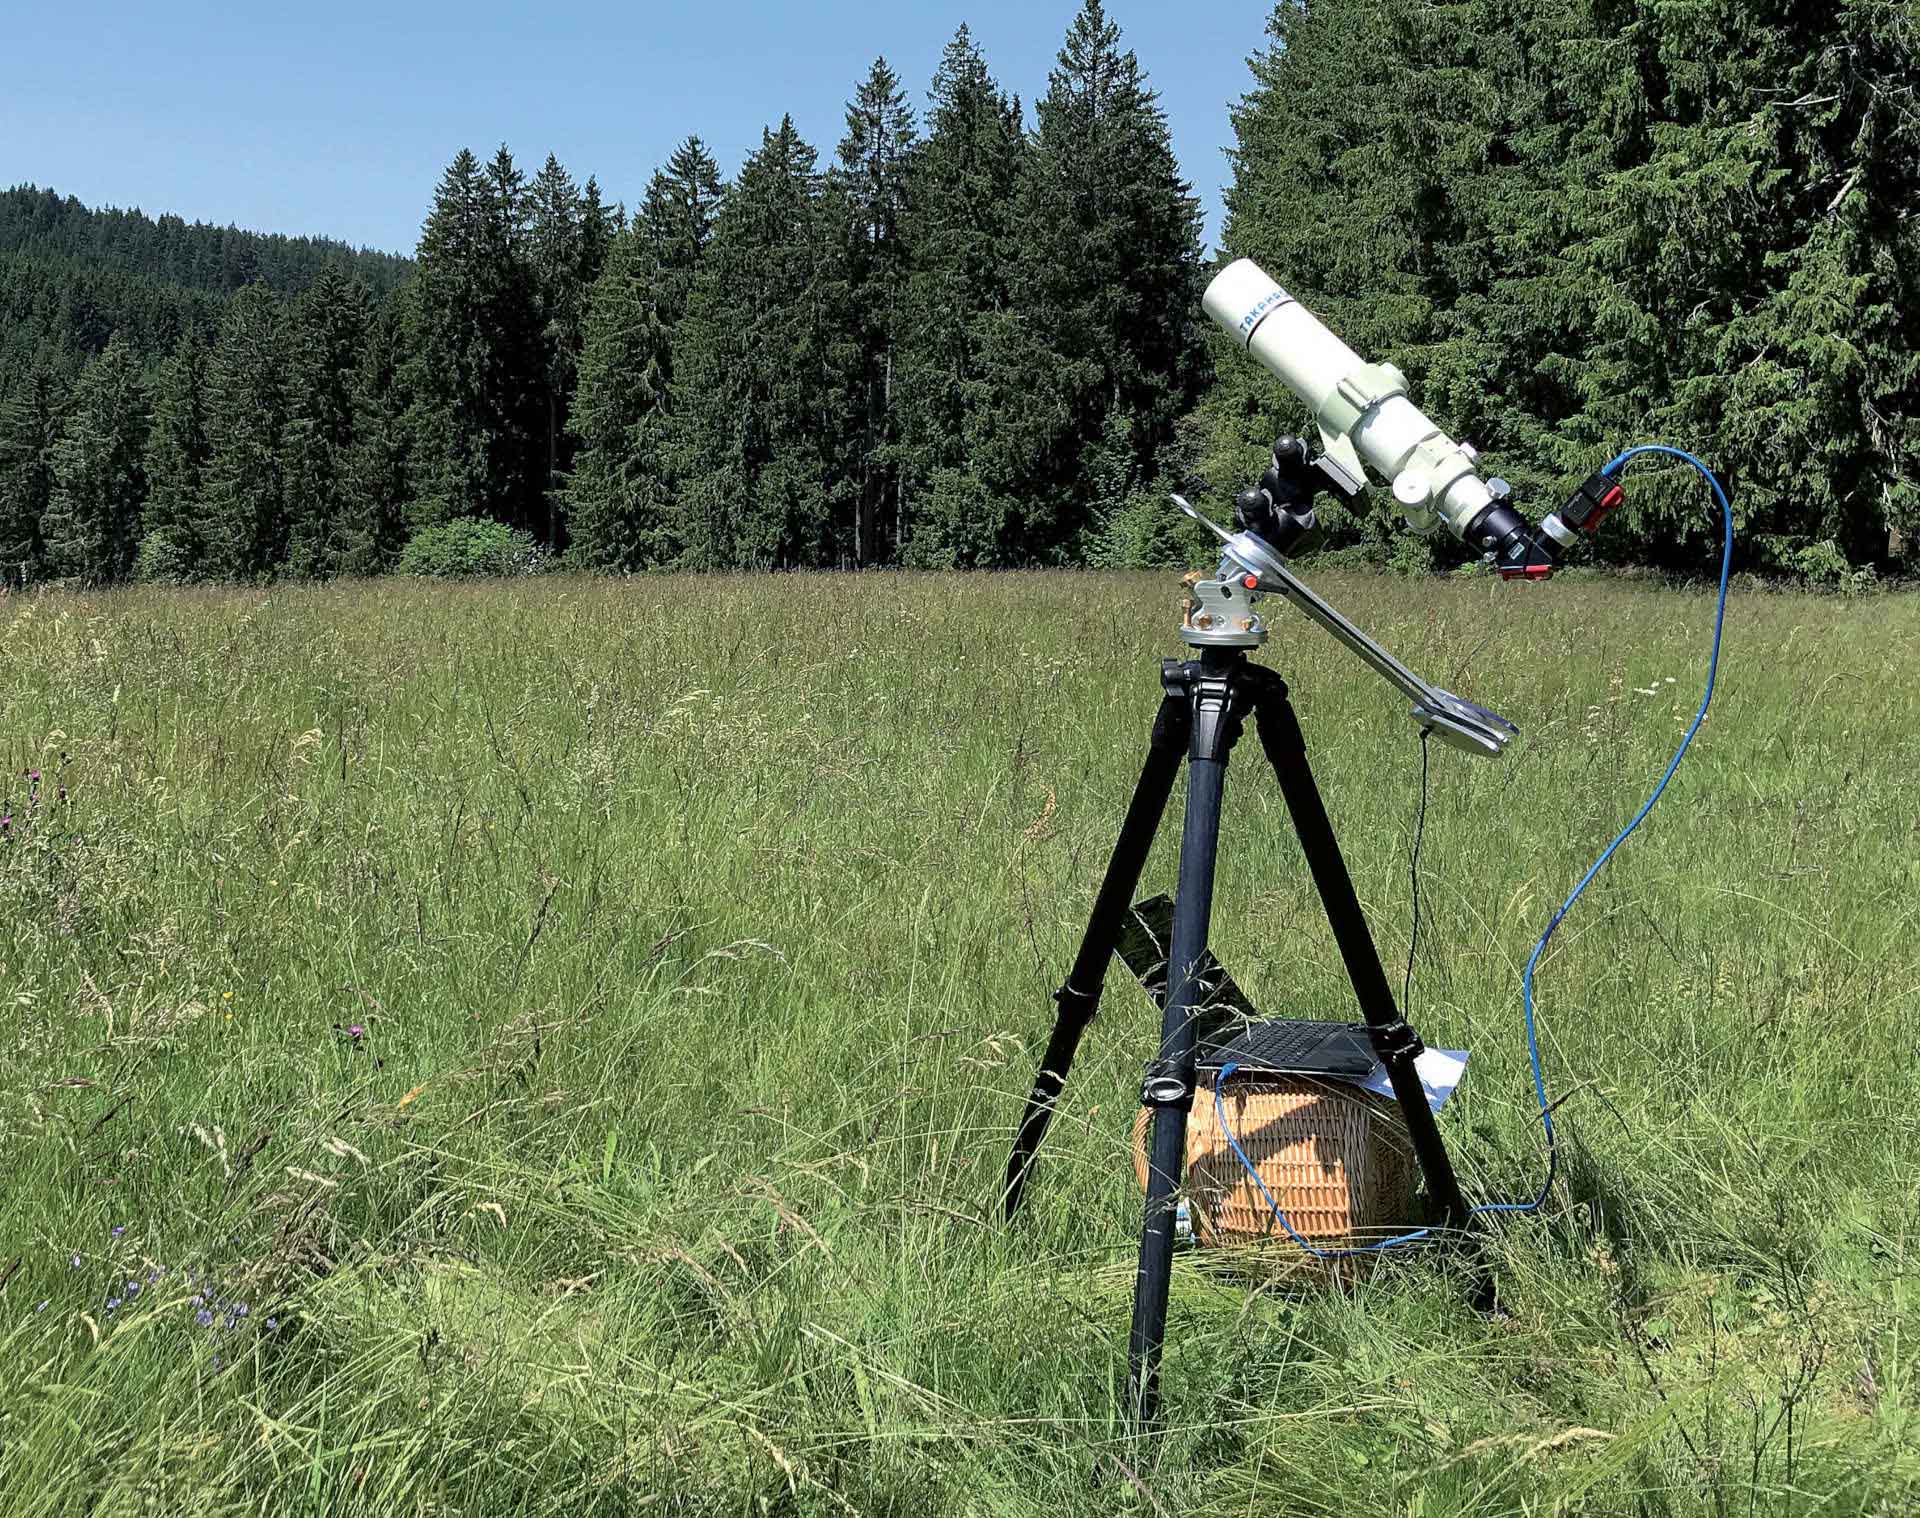 For the transit captured in the third picture, the equipment was set up in a clearing in the Black Forest as shown in the second picture. U. Dittler
 Image processing
When capturing an ISS transit with a CCD camera, the images are usually saved in the form of a continuous film. The first step in image processing is to look at all the individual frames from the film in order to note which ones actually contain the ISS. If you stopped the recording sequence shortly after the transit, it is of course a good idea to start checking the film from the end and work backwards. The images with the ISS should then be saved as individual files (AviStack software, for example, has a function for doing this), while all the other images without the ISS can be processed or stacked in the usual way for Sun or Moon photography (for example using Autostakkert2 software).
In order to create a montage of the ISS transit from the individual images of the ISS and the stacked composite picture, all images can first be opened in Photoshop as individual layers in a common file (e.g. using the function "File – Scripts – Load Files into Stack"). To ensure that all the ISS images are visible in each layer, it is useful to brighten all the layers (in the case of images of a bright ISS in front of the dark Moon) or darken them (in the case of images of the dark ISS in front of the bright Sun). This ensures that all the positions of the ISS are visible in each layer. The Sun or Moon is not yet optimised, this is done in the next step. To do this, the stacked composite picture of the Moon or Sun without the ISS is placed as the top layer above the layers with the ISS images and then the (soft-edged) eraser tool is used to erase the stacked lunar surface at the points above the individual ISS images so that the ISS image below becomes visible. The layers can then be joined together and further processed and optimised – for example in terms of contrast or colour.
The bottom line
Photographing a transit of the International Space Station in front of the Sun and Moon is always exciting and remains a challenge even after the first successful attempts. This is because the ISS always presents itself in slightly different ways due to its varying altitudes and distances from the observer, and the Sun, too, presents us with different appearances through varying combinations of sunspots. Due to its different phases over the course of the month, an ISS transit in front of the waxing or waning Moon is also continually different. If you are able to successfully photograph an ISS transit, we’d love to see the results!
Author: Ullrich Dittler / Licence: Oculum-Verlag GmbH