

The Sun in focus
No other star allows us to see and photograph details on its surface. With these tips, you can succeed in doing it.
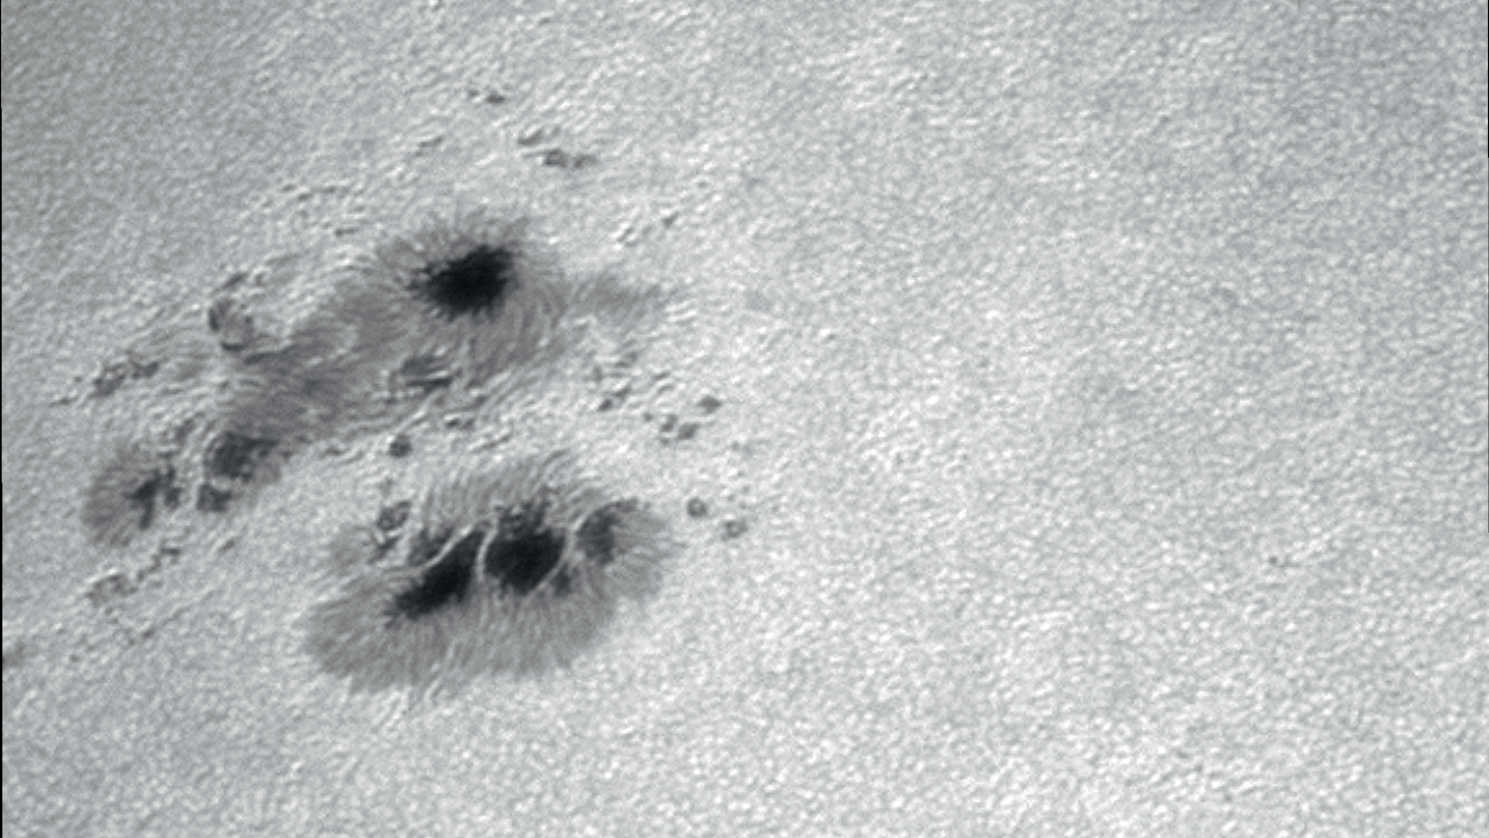 Sunspots in white light. The picture clearly shows the different structures of the individual spots. Photographed with an uncooled CCD camera on a telescope with 130 mm aperture and a focal length of 3,250 mm. 500 images from a 2,500-image capture sequence were used for this composite picture. U. Dittler
Documenting the daily changes to our central star as an introduction to solar photography
The sun is undoubtedly a very exciting star: it changes its appearance from day to day. This is due on the one hand, to its dynamic surface, on which structures constantly develop and disappear, and on the other hand to its rotation, which varies between 25 and 35 days depending on heliographic latitude. It's an exciting challenge to photographically document these daily changes.
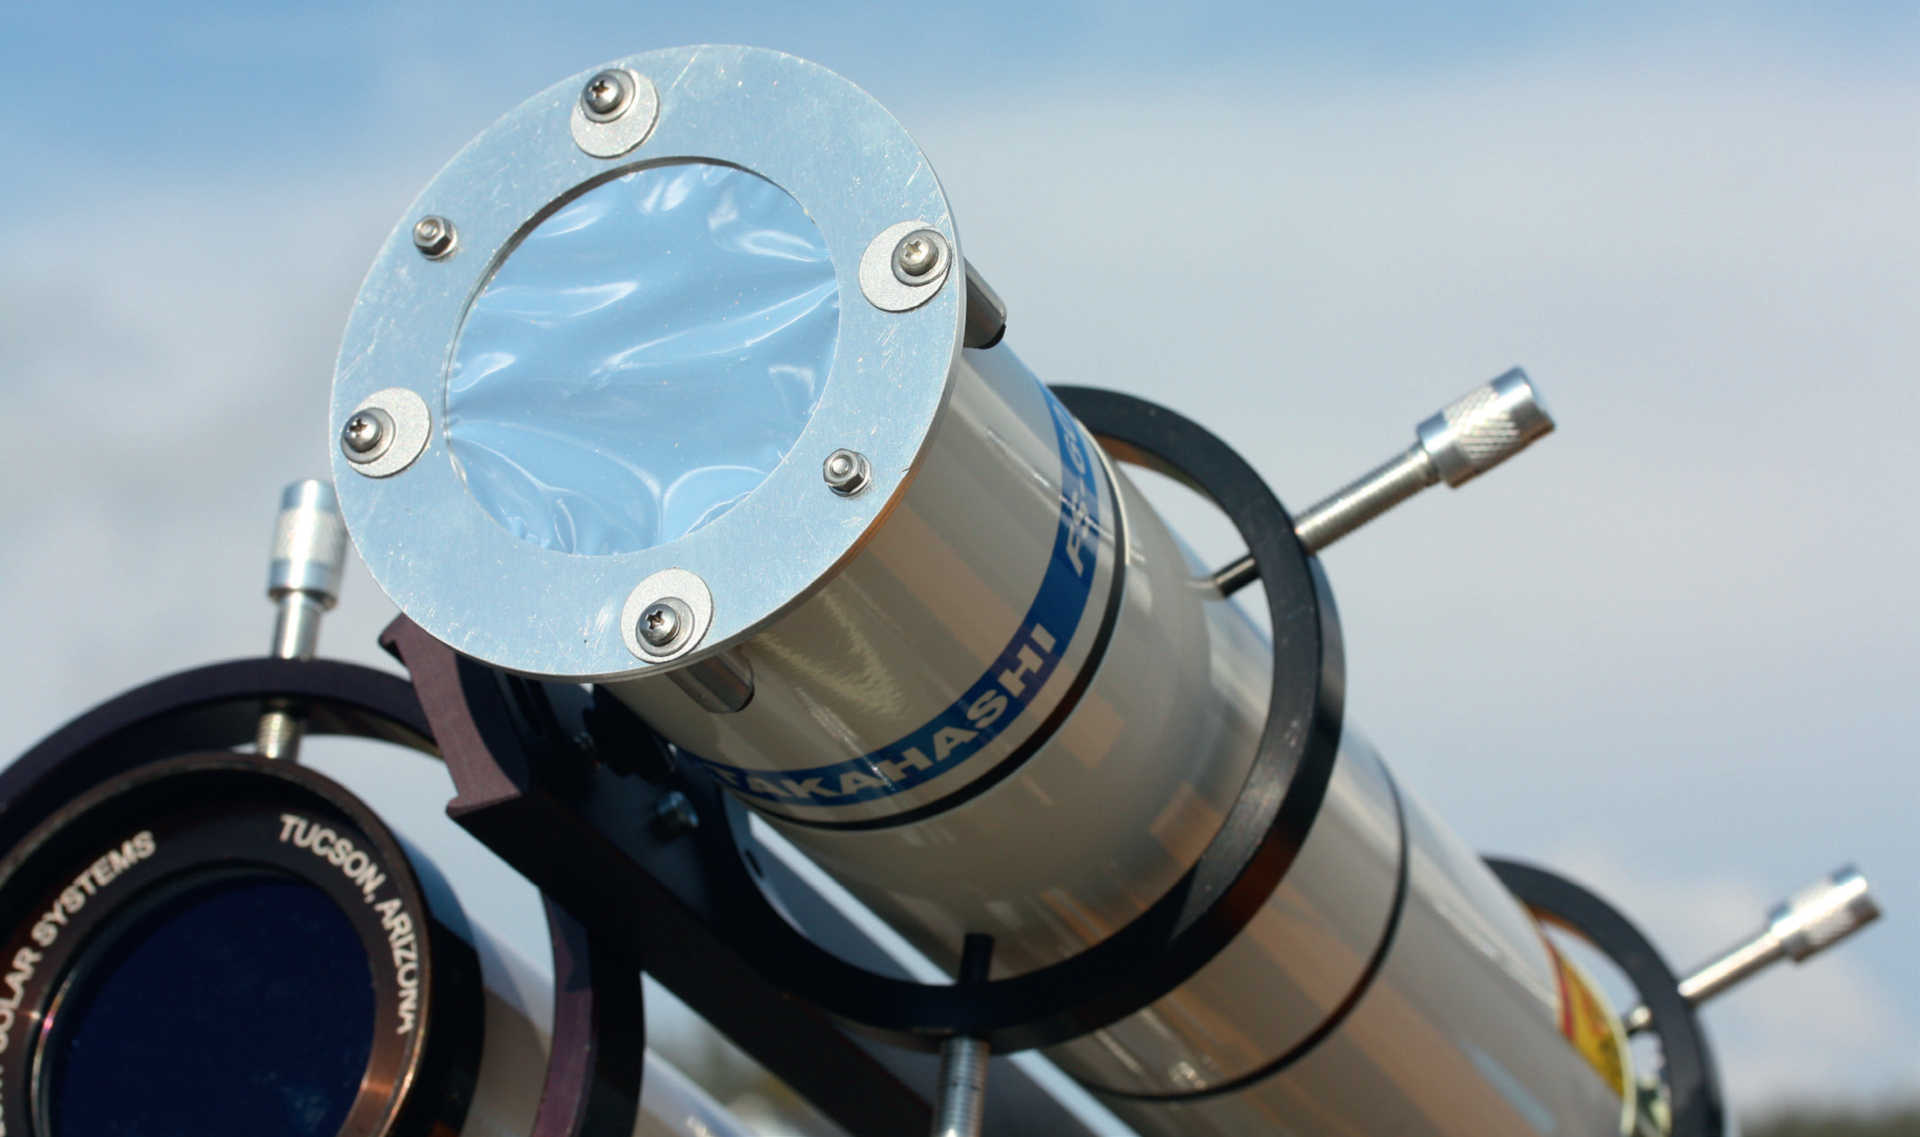 Filtering solar radiation is essential for solar photography. This can be done with a simple film filter which, as seen in this small lens telescope, is placed in front of the telescope. U. Dittler
The photosphere is the ideal starting point for solar photography, i.e. the visible surface of the Sun, which is around 400 km deep and has a temperature of between 5500°C and 6000°C. Here we are talking about white light photography, i.e. using the entire visible light spectrum. Reducing the enormous radiation energy of the Sun is critical: never observe the Sun without a proper filter as this can otherwise lead to irreparable eye damage!
Protected view
One of the most common, inexpensive, and easiest ways to absorb radiation for solar photography in white light is to use a suitable solar filter foil. These foils reduce the light entering the optics to a fraction of the total radiation and thus allow safe solar observation. Filters for camera lenses and telescopes can be made quite easily from solar filter foils. These foils can also be bought ready-made for many telescopes.
A distinction is made between filter foils with an optical density of ND 5 for visual use, and ND 3.8 foils for photography. Both foils reduce sunlight, but to varying degrees: the foil for visual observation (ND 5) allows only 1/100,000 of sunlight to pass through for glare-free observation, whereas the photographic foil (ND 3.8) allows 1/6,300 of the sunlight to pass. This is far too much for visual observation, but allows very short exposure times for freezing air turbulence during photography. As an alternative to the foil solar filters, attachable glass solar filters are also available for different telescope sizes and types.
Success through hundreds of images
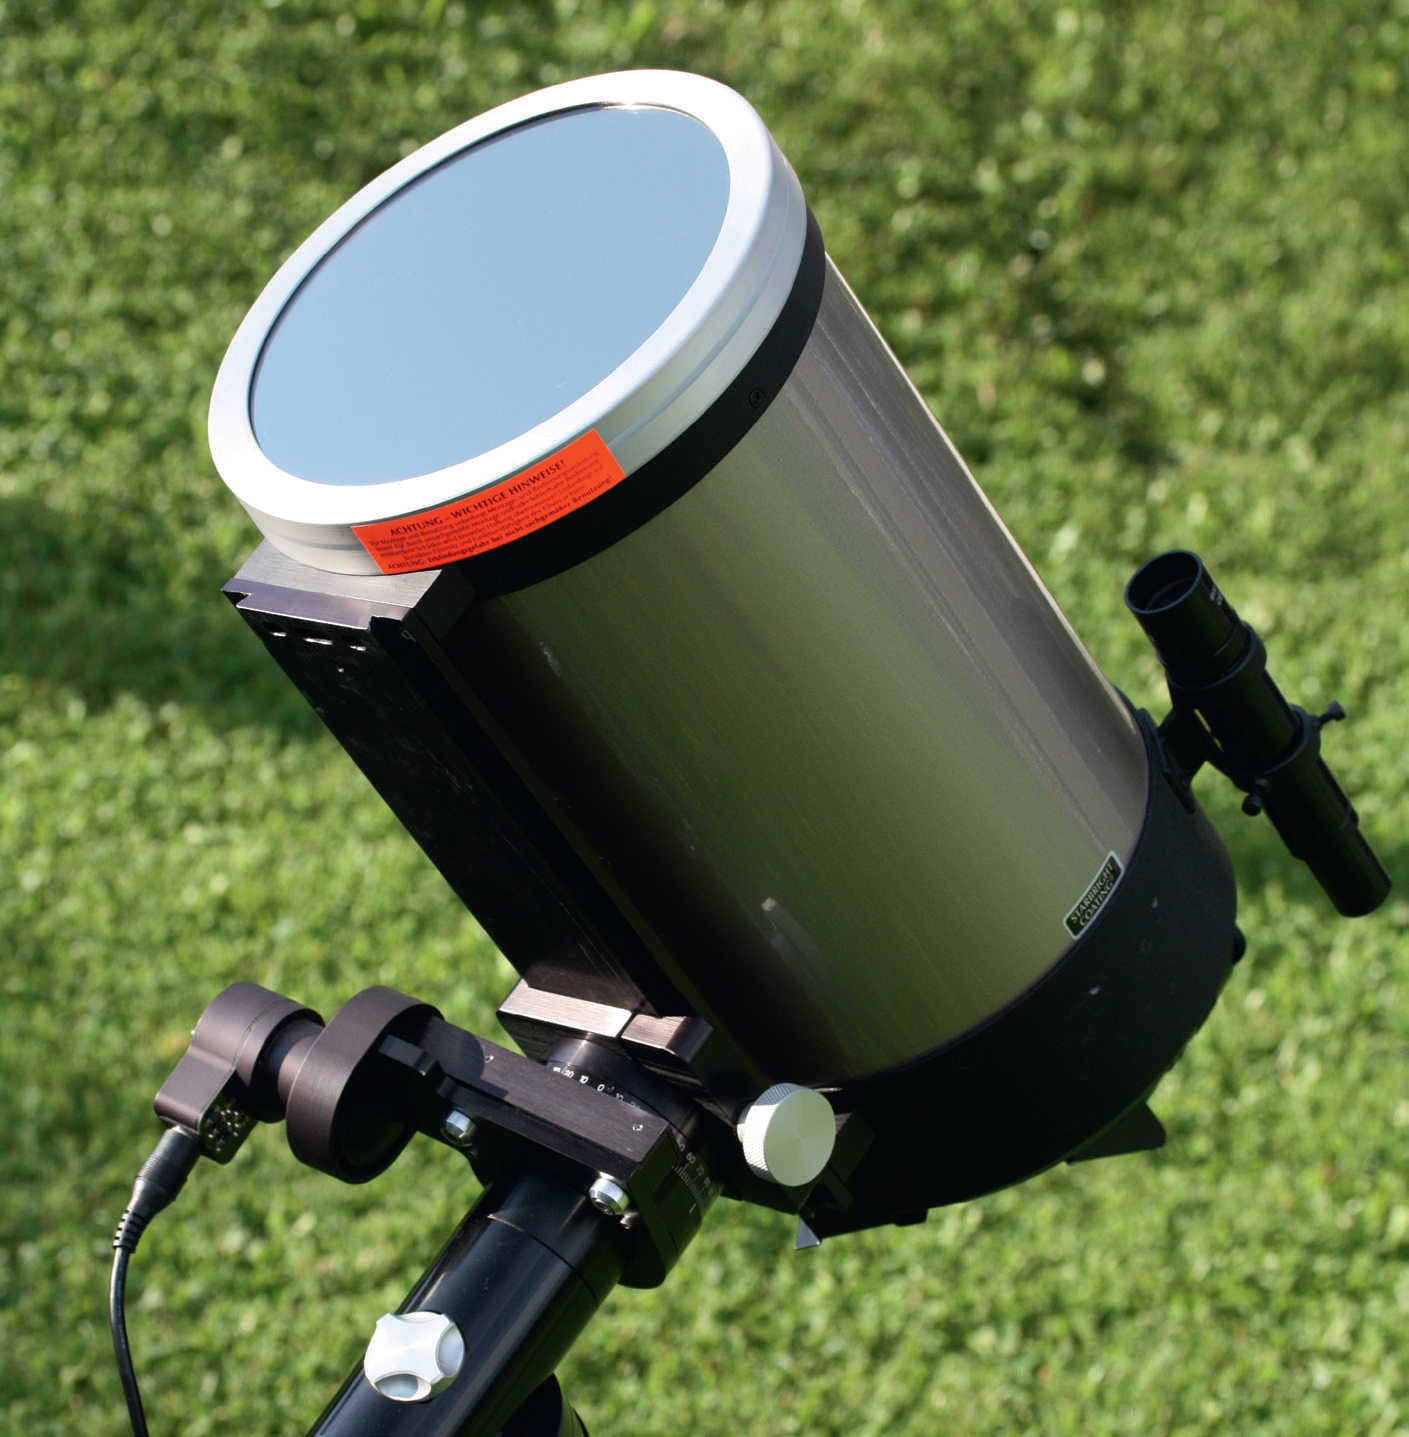 As an alternative to foil filters, the Sun’s radiation energy can also be blocked from entering the telescope with glass filters. Here a glass solar filter is used on an SC telescope. U. Dittler
For solar photography, it is worthwhile recording several hundred (or thousand) images of the Sun in video format with a CCD camera, and to use digital image processing to select (or have the software select) the best images from this video and then further process them into a finished picture. The procedure is similar to the imaging process for lunar and planetary photography.
As the Sun provides sufficient light, the respective exposure time of the individual images is only a fraction of a second and a video containing several thousand images can be created within a few minutes. In this way, any disturbances caused by air turbulence, which may make individual images look very blurred and washed out, can be eliminated during image processing.
Selecting the subject
Sunspots are the easiest objects on the surface of the Sun to photograph for beginners. These are cooler areas of the photosphere, whose temperature is about 1000°C below the ambient temperature, so that these areas appear as dark spots. The form, size and shape of the individual sunspots can change continuously and individually – this makes their daily photographic documentation so interesting. The central areas of the sunspots (umbra) usually appear well-defined and, in the case of larger spots, are often surrounded by a lighter area called the penumbra. Groups of sunspots often have two centres and are then referred to as bipolar sunspot groups.
Imaging in practice
 Solar finders are available in a variety of designs, but they all follow the pinhole camera principle and cast a small image of the Sun onto a projection surface, simplifying the telescope's alignment for solar photography. U. Dittler
Beautiful overview images of the entire Sun can be created using short focal length telescopes. By contrast, long focal length telescopes allow the detailed resolution and photography of individual sunspot structures. If the seeing is good, the granular surface of the Sun can also be photographed using a telescope with an aperture of 100 mm or more: the individual granules are short-lived rising and falling gas bubbles with diameters of about 1,000 km.
When choosing an observation location, care should be taken that you will not be disturbed by unnecessary turbulence, such as from a chimney or other heat-emitting surfaces. Depending on the focal length used, it may be difficult to point the telescope at the Sun, especially when the finder is covered for safety reasons. Small solar finders, which essentially act as a pinhole camera, casting an image of the Sun onto a projection surface, are helpful here. The construction of these solar finders may be simple, but they are remarkably reliable in their application.
Focusing the pictures can then be done quite simply by looking at the magnified image of the Sun on the notebook’s monitor before starting the imaging sequence. Various programs are available for processing the sequence of video images: AviStack freeware, for example, is very good for developing photographs of the Sun.
 With short focal length telescopes (approx. 500 - 600 mm focal length), overview images can be taken of the Sun showing the formation of the sunspots. This image was taken with an uncooled CCD camera on a telescope with 60 mm aperture and a 600 mm focal length (composite of 500 images from a 2,500 image capture sequence) U. Dittler
 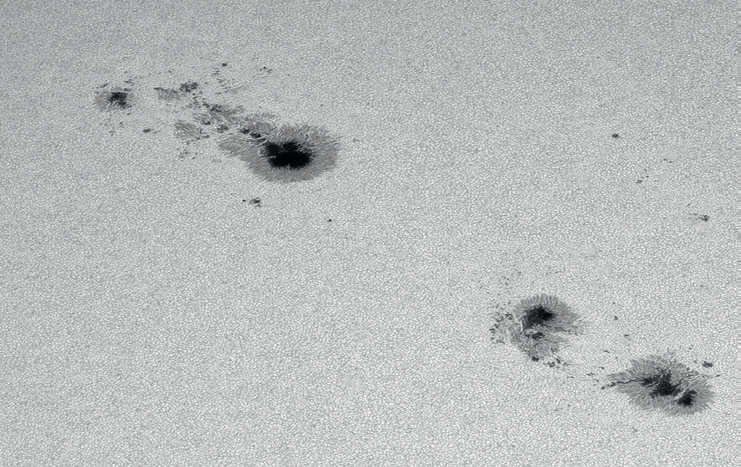 When shooting with long focal length telescopes the granules and details of the sunspots can be captured. This picture was taken with an uncooled CCD camera on a telescope with a 130-mm aperture and a 2,000-mm focal length (composite of 500 images from a 2,500 image capture sequence). U. Dittler
 Author: Ullrich Dittler / Licence: Oculum-Verlag GmbH