

Planetary photography. Procedure and image processing.
How do you ensure that image processing is as easy as possible? Careful setup and control during imaging are key.
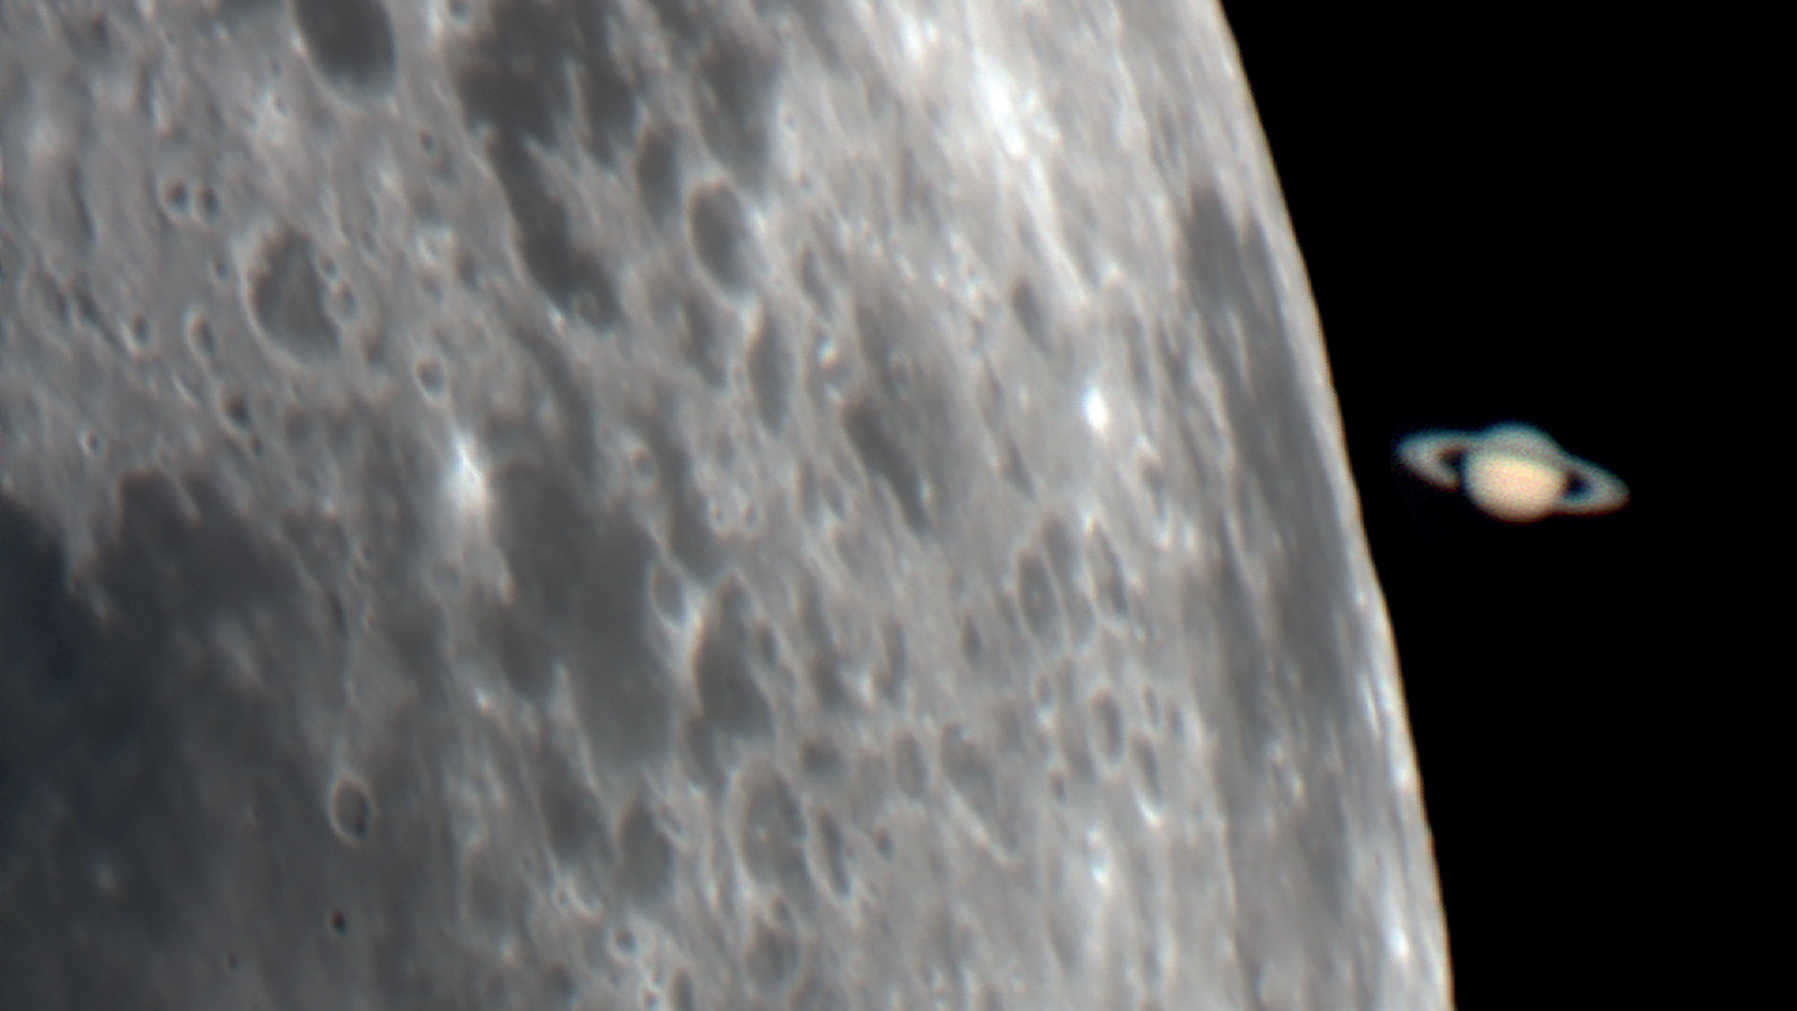 Occultation of the planet Saturn by the Moon on 22 May 2007. Captured with an uncooled CCD camera on a Schmidt Cassegrain telescope with 200 mm aperture and a 2,000 mm focal length. U. Dittler
When the planets presentef themselves in good visibility in summer, this offered many amateur astronomers a good opportunity to try out planetary photography. The previous article dealt with the necessary equipment and preparation for planetary photography, now we take a look at the photography itself and the image processing that follows.
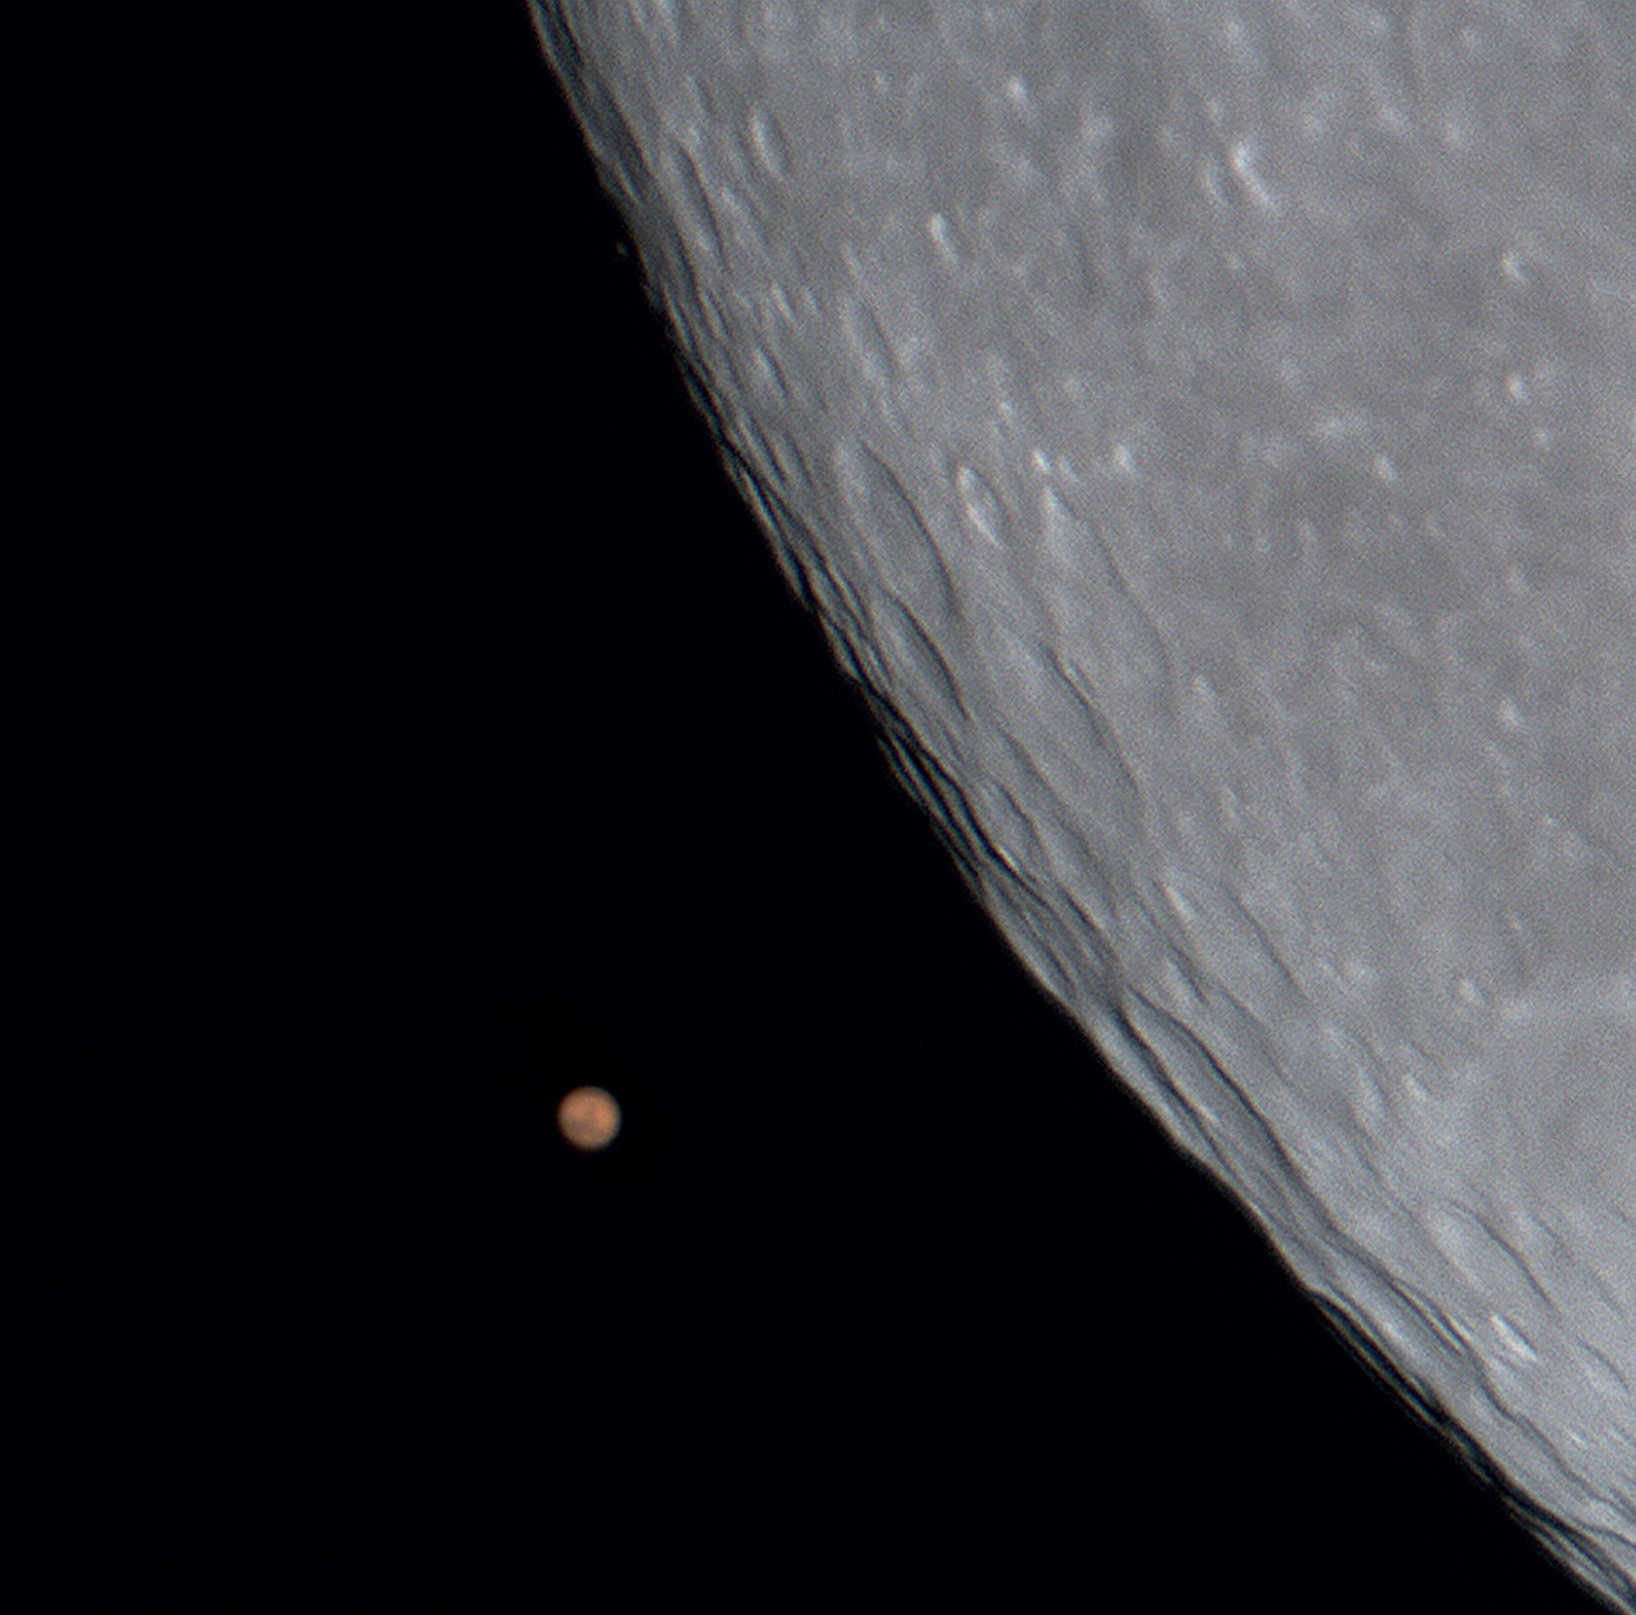 An almost-occultation of the planet Mars by the Moon on 24 December 2007. Captured with an uncooled CCD camera on an SCT with 200 mm aperture and a 2,000 mm focal length. U. Dittler
Planets should be photographed at their highest possible point above the horizon, and the seeing should be good. In order to be able to create several stress-free sequences of images of the planets with an uncooled CCD camera, well-aligned motorised tracking is also essential. However, the polar alignment demands are not quite as strict as in deep sky photography.
Setup and settings
The alignment demands may be lower, but it is still helpful to start setting up your equipment at dusk. Sufficient attention should be paid to balancing the telescope in both axes during setup. When shooting a series of images, it may be necessary to manually correct the tracking from time to time. Since poorly balanced axes often lead to annoying skipping or slack, correctly balanced equipment is helpful in order to ensure fewer interruptions during the imaging sequence, which in turn contributes to the quality of the overall picture.
Locating the bright planets is not usually a problem. If the mount does not have GoTo functionality, an appropriate sky atlas will help you find the outer planets Uranus and Neptune by star hopping. The large image sensors in your CCD camera will help you to locate the faint planets, since they will always show more of the surrounding stars than small chip surfaces, which helps with orientation.
Focusing for planetary photography can be simplified by enlarging the image on your notebook monitor. When focusing precisely on the bright gas planets, it is advisable not only to pay attention to the outline and the richness of detail, but also to keep an eye on their fainter moons. It is often easier to find the exact focus point by concentrating on the visibility of the point-shaped moons than by using the flat planetary structures. In unfavourable conditions – and when focusing the fainter planets Uranus and Neptune – it may be worthwhile to choose a bright star nearby and focus on that before then panning back to the planet.
Setting the exposure
The correct exposure time for planetary photography depends on several factors such as the telescope aperture, the focal length used, the sensitivity of the camera chip and, of course, the local conditions. However, the exposure times are always in the range of fractions of a second and can easily be controlled with your camera’s imaging software histogram function: the peak in your camera’s histogram display must not touch either side side or be cut off. Depending on the conditions, several hundred or several thousand images should be captured and saved as a film sequence in the highest possible quality. Which data format is selected depends on the software used. The SER format, which supports, for example, Lucam Recorder software from Heiko Wilkens, Genika Astro from AiryLab, and FireCapture from Torsten Edelmann, has proved its worth.
 Even if the Moon does not occult the planet, the passage of the two celestial bodies can be an exciting photographic challenge. Here, a DSLR camera captured how, on 24 December 2007, planet Mars and the Moon move past one another, without any occultation occurring at the observer's location. U. Dittler
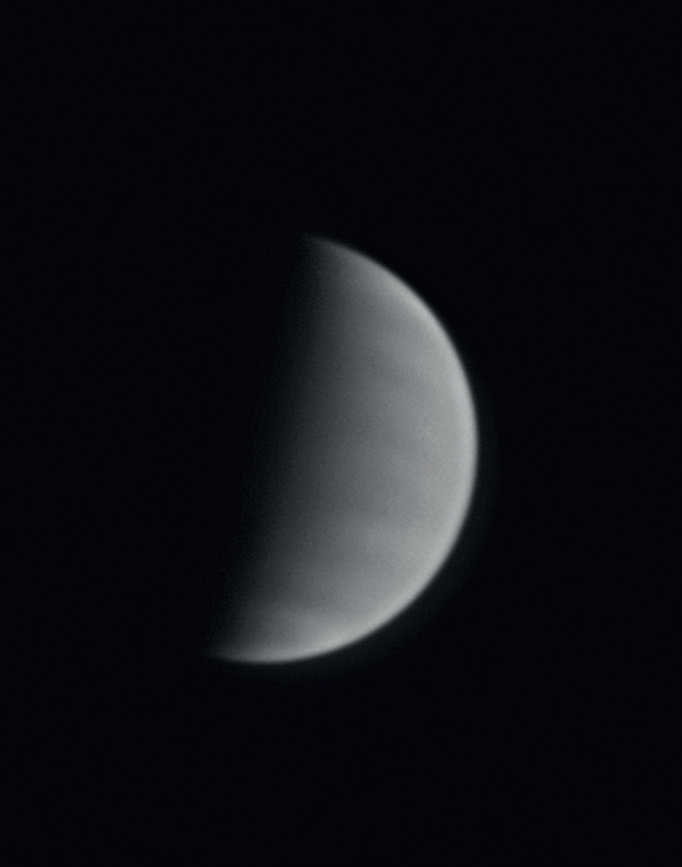 Image of the planet Venus. A UV filter allowed the capture of some cloud structures. Mario Weigand
Quality should be checked during imaging to avoid later surprises. Sharpness can be controlled at any time using the CCD camera’s live image on the notebook monitor. You can also check the exposure time anytime while imaging to see whether it has been correctly set or whether areas of the image are overexposed and washed out. The quality of the final composite picture can only be evaluated after image processing, as it is usually too time-consuming to do this while imaging. With a little practice, however, the quality of the final picture can be assessed very well on the basis of the quality of the individual frames during imaging.
As the quality of the seeing tends to change over the course of an evening, several series of images should be taken – as often it is only during image processing that it becomes clear which film was recorded in the best conditions. This author usually creates a series of 2,500 frames, the resulting file with a data volume of about 4GB can still be processed reasonably well.
Image processing
Autostakkert!2 software is free of charge and is perfect for processing planetary photographs, because the program is really easy to use and works very quickly. Autostakkert!2 can use several hundred reference points per image to eliminate the qualitative differences in the images as effectively as possible.
When you start the program, two windows open: one window in which you can set the options for processing the film sequences, and a second window that displays the loaded image sequence. When processing in Autostackert!2, single or multiple film sequences can be loaded at the same time and processed together with the same settings. This is useful, for example, when a planet has been captured with R, G and B filters and these three related sequences are to be matched during processing. Since the conditions and the telescope used have a considerable influence on the right settings to use during image processing, no general tips can be given here – trial and error is best.
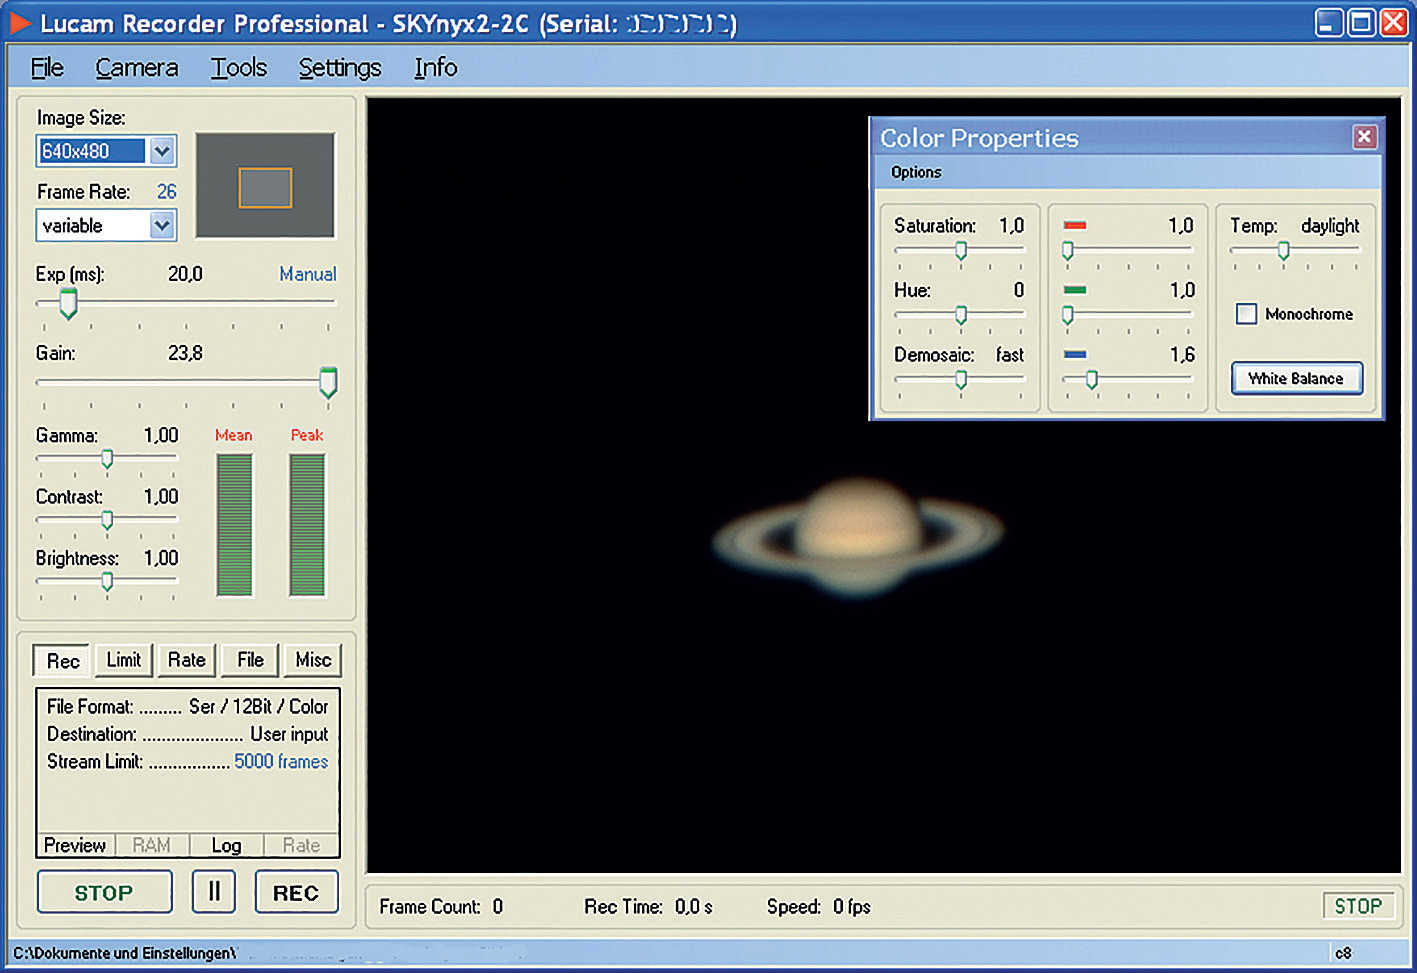 Screenshot from Lucam Recorder while imaging the planet Saturn. U. Dittler
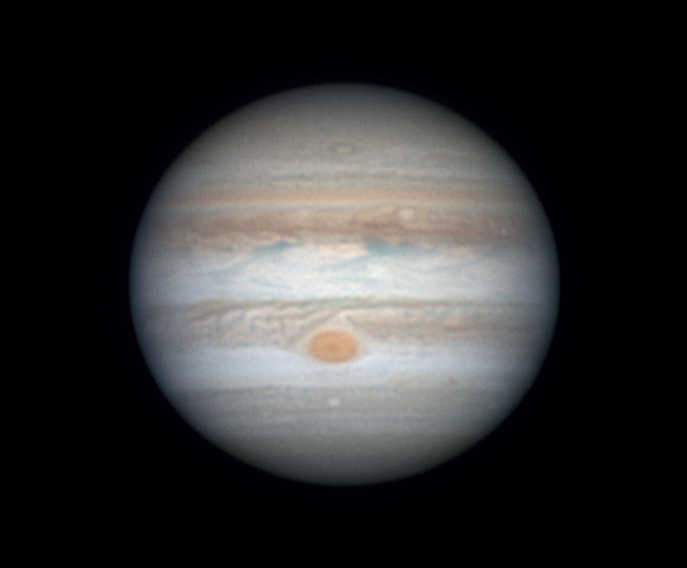 Picture of the planet Jupiter, taken on 8 April 2017 with a 10-inch Newtonian telescope, Barlow and ZWO ADC at f=4,300mm. Captured with an ASI224MC camera with RGB filters. Composite picture from 2,000 of 4,000 images. Volker Heinz
 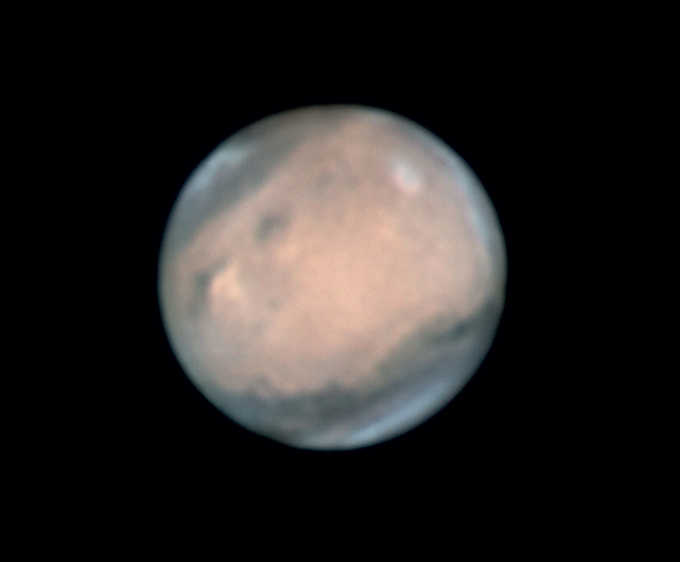 Picture of the planet Mars, taken on 20 May 2016 with a 10-inch Newtonian telescope, Barlow and ZWO ADC at f=4,800mm. Captured with an ASI120M camera with RGB filters. Composite picture from 5,000 of 11,000 images. Volker Heinz
 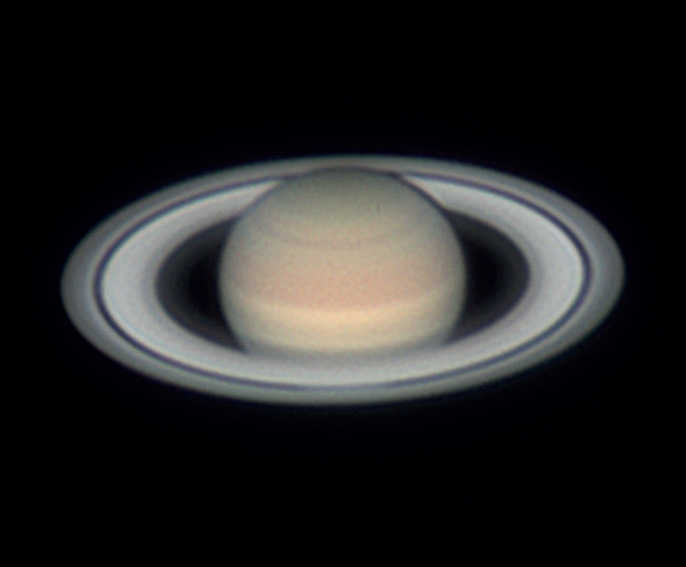 Picture of the planet Saturn, taken on 20 May 2016 with a 10-inch Newtonian telescope, Barlow and ZWO ADC at f=4,300mm. Captured with an ASI120M camera with RGB filters. Composite picture from 3,000 of 6,000 images. Volker Heinz
 Author: Ullrich Dittler / Licence: Oculum-Verlag GmbH