

Trails in the sky
Why not make use of the rotation of the night sky? Star trail shots are impressive and are perfect for an introduction to astrophotography.
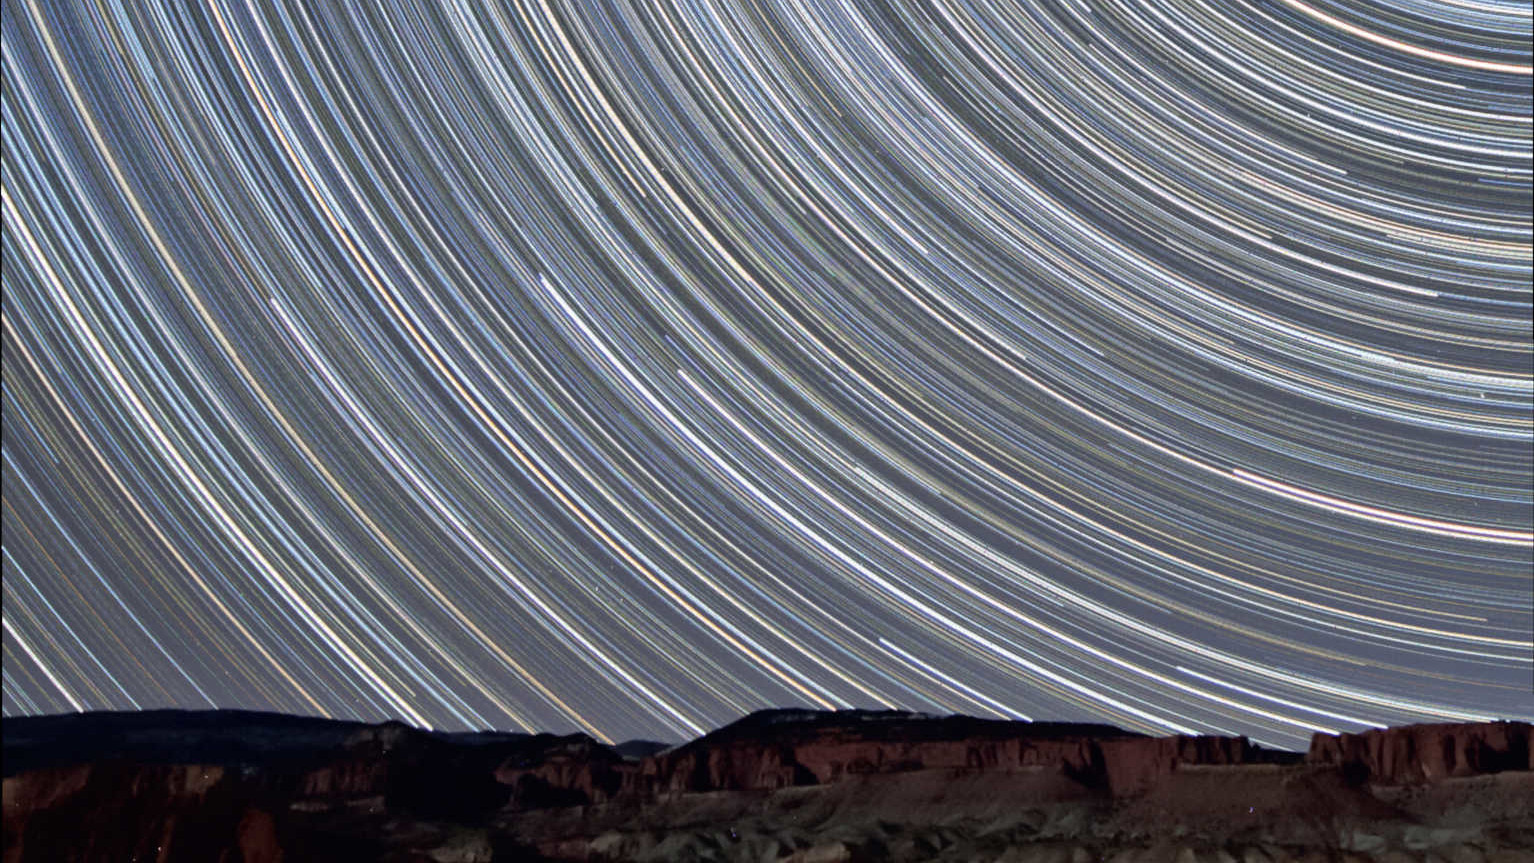 A few miles from the Capitol Reef National Park in Utah (USA), these star trail shots were taken looking north, showing the movement of stars over the red sandstone rock lit by the waxing Moon. This composite image consists of 350 shots with an exposure time of 90 seconds each (total exposure time: 525 minutes = 8.75 hours). The resulting image was created with a 10-20mm lens (at 10 mm and f/4) on a Canon 450D DSLR. U. Dittler
Here’s how to create impressive star trail images
It is fascinating to turn the movement of stars in the night sky into a star trail photograph. If Polaris is included in the picture, then the rotation of the sky around the celestial pole becomes impressively clear. Best of all, the technical effort required to create star trail images is relatively low.
 U. Dittler
The basic process for creating star trail images is quite simple: using a camera, successive images are taken of a region of the sky, thereby recording the movement of stars across the sky over a longer period of time. By combining these images using digital image processing, you can create a star trail picture with a total exposure time of several hours, without experiencing all the image quality disadvantages of a single exposure lasting several hours.
Equipment required
A sturdy and stable tripod, a camera and a remote shutter release are all you need to get started with star trail photography. The camera should have a wide-angle lens in order to be able to capture as large a section of the sky as possible – and thus a large field of moving stars. You also need to be able to control the exposure time manually. You must also be able to connect a remote shutter release so that you can operate the camera without vibration. Digital SLR cameras with wide-angle lenses that gather lots of light (with focal lengths between 20 and 35mm) and manual exposure settings are perfect for creating star trail images.
Selecting the subject
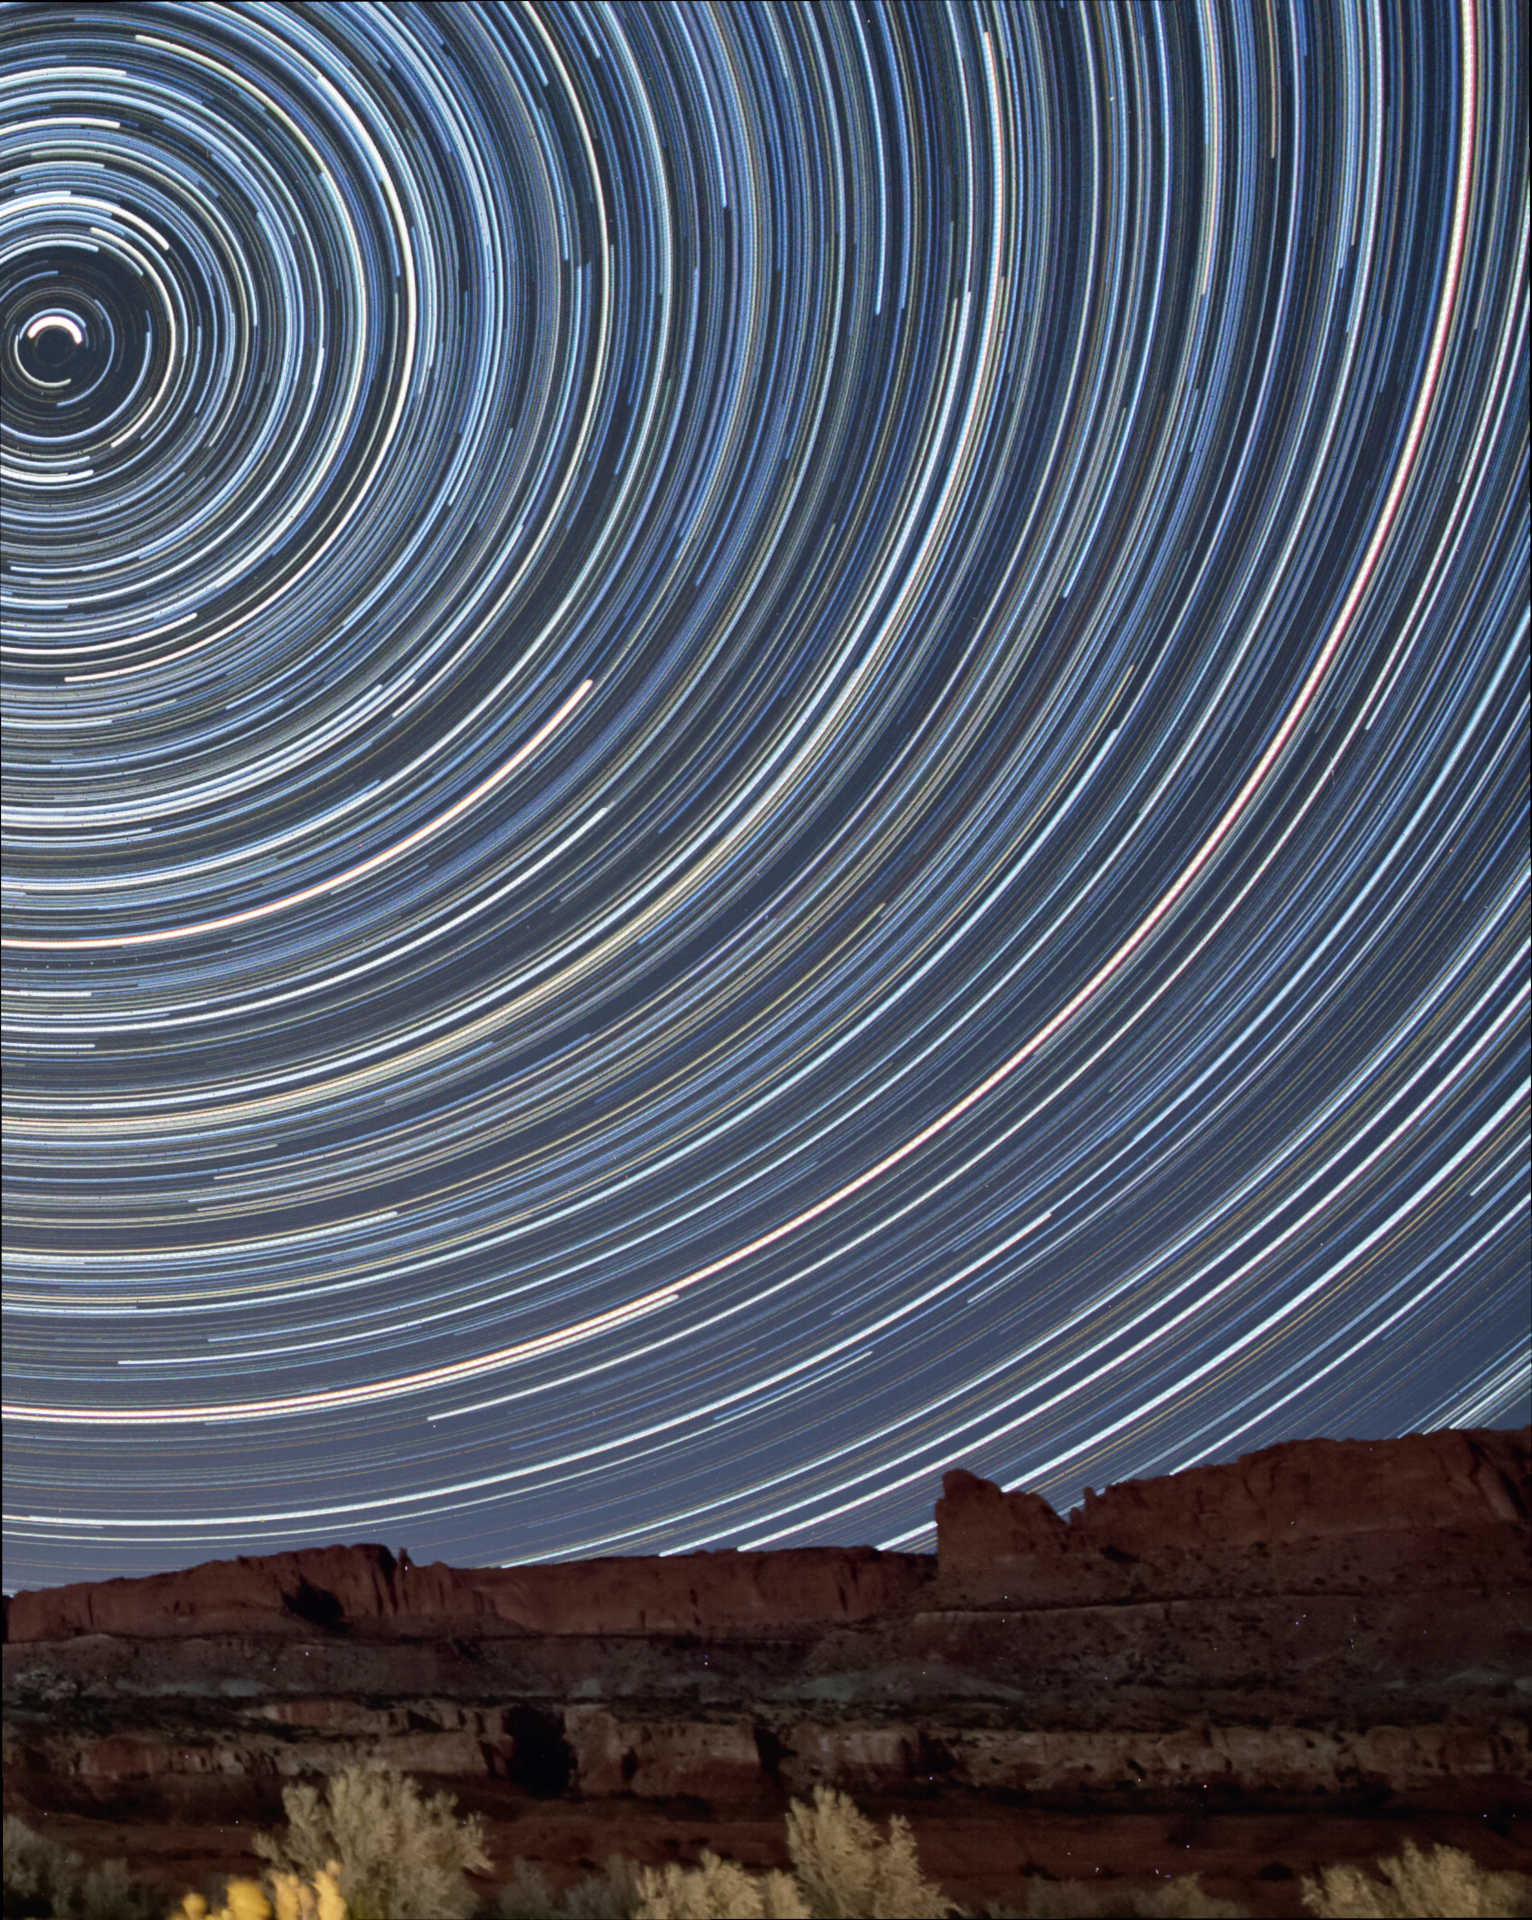
Since it is usually not possible to identify constellations in a finished star trail image, it is not so important which region of the sky you chose to photograph. A more important question for the orientation of the camera is whether you want to show only the movement of the stars without any landscape, or whether parts of the landscape should also form part of the foreground of the picture. Individual objects such as buildings, typical landscape formations or trees in the foreground can make the picture more interesting and more vivid. However, there should be no flags or plants in the picture that might move in the wind while you are creating your images. If the celestial pole is in the field of view, the star trails in the finished image will rotate around it.
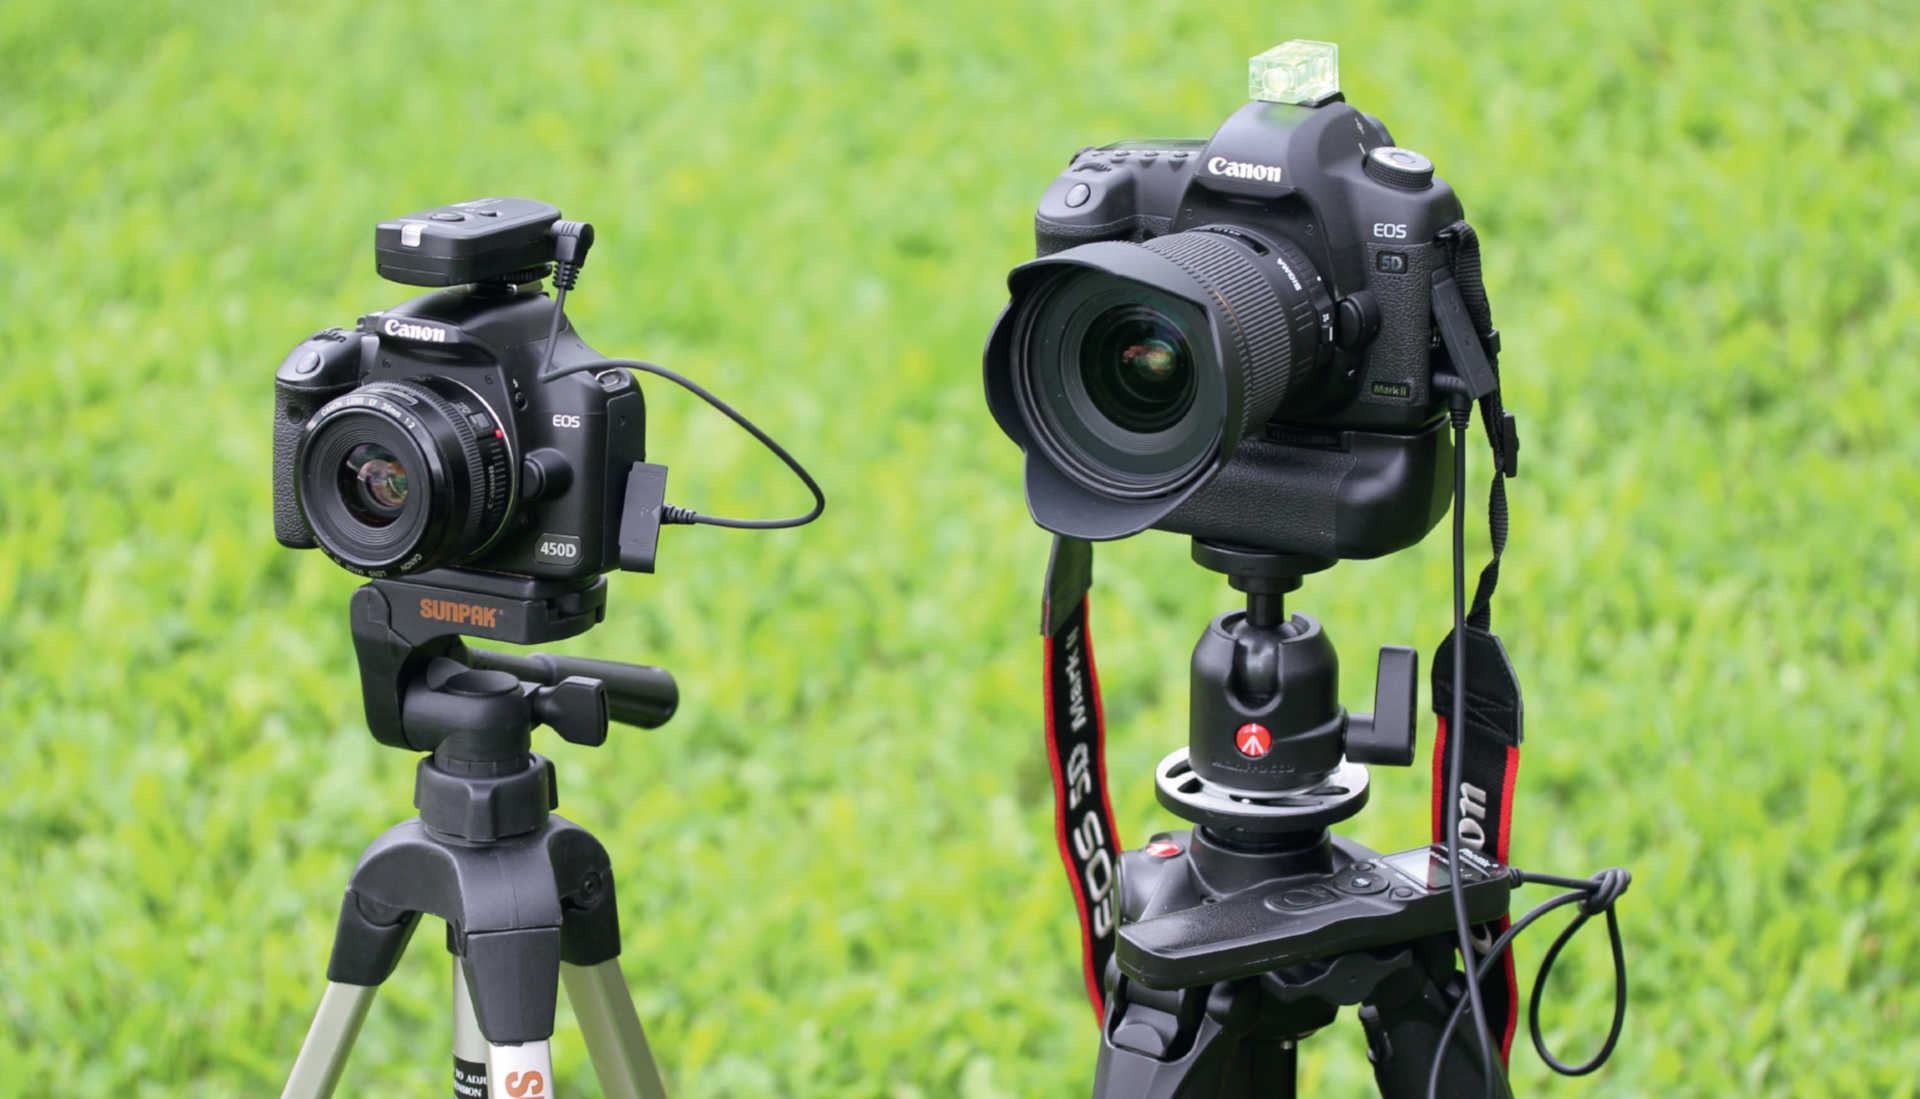 To get started with star trail photography, you can use an inexpensive camera with a wide-angle lens (here on the left you can see a Canon EOS 450D with an inexpensive 35-mm lens), a remote control (here a wireless remote control is used) and a low-cost tripod. Dedicated astrophotographers can use a full-frame digital SLR camera with a wide-angle lens that gathers plenty of light (here a Canon 5D with a 20-mm focal length lens with f/1.8 aperture) – shown on the right. The attached battery grip enables a longer sequence of image capture, which is independently controlled by the programmable remote shutter release. U. Dittler
Capturing images on the night
Star trail images should be taken at night around New Moon, so that faint stars are not swallowed up or outshone by the bright moonlight. To determine the correct exposure time, it is important to take test images and examine their histograms. No part of the image should be overexposed or underexposed. The sensitivity (about 400 or 800 ISO) and exposure times should be set to display as many stars as possible. The number of images you can produce is actually limited only by the capacity of your camera memory and the battery.
Before you start shooting your series of pictures, make sure that the camera's auto white balance, auto focus and image stabiliser are turned off, and the file format selected is JPG or RAW (be aware that it takes longer to save the larger RAW files, and therefore the time between shots is increased – with resulting gaps in star trails). In-camera noise reduction should also be deactivated. Since the autofocus does not usually work, you will need to focus manually; this can be done by enlarging the live image on the camera display.
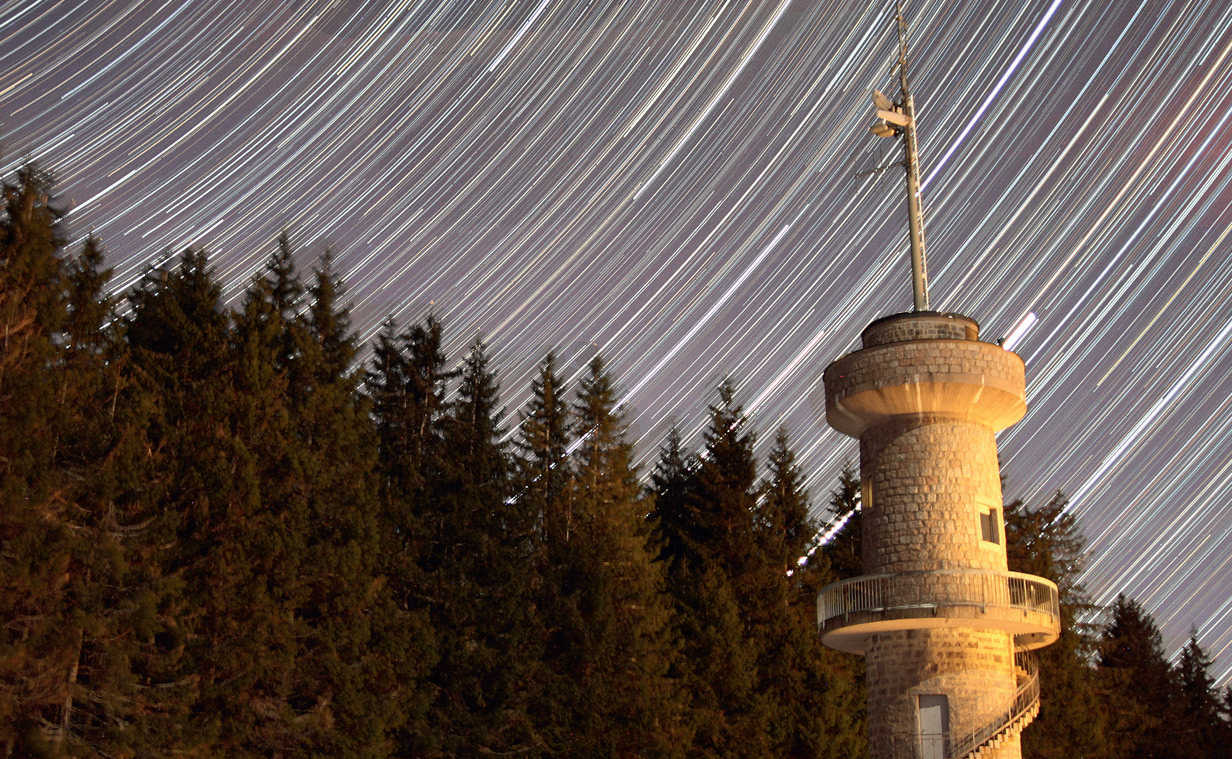 Movement of the stars over the observation tower on the 1149 meter high Brend, a mountain in the southern Black Forest. The image consists of 413 images each with an exposure time of 15 seconds, showing the movement of the stars over a period of around 100 minutes. Camera: Canon 550D with 20-mm lens and f/1.4 aperture. Since one side of the tower was illuminated by a light from a nearby hotel, the exposure time of each shot had to take this into account to avoid this side of the tower appearing overexposed and washed out. U. Dittler
Image processing
Processing the individual images into a star track picture can be done manually with any image processing software. However, it is much easier to use a program designed especially for the purpose, such as the free Startrails for Windows program or StartStaX for Mac.
Author: Ullrich Dittler / Licence: Oculum-Verlag GmbH