

Photographing the Milky Way: Here's How It Really Works
Photographing the Milky Way – but where do you start? This article shows you, step by step, how to take your first wide-field astrophotograph
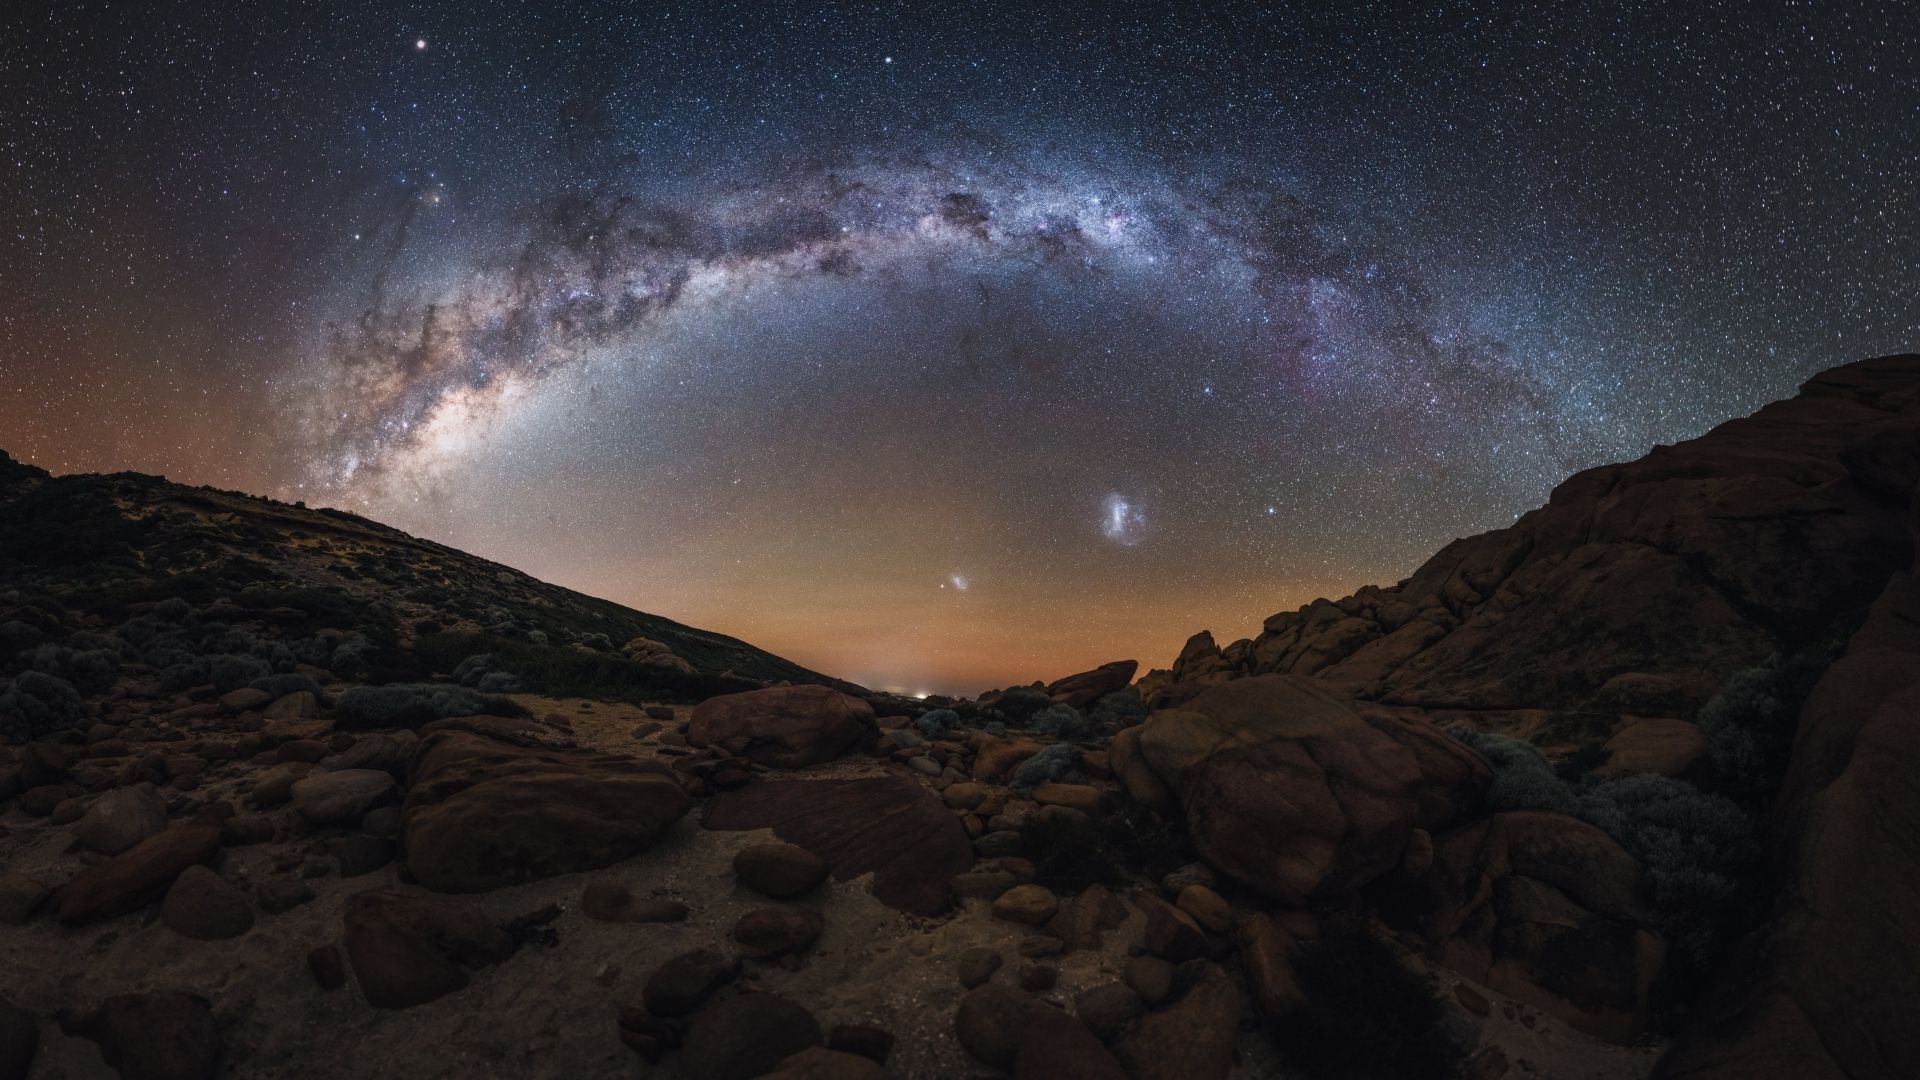
Anyone who has ever experienced a truly dark, clear summer night sky knows just how impressive the countless stars look to the naked eye. It almost looks as though light clouds are hanging in the sky – but in reality, you are looking at dense regions of dust and stars within our galaxy.
Perhaps you’ve tried taking out your smartphone at a moment like this, only to be disappointed to find that the result is noisy, the stars have been smudged into streaks, or the image is simply black. I know exactly how that feels. That’s why I’m going to show you how I plan my Milky Way photos and how you can take impressive shots with the right knowledge.
5 things you need to get started
To successfully capture the Milky Way, I recommend the following equipment:
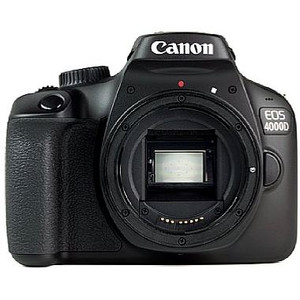
- A camera with a manual mode: ideally an SLR or mirrorless camera. A full-frame sensor is advantageous due to its better noise performance, but it is not essential.
- A wide-angle, fast lens: The shorter the focal length and the wider the aperture (small f-number such as f/1.8 or f/2.8), the better.
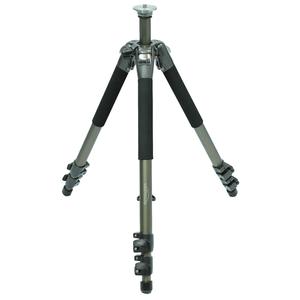
- A sturdy tripod: As we’ll be using long exposure times, a stable base is essential.
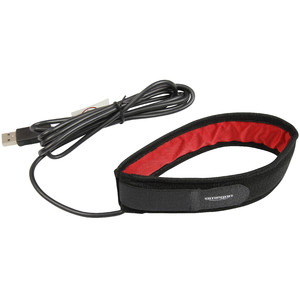
- A remote or interval release: To avoid camera shake when pressing the shutter button.
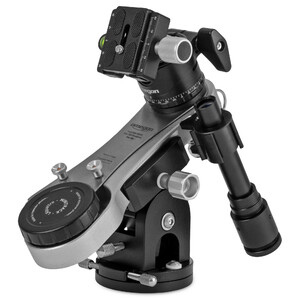
- A star tracker: To ensure the stars remain as points of light despite the Earth’s rotation.
Choosing a camera and lens/mount
As the Milky Way stretches across a vast area of the sky, you’ll need a wide field of view. I usually use a focal length of 14 mm on my full-frame camera. If you’re using an APS-C camera, this would be equivalent to around 10 mm to achieve a similar effect.
However, don’t go too far into the wide-angle range (fisheye), unless you like that particular look. With extreme wide angles, the star reproduction at the edges (distortions) and colour accuracy often suffer. It also becomes more difficult to incorporate the foreground naturally into the composition. Alternatively, you can photograph the foreground using a different focal length to that used for the Milky Way. Of course, this makes image processing more difficult.
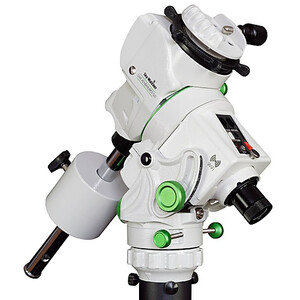
I use the Omegon LX Quattro as my tracker/mount. It requires no batteries and operates purely mechanically. It is ideal for the Milky Way. And if you later work with longer focal lengths of up to 80 mm, it will serve you well too.
Preparation: Planning is everything
Before you pack your camera, let’s clarify a few key points:
- When is the new moon? This is crucial. The moon’s light overpowers the fine details of the Milky Way. So try to find a time around the new moon.
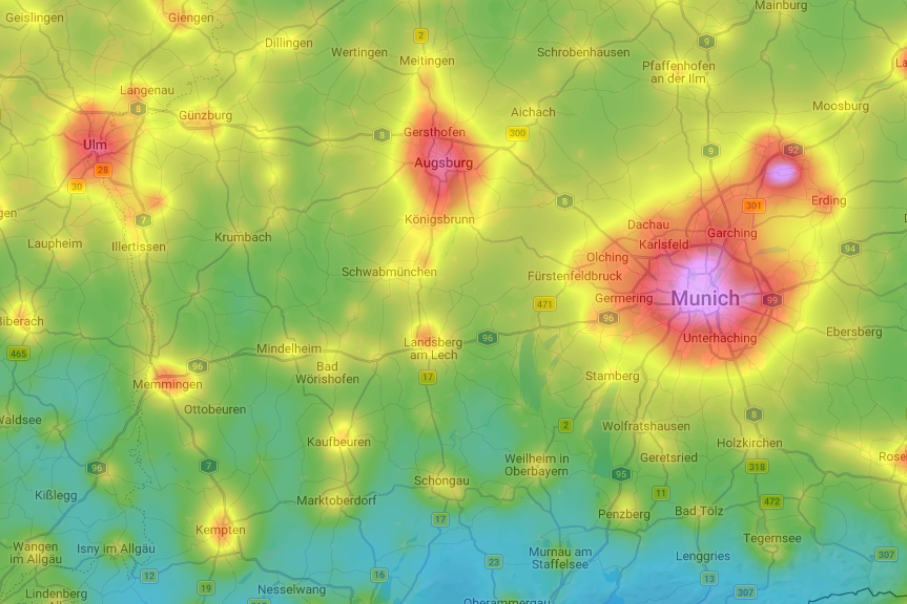
- Is my location dark enough? Light pollution is the biggest enemy. I use tools like the Light Pollution Map to find places where it’s really dark for at least 50 km to the south (that’s where the galactic centre is).
- What does my foreground look like? A picture with just stars often looks flat. I look for interesting silhouettes such as chapels, striking trees or mountain panoramas. My tip: Avoid overly delicate objects such as electricity pylons or leafy trees directly backlit by the stars, as these are extremely difficult to clean up later during ‘stacking’ (the process of combining images).
Pro tip: Use apps such as PhotoPills or Stellarium to see exactly when and where the Milky Way will be in the sky, even during the day.
The recording: step by step
Once the tripod is set up and the frame has been selected, I proceed as follows:
1. The sharp foreground
Before I switch on my tracking device (the tracker), I take a separate, very long exposure for the foreground. Although the Milky Way is blurred here due to the Earth’s rotation, the landscape is captured with low noise and in great detail.
2. Focus and settings
- Focus: Make sure you set this manually! Find a bright star, use the display magnifier and turn the focus ring until the star is a tiny, sharp dot.
- Format: Shoot exclusively in RAW. Switch off the camera’s internal corrections (noise reduction, vignetting correction), as these often lead to strange artefacts in astrophotography.
- Example settings: ISO 1600 (or 3200), aperture f/2.8, exposure time approx. 30 seconds.
3. Tracking and stacking
Now I switch on the tracker. This compensates for the Earth’s rotation, allowing me to use longer exposure times without the stars turning into streaks. To achieve a truly low-noise image, I don’t just take a single photo, but a whole series (e.g. 40 images at 30 seconds each). This results in a total exposure time of 20 minutes.
Post-production: Where the magic happens
You’re back in the warmth, still feeling the chill of the night in your bones, but dozens of RAW images are already waiting on your memory card. Now the second part of the work begins: stacking.
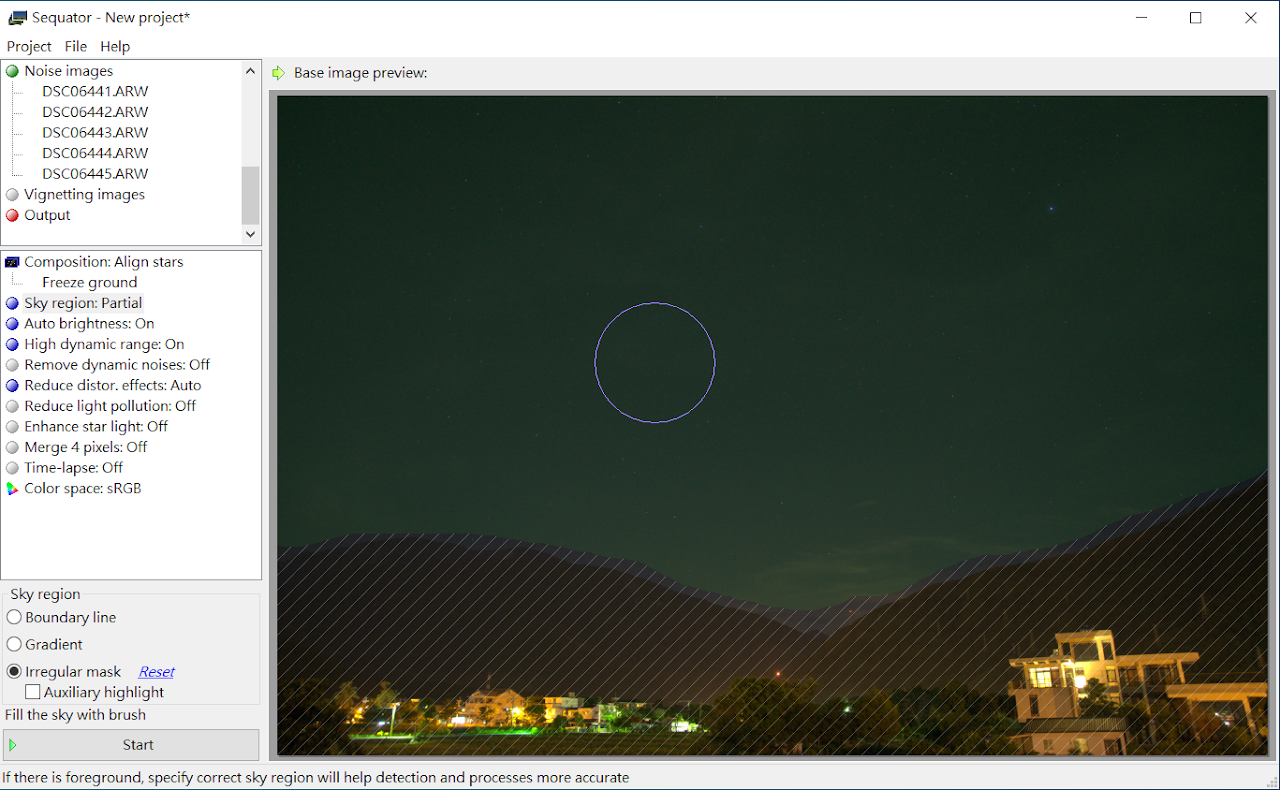
I recommend the free tool Sequator for this. It’s intuitive and delivers excellent results.
- Load your star images as ‘Star Images’.
- Select a reference image from the middle of your series.
- Use the ‘Irregular Mask’ function to roughly mark out the sky, and select ‘Align Stars’ and ‘Freeze Ground’ in the composition settings.
The ultimate in image editing software
Finally, I merge the stacked image of the Milky Way with my separate foreground photo in Photoshop. Using the Select -> Select Subject -> Sky function, the foreground can usually be masked very precisely. This allows me to edit the Milky Way and the landscape separately (contrast, colours, sharpness) before combining them into a finished image. This can also be done in GIMP or Affinity Photo
Now it’s your turn
Milky Way photography is a fantastic introduction to astrophotography. With minimal effort, you can create images that most people have never seen with their own eyes.
Be patient with yourself. Even for me, it rarely worked out perfectly the first time. Keep at it – the next image is guaranteed to be better!
Questions about settings or equipment? We’re happy to help on our social media channels.
Author: Marc-Antonio Fischer

Marc-Antonio, also known online as astronomical_horizon, is a passionate astrophotographer who specialises in fast reflector telescopes. His speciality: small planetary nebulae. When he’s not gazing at the stars, his heart lies with botany. He knows the local flora like the back of his hand. If he has any time left over, he picks up his electric guitar.