Your partner for astronomy

Archive for June 2020

New: StarSense Explorer telescopes from Celeston

June 30 2020, Stefan Taube

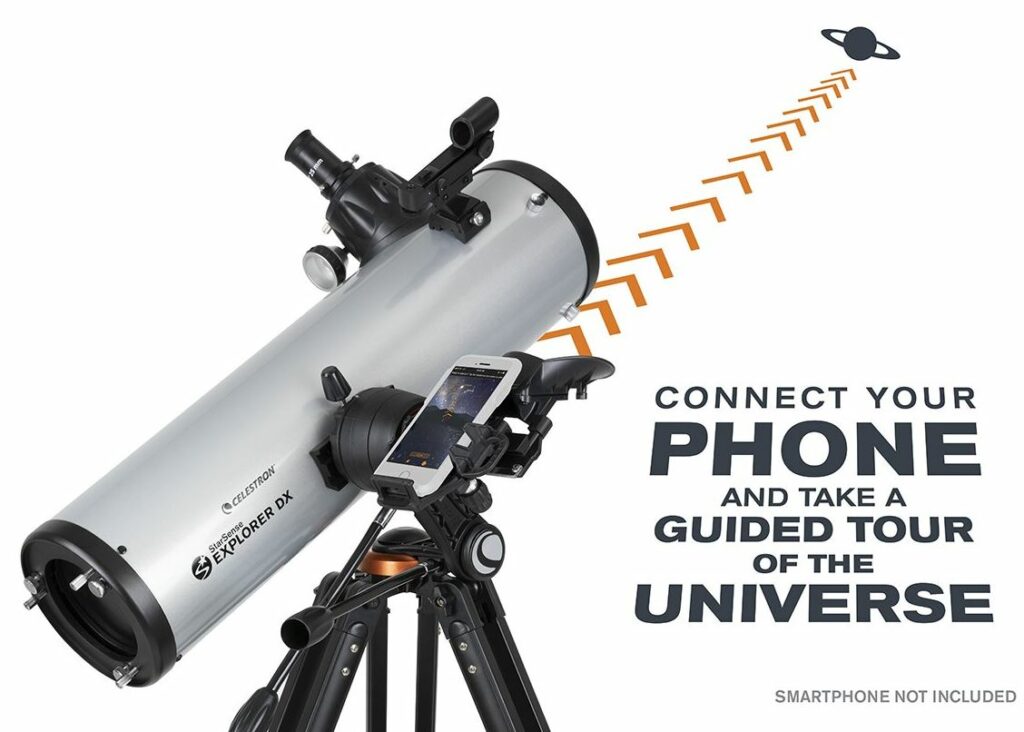
The idea of controlling a telescope with a smartphone is nothing new. With the StarSense Explorer range, Celestron brings  another option into play, which may be particularly interesting for beginners.

A special feature of the StarSense Explorer telescopes is that a WLAN connection does not need to be established between the telescope and the smartphone. The free StarSense Explorer app orients itself directly to the night sky, via the smartphone camera and a sophisticated mirror system.

Celestron StarSense Explorer DX

Celeston StarSense Explorer DX


Here’s how it works: All you need to do is install the free StarSense Explorer app and insert your smartphone into the special cradle attached to the telescope. The app uses location data from your smartphone to determine the observing location and does not require you to separately enter the current date and time.

The StarSense Explorer app uses a special lost-in-space algorithm (LISA), which is also used for the orientation of satellites. Star patterns recorded by the smartphone camera are compared with the internal database. These calculations are combined with information from the smartphone’s gyroscope and accelerometer. All this leads to a very high degree of precision that no other planetarium app can achieve! So you can move confidently through the night, even with no prior knowledge!

In drei Schritten zum Erfolg

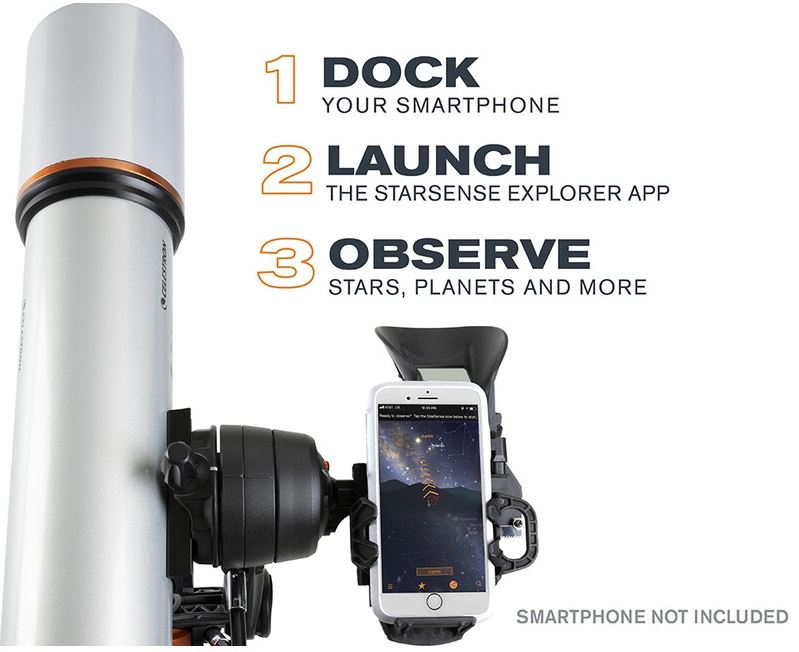
Insert your smartphone, launch the app and you’re ready to start observing.

The StarSense Explorer app will suggest rewarding objects to observe that night at your location. You can also use the planetarium view to pan to interesting objects and identify them.

StarSense Explorer telescopes are supplied with an altazimuth mount so you can move the telescope simply about the altitude and azimuth axes. Two shafts with large grips allow fine adjustment and tracking. The telescopes are not equipped with a motor, but belong to the class of PushTo telescopes.

By the way, of course you can also use your StarSense Explorer telescope without a smartphone, for example, for a quick view of the Moon, which you should be able to find without an electronic helper.

Free mouth and nose masks from your 3D printer: How to make your own mask

June 5 2020, Marcus Schenk

It is part of everyday life. We all have to wear a face mask in public from now on. We, therefore, have an unconventional craft tip for everyone with a 3D printer.

With our free downloadable 3D file and a simple tissue, you can quickly make your own makeshift mask.

Once printed you can make up a mask in only a few minutes.

Die selbstgebastelte Mund- und Nasenmaske


So how does this work exactly?

Normally our production department develops new products and telescopes for our Omegon brand but, due to the Coronavirus outbreak, we are having a rethink. So our developers have designed a holder, using which you can create a sturdy mouth and nose cover using kitchen roll.

But how? You attach two of the four frame sections created in the 3D printer to the outer edges of the sheet of kitchen roll. Even a sharp tug will not tear the paper, it will remain sturdy. You can then attach a rubber band to the sections of frame and, voila, you have a mask!

And this is how it works:

  1. Download the files Holders.stl and Top.stl and save them to a card which is suitable for your 3D printer.

Download Holder

Download Top

  1. Place 1x Holders.stl and 2x Top.stl into the work area and start the 3D print.
  2. Around 3 hours later you will have the following components:
Holder für die Mund- und Nasenmaske aus dem 3D-Drucker

One of two upper sections, each of which clicks into a lower section with the inlaid paper.


Step-by-step guide to making your mask:

  1. Lay out one disposable tissue and two sheets of kitchen roll. Ensure that you use a good quality tissue – it should be thick and dense enough not to become saturated. Lay one sheet of kitchen roll in front of you and place the other on top of it at a 90 degree angle. Finally place the unfolded tissue on top.

  1. Cut both sheets of kitchen roll to the same size as the tissue.

  2. Using the tissue’s folds as an aid, create three mountain folds in order to achieve the classic mask design. Pinch the creases together at the sides (as shown in the image) and place the crease towards the top edge. Do the same with the other folds.

  1. The folds should resemble those in the following image:

  1. Now take a standard hole punch and punch holes in the right and left-hand sides.

  1. Find a rubber band and cut it into 20 centimetre sections. The holders have a small hole at one end and a tapered slit at the other end to hold the rubber band. Tie the rubber band at one end, feed the other end through the small hole and pull the band through until it stops at the knot. Feed the untied end into the slit and wedge it in. Do the same with the other rubber band.

  2. Place the mask with the pre-punched holes into the designated holder lugs and attach the mask to the upper sections. Press down firmly, pressing the spikes into the sheets as you do so.

  1. Your mask is now ready and you can try it on as shown in the top image.

Bear in mind that this is only a makeshift mask and you should replace the tissues after use. However, the plastic units which you produced in the 3D printer are reusable.

Note: These masks reduce the risk of transmission due to airborne infection in the environment. This is not a medical product as defined by the Medicinal Devices Act and does not constitute personal protective equipment (PPE).

Enjoy printing and making.