7,500+ items available from stock
Best price guarantee
Your partner for astronomy

Posts Tagged 'touptek'

Mars Opposition 2018: How to Observe Mars and its Details

June 29 2018, Marcus Schenk

On the 27th of July, 2018, the time will finally be upon us: our neighbor, Mars, will stand in opposition to the Sun.  Such an event happens every two years, but this time around is something much more special.  The last time Mars was so close to Earth, during opposition, was back in 2003.  This year, the red planet will come within 57 million kilometers, which is about the same distance as 15 years before.  Mars will appear to be about half of the size of Jupiter, something only rarely observable, but with numerous details.

For more info about the Opposition, how to observe, which details to look for and which accessories improve your chances of a rewarding observation, read on below:
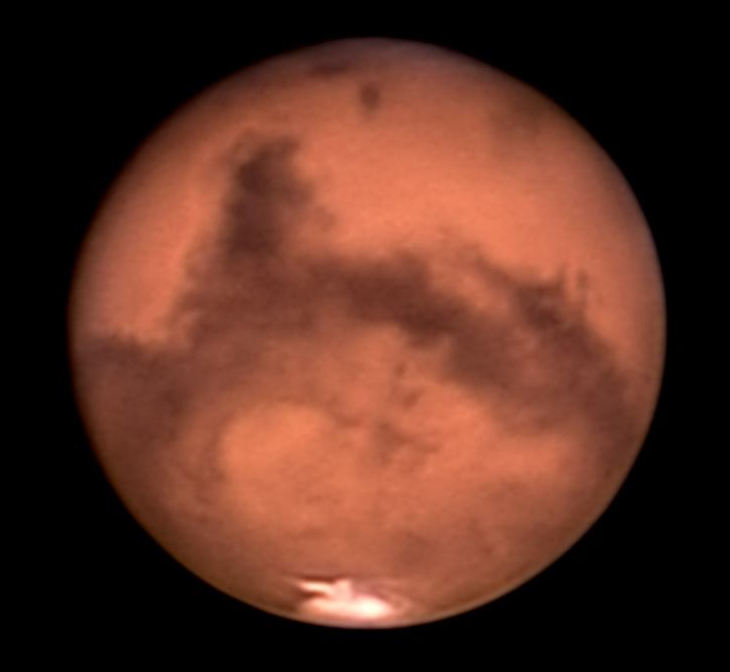
Photo: B.Gährken

Content:

  1. Mars: The facts about a fascinating planet
  2. The Mars Opposition: What is it?
  3. Why only every two years?
  4. Why will Mars be so large this year
  5. Which Telescope?
  6. You can see this on Mars
  7. Helpful accessories, to improve your observation

1. Mars: The facts about a fascinating planet

With a diameter of 6,000 km, 687 day orbit and a mountain at 27,000 meters – Mars is only half as large as the Earth, but resembles our home very much.  Much like Earth, Mars is home to a rocky surface with mountains, plateaus and canyons.  Valles Marineris is a massive 4,000 km long canyon, with a width of 700 km, and is considered the Grand Canyon of Mars.  Comparatively, our Grand Canyon is relatively small at only 450 km in length and with a 30 km width.

Mars features other similarities, with its polar ice caps and even seasons.  Standing on Mars, you would also see sunrises and sunsets.  You could even see Earth with a telescope.  The planet even features a similar tilt in its orbital path and a day lasts 24 hours and 40 minutes.

What a nice twin, right?  Many space pioneers think so.  And to top it all off, recently NASA revealed clues that the planet was able to support life.  There are, of course, a few disadvantages to lifing on Mars: the cold.  A thick jacket won’t be enough, given that the temperatures drop to -85°C.  Nevertheless, temperatures could reach about 20°C at the equator.

Even the oxygen levels and atmospheric pressure varies greatly: 95% carbon dioxide, 1.8% nitrogen und 0.1% oxygen.  On Earth: 78% nitrogen and 20% oxygen. In other words, breathing on Mars would be suffocating.  Take off your spacesuit and your blood would boil in short time, as if you were at 35 km in altitude above the Earth – 3 times higher than cruise altitude of a commercial jet.

2. The Mars Opposition: What is an opposition?

An opposition occurs, when Mars stands in a straight line with Earth and the Sun.

3. Why only every two years?

Mars orbits the Sun once every 687 days, so roughly 2 years.  We on Earth travel a much higher speed and only require 365 days to orbit.

Imagine that both planets start at the same spot.  The Earth would lap Mars at some point during its orbit.  Given that Mars is also orbiting, one trip around the Sun would not suffice, however.  Only after 780 days will the Earth and Mars be aligned once again.  An opposition!

4. Why will Mars appear to be so large this year?

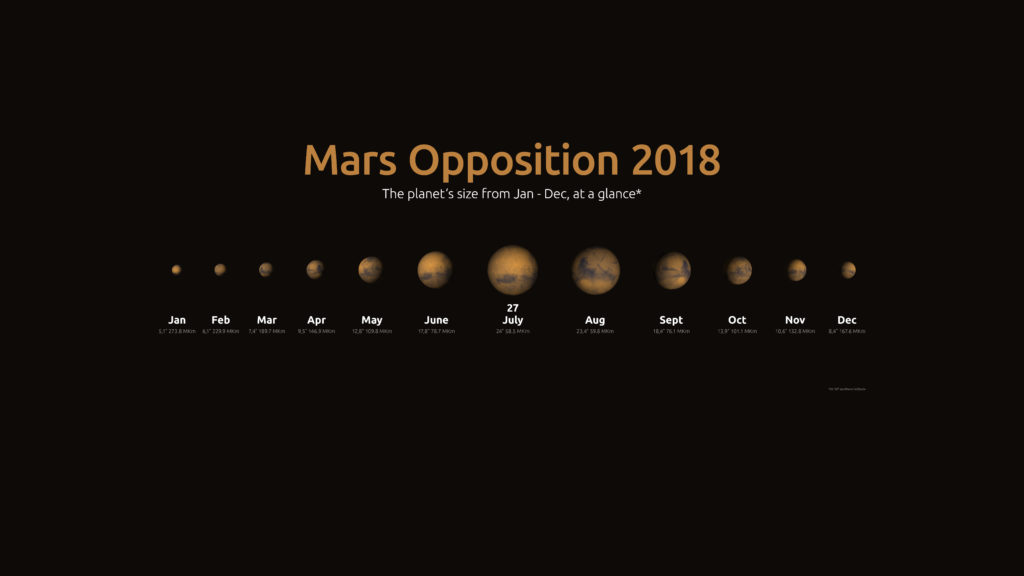
Mars is pretty conspicuous in the sky this year.  The red planet rises as dusk falls, and will shine bright in the night sky until dawn.  The disk will appear to be enormous!  It will increase to up to 24 arc seconds.  Through a telescope, Mars will appear especially large, meaning we will be able to identify many details on the surface.  It is a unique chance for observers and astro-photographers.  Mars only appeared slightly smaller during the Opposition of 2003.

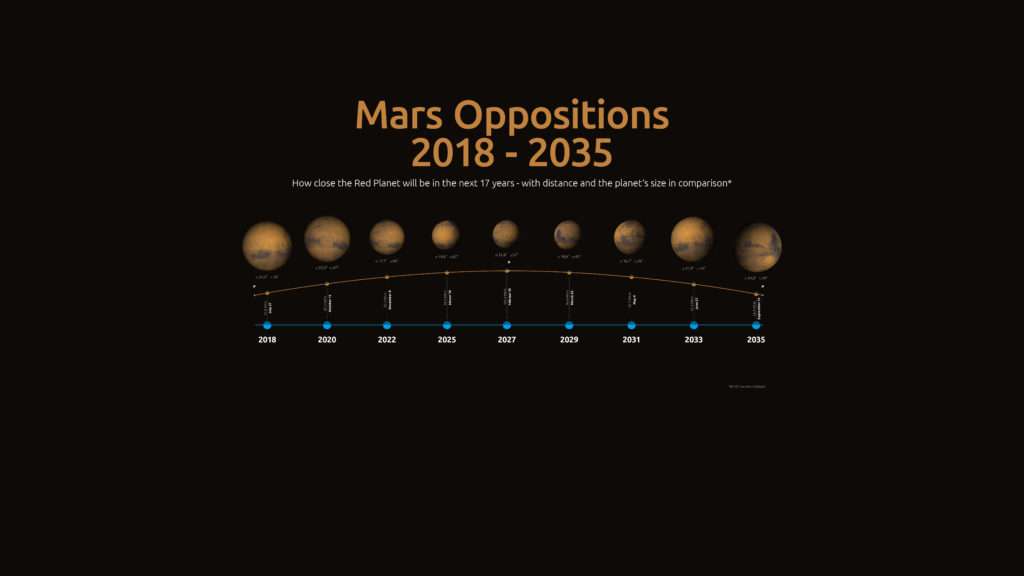
Mars does not have a circular orbit, rather an off-center orbit around the Sun.  That is why its distance to Earth can vary so greatly.  Depending on the position, oppositions can vary between 101 m and 55 m km.  This year: 57.7 m km.  In 2020, 62.2 m km and two years later 82 m km.  By year 2035, Mars will once again be about as close as this year.

For observers in the norther hemisphere, the close oppositions will take place below the celestial equator, since they occur in the Summer months.  The planet will not be found high above the horizon, but rather just above it: this year, just 15°.
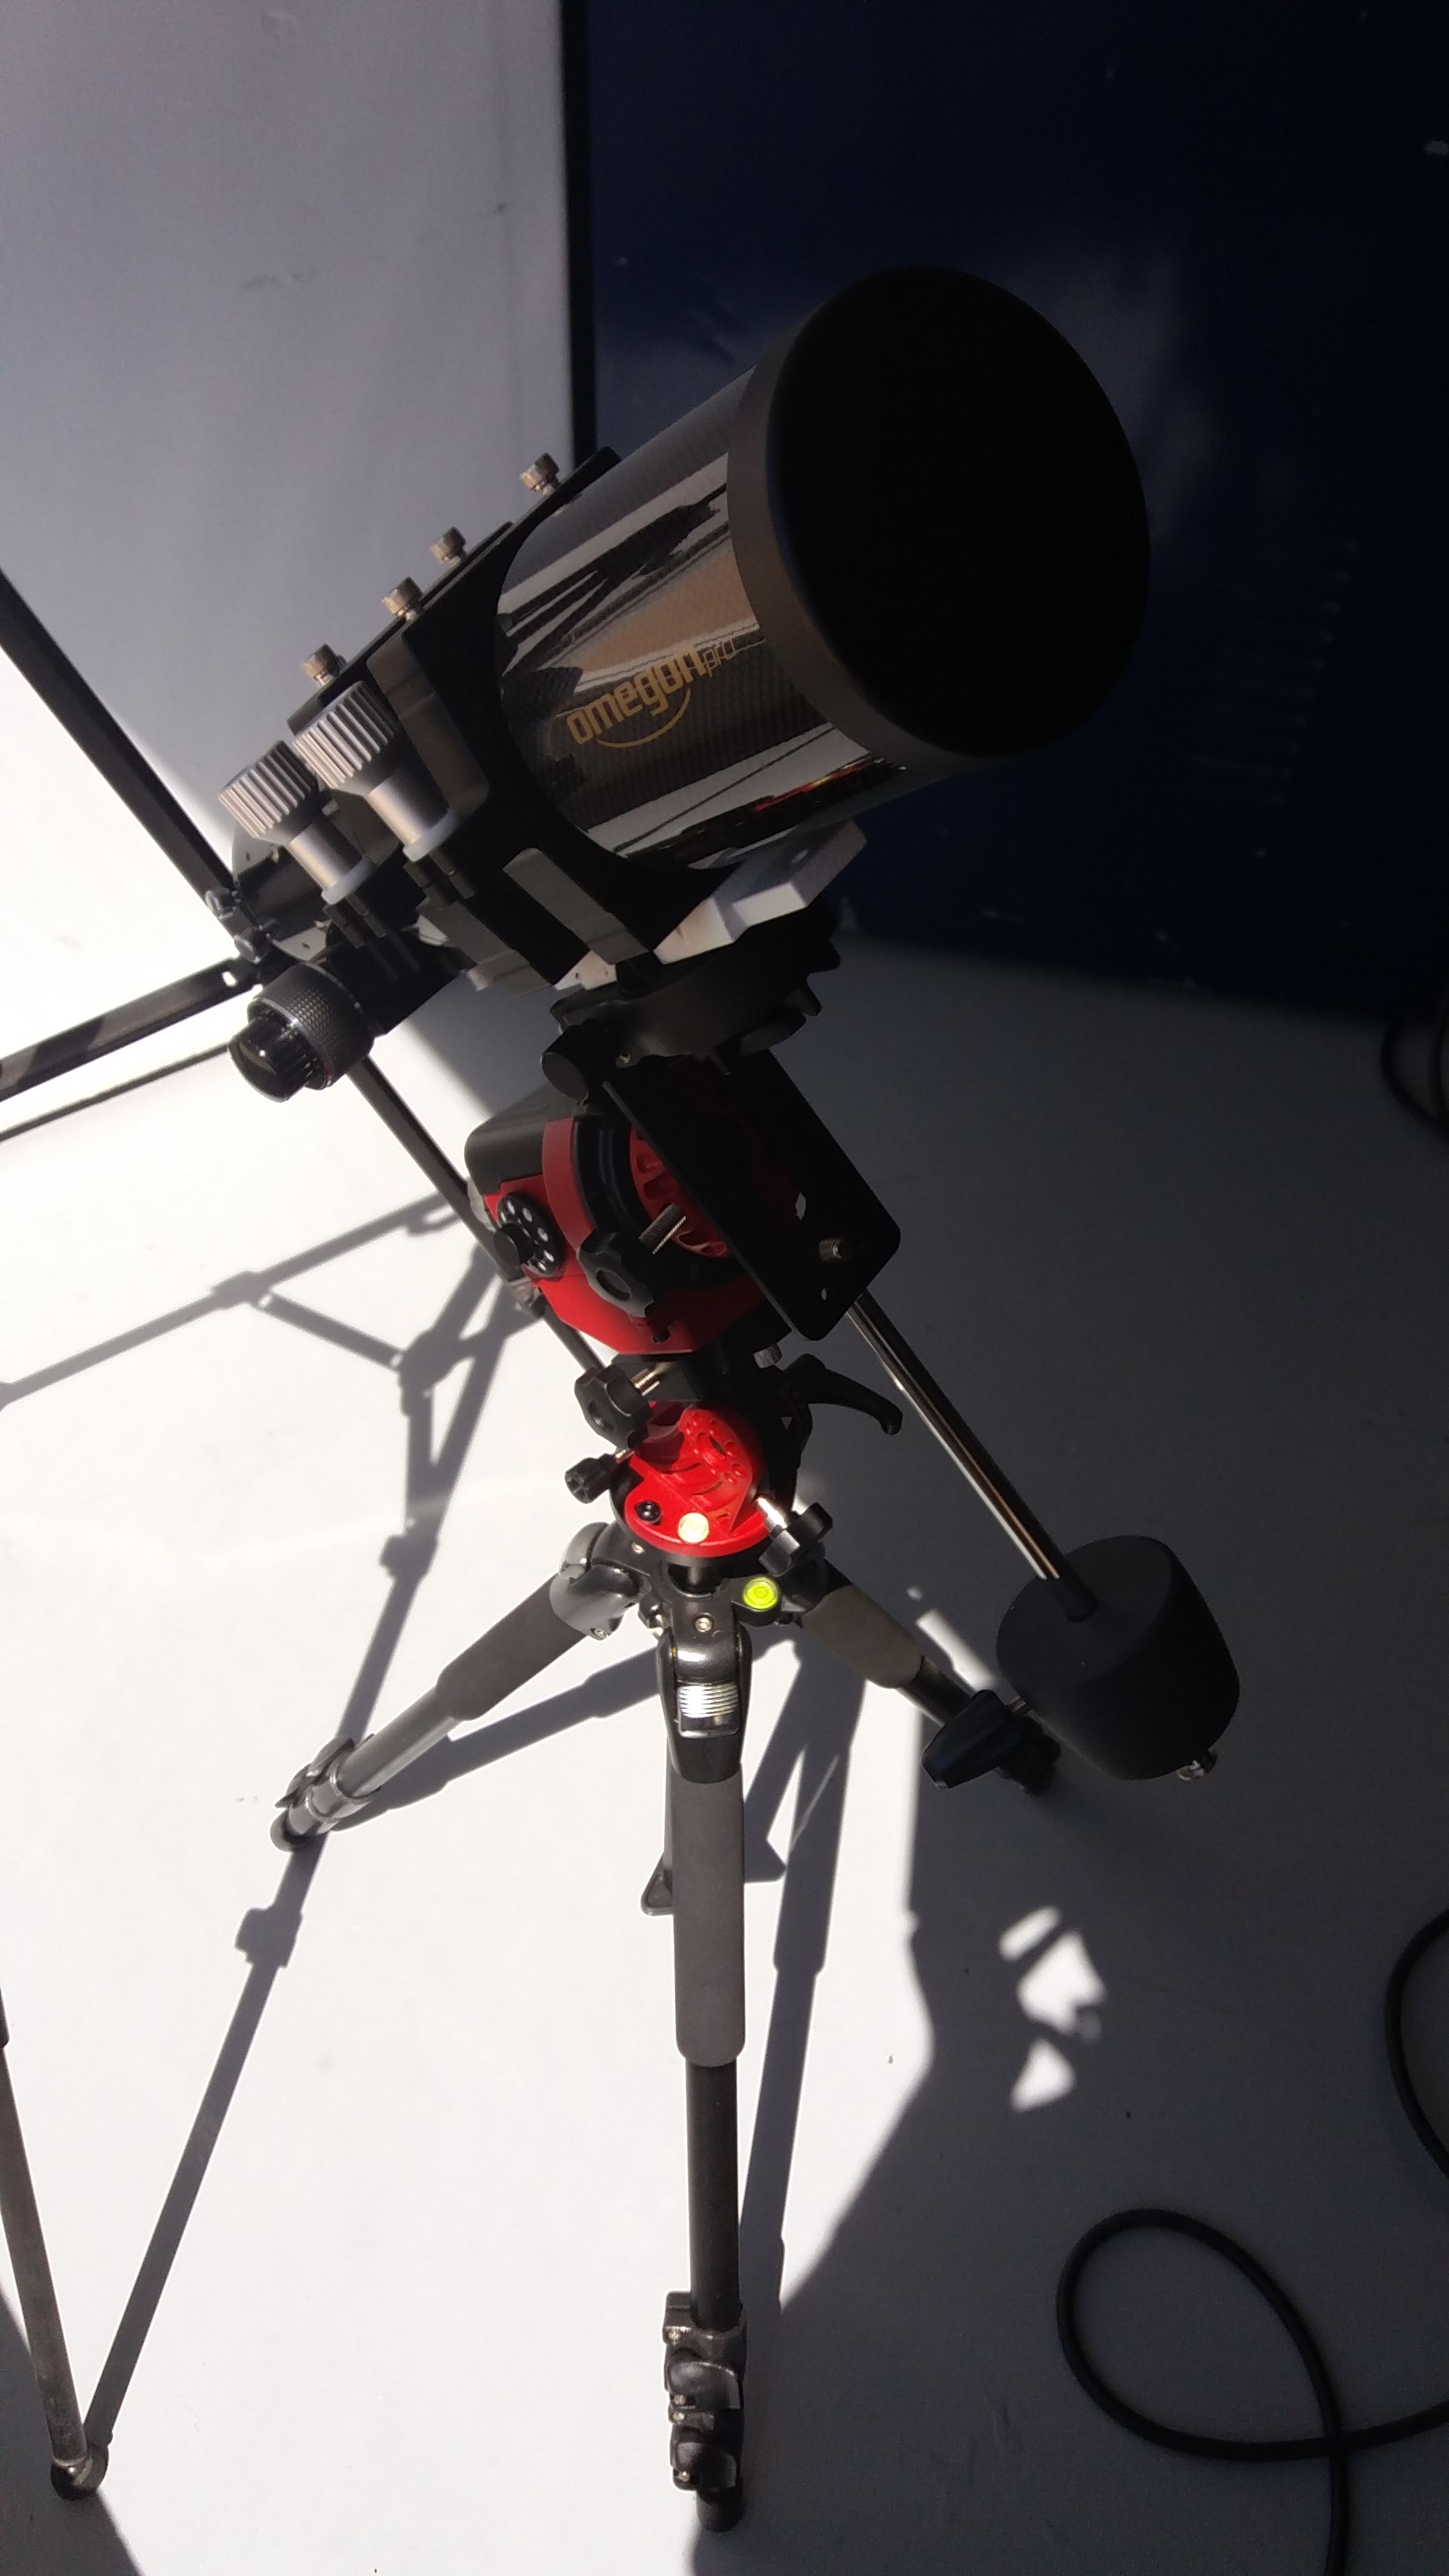
5. Which Telescope?

Mars is bright and an object, that you can see with the naked eye.  It will rise late in the eveing in the south west, climbing ever higher and reaching its meridian on 27th of July, 2018.  Shortly before sunrise, the red planet will once again disappear under the horizon.  You cannot miss Mars, since it will be the only bright object with a very bright and red color.

During the opposition, Mars will be quite large.  That is why you could use just about every telescope to have a look at the planet, even a telescope with a 70-80 mm aperture.  A good beginner’s scope for planets would be the Omegon AC 90/1000 EQ-2.  With an intermediate or large telescope from 150 – 200 mm, you will be able to enjoy a greater resolution, which is important if you want to be able to see the small details.  Keep an eye out that the telescope is well calibrated and adjusted for the temperature outside – important factors for a good, contrast-rich image.  Many observers cherish Dobson telescopes, since they are inexpensive, bright, and easy to work with.

Mars bei 250-facher Vergrößerung

Mars through a telescope

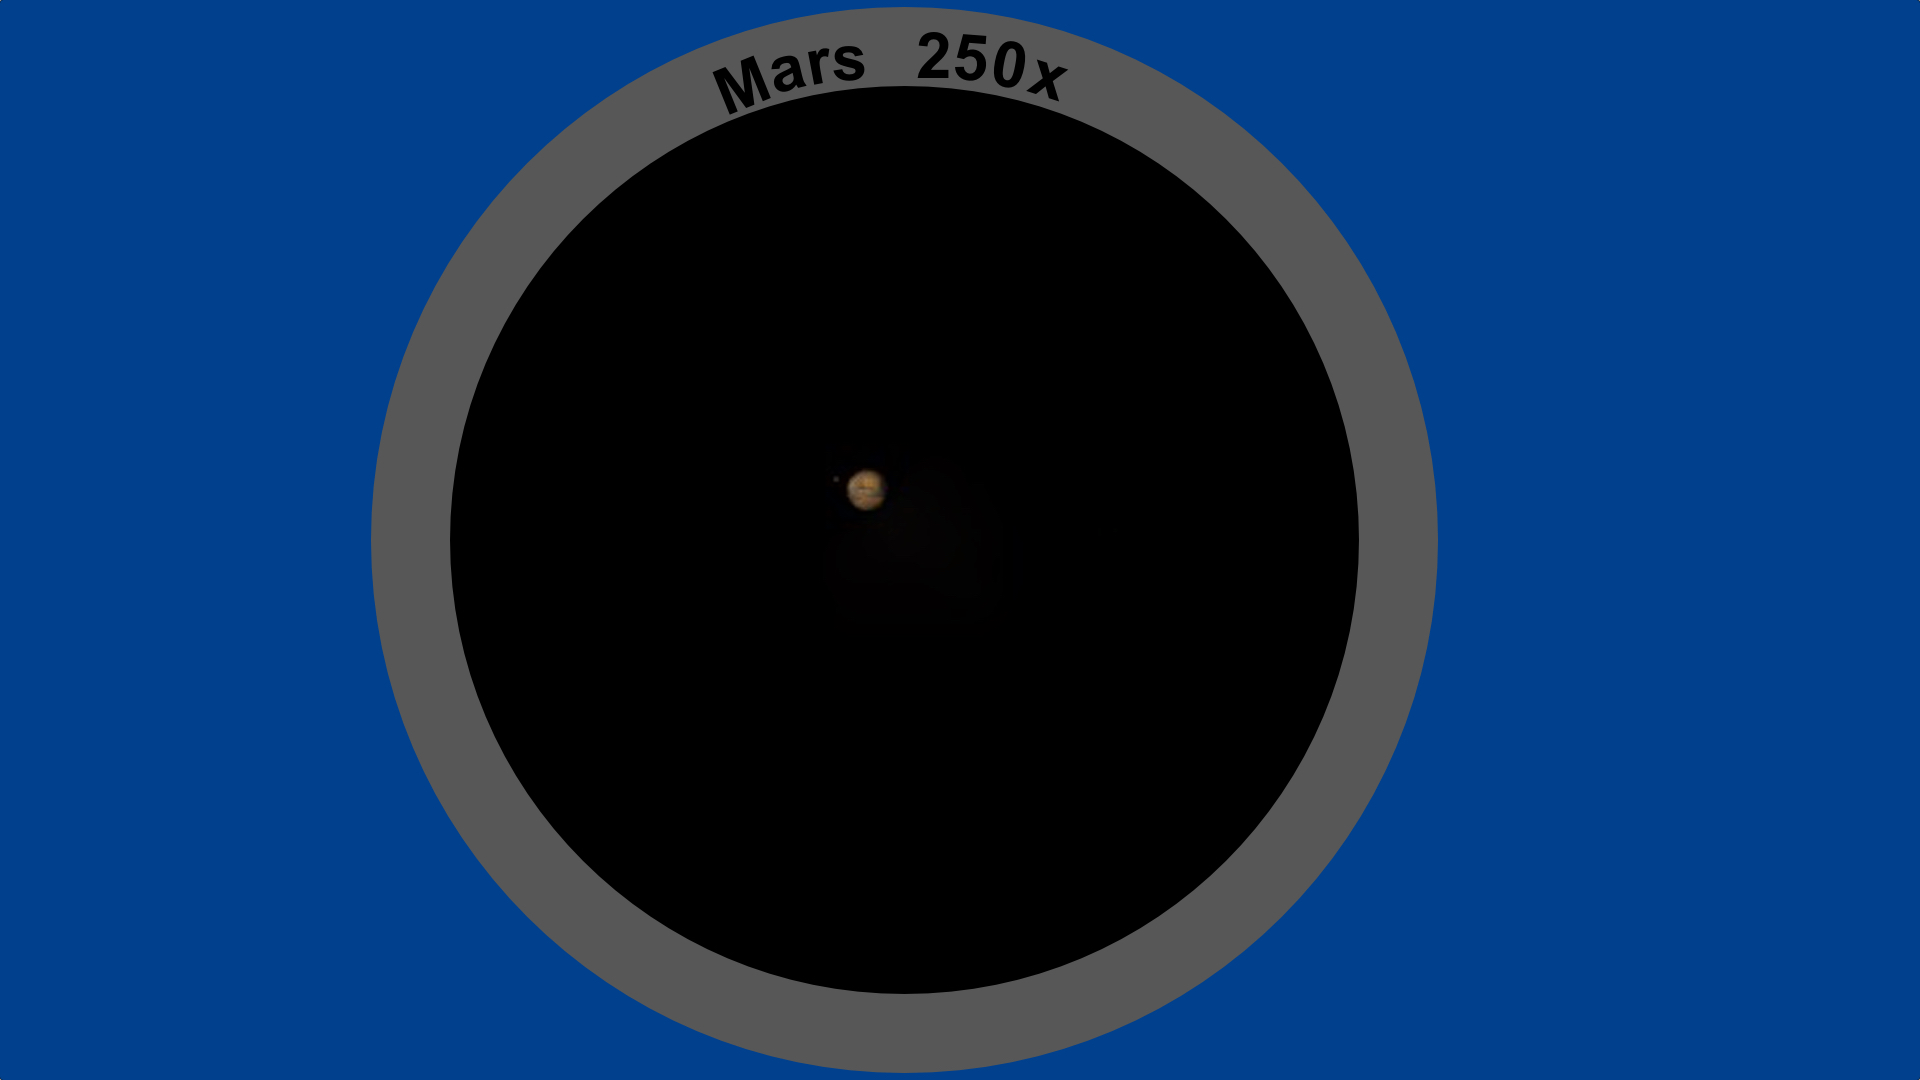
To view Mars, use a magnification of at least 100.  Reason is, the small the planet, the more difficult it will be to see detail.  Shorter focal lengths additionally afford you the greatest magnification.  Magnifications of 200 – 300x are sensible to use.  Hint: high-quality Televue Eyepieces on Sale are available here.

6. What to See on Mars

If you have a telescope of 100x, mars will appears only as red ball.  With patience, you should be able to identify the bright, white polar caps.

Marsdetails

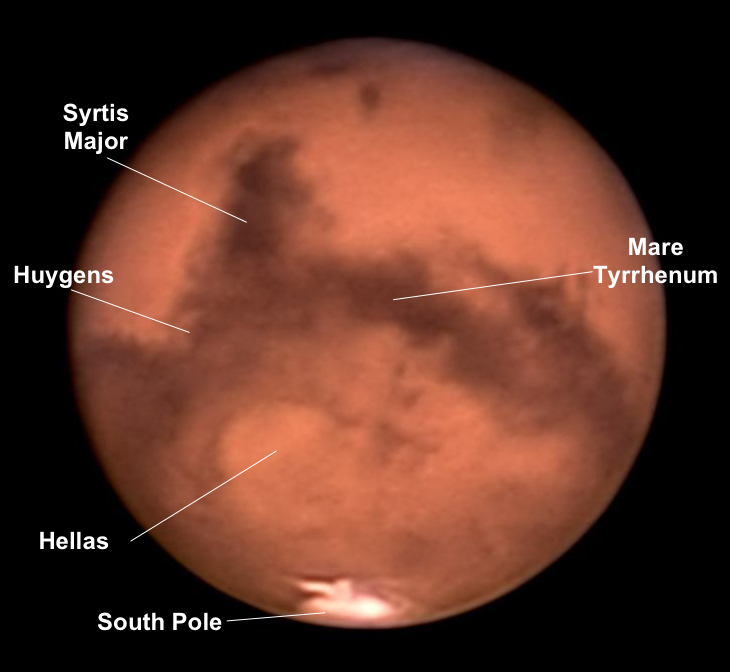
Mars with notations, Image: B. Gährken

The most noticeable dark area on the red planet is the Syrte, which is a large, dust-free, and high plateau with a width of 1,300 km.  The area lies close to the equator and should be noticeable with an intermediate telescope.  The Hellas Basin is a large, bright region, found south of Syrte and often home to storms.  Of course, we will only be able to see these two regions, if Mars happens to be sharing this side of itself.  Additionally, white clouds of meteorological phenomena can be seen with larger telescopes and color filters.

A foldable “Mars Map”  from Orion is helpful in preparing for observations and photography.

7. Helpful Accessories

The ADC Corrector: for more contrast on the horizon

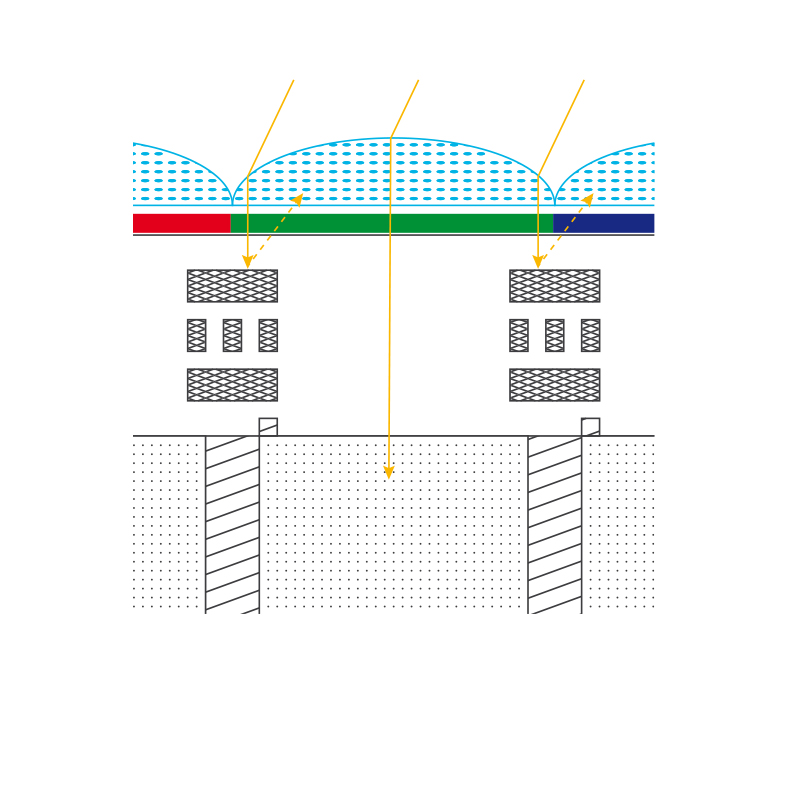
If we observe an object just above the horizon, the object could already set.  The light of the cosmos is often distorted, while passing through the atmostphere or bowed.  We see the same effect, for example, in a glass of water or a straw.  The water is an optically dense medium – just as a straw would in a different way.  Our atmosphere does the same.

ADC Korrektor

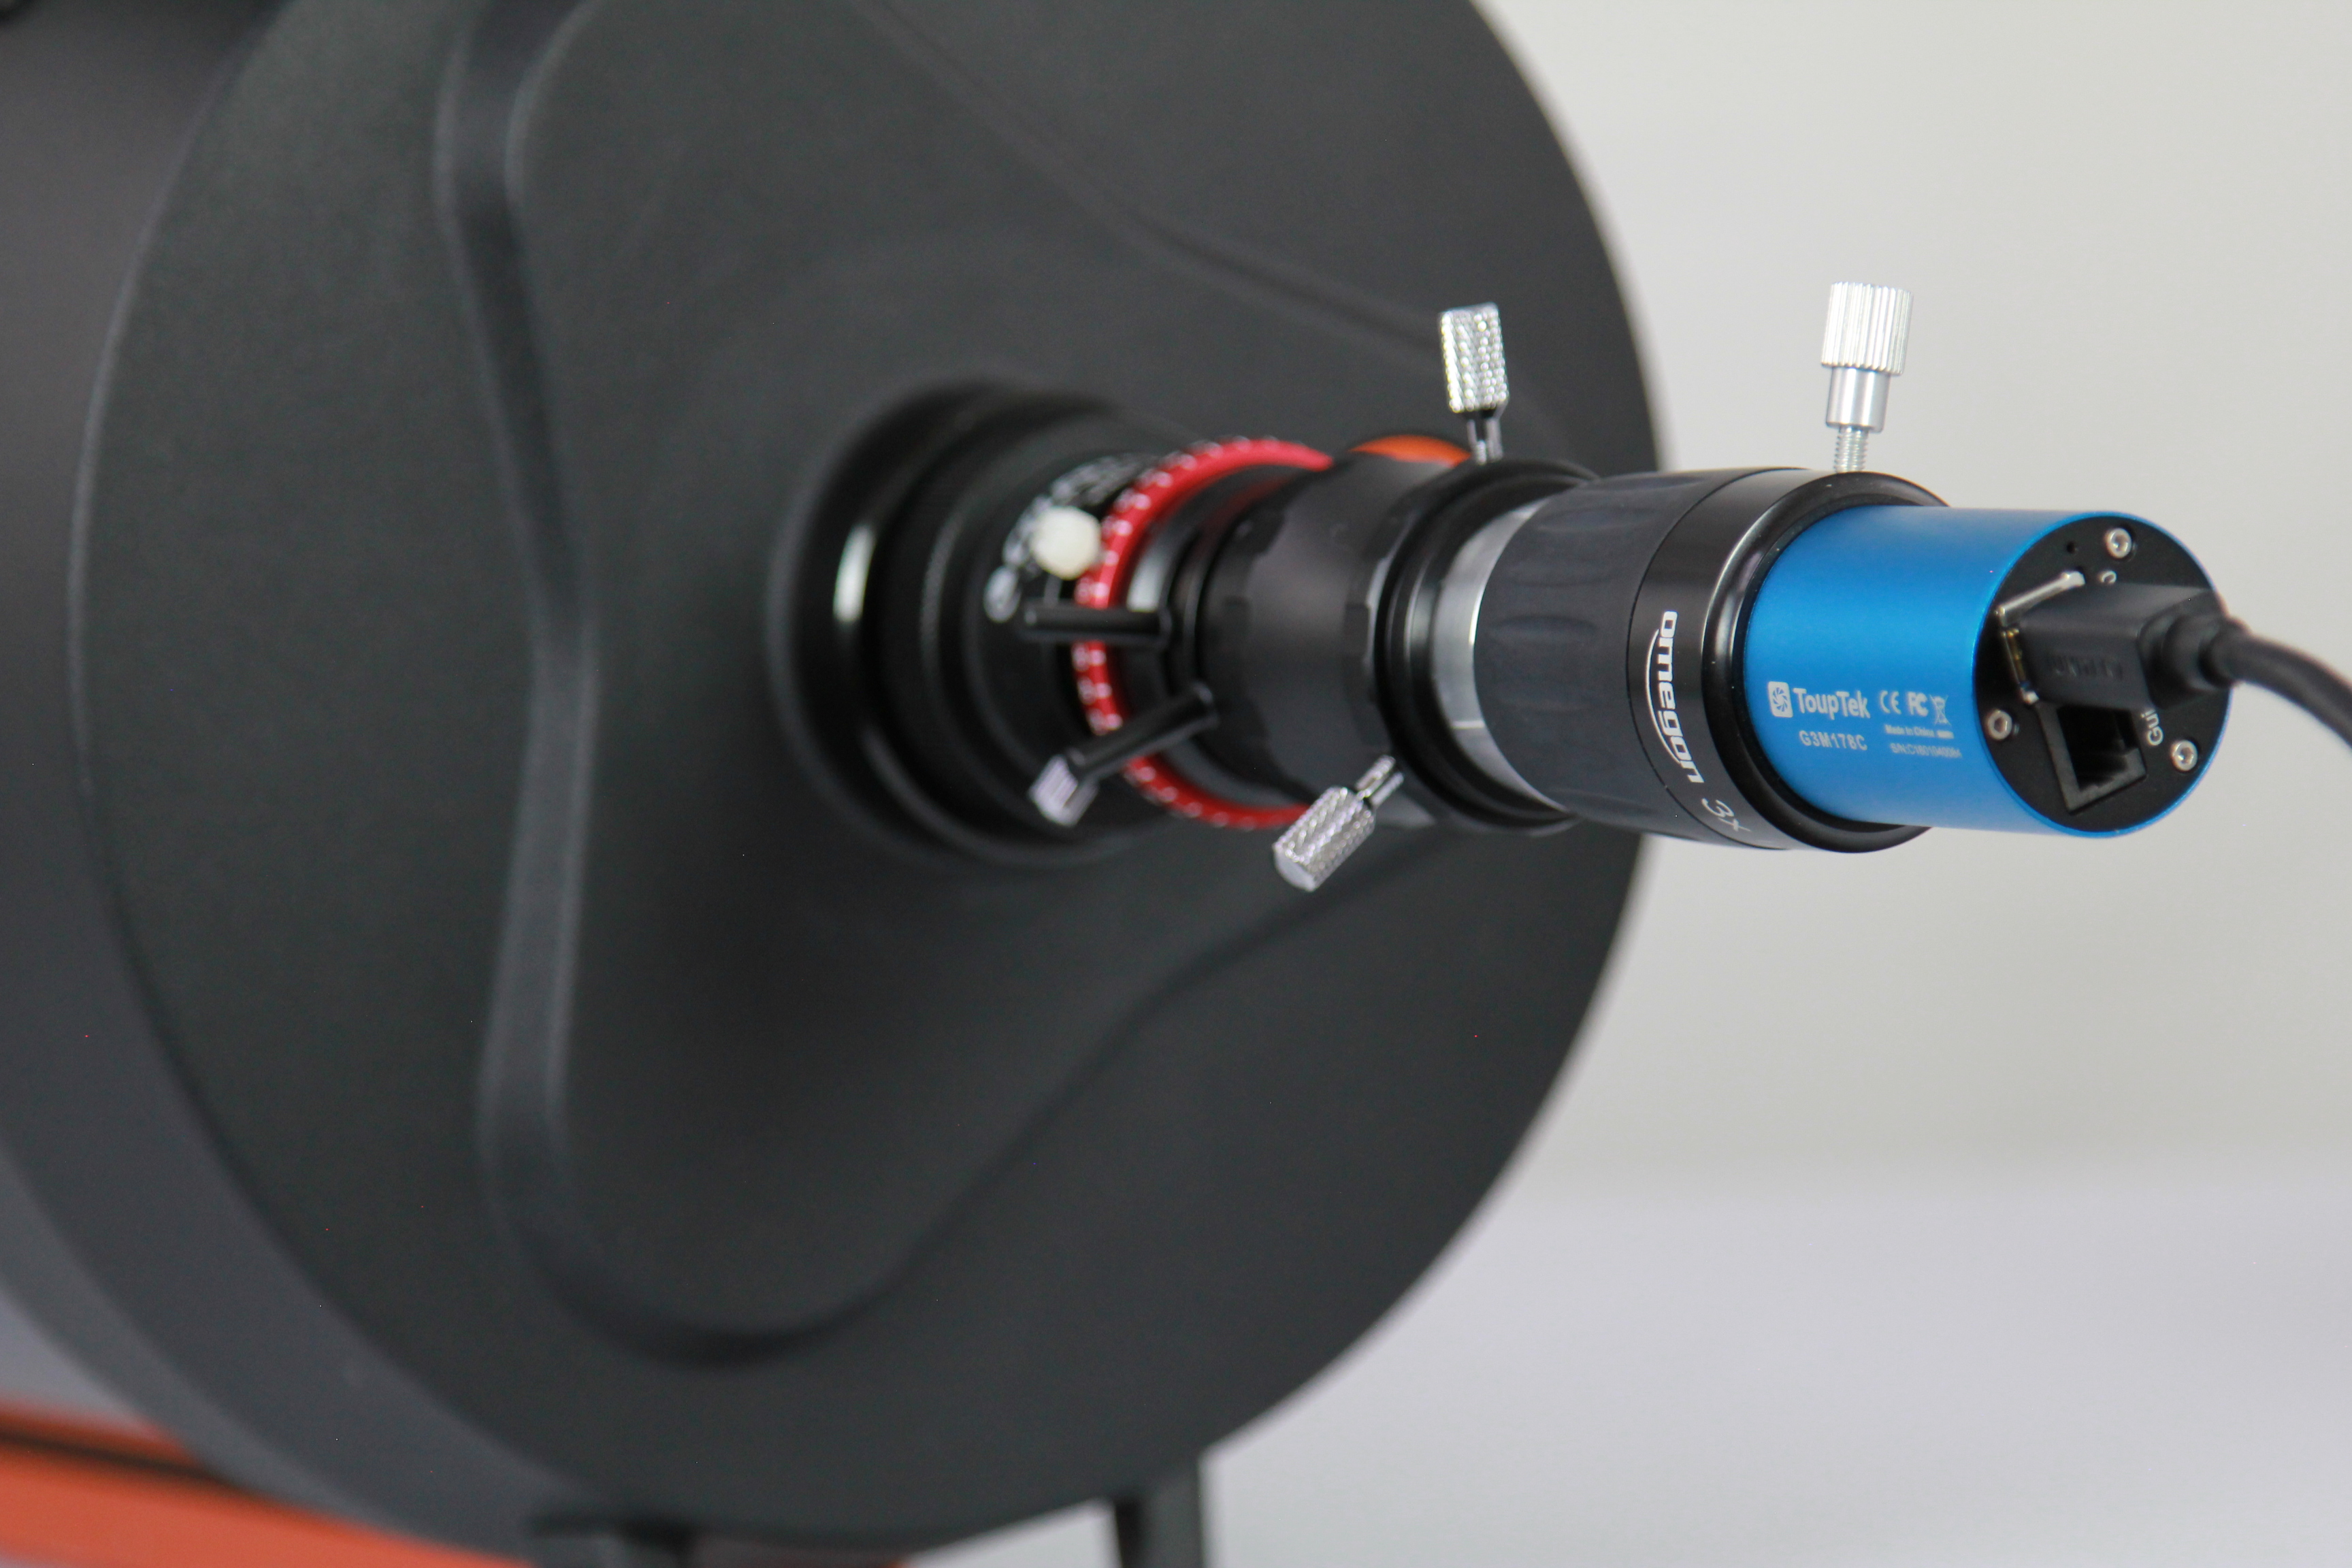
A Schmidt-Cassegrain Telescope with ADC and a Toupek camera

Is that a problem? Indeed, when we talk about an astronomical object.  Blue and red light is distorted in different ways.  Objects then exhibit a colored edge and appear to be contrast-less.  The images are just less sharp, than those higher in the sky.

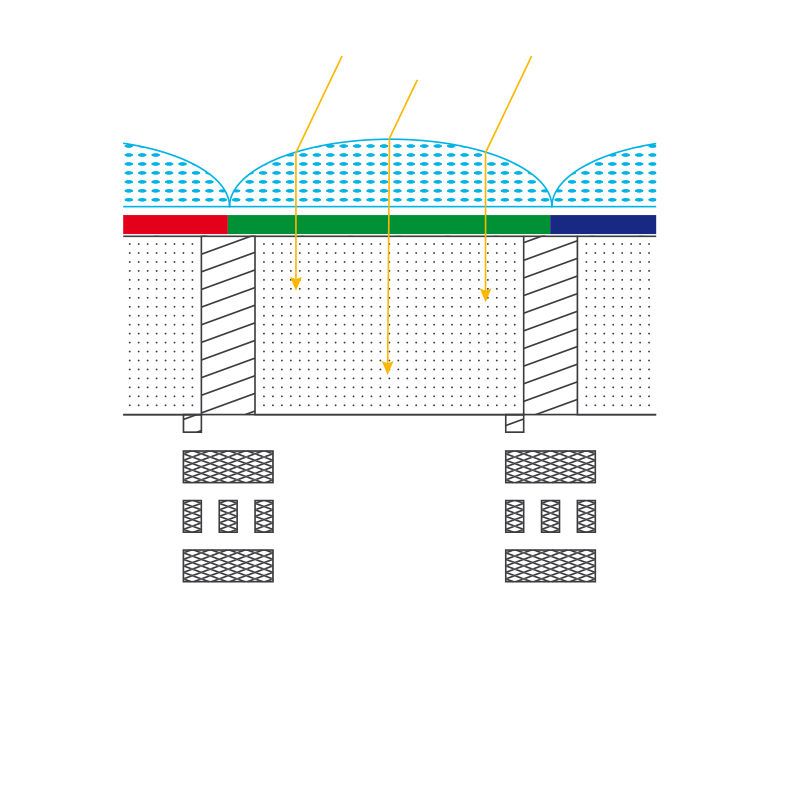
The ADC from Omegon produces – if you will – a negative color defect, which works against the atmosphere.  The planet Mars plays a role here.  Mars appears, to float just a bit higher.  When one of our colleagues tested the ADC the first time, he noted, “The effect was massive.  It appeared as if the telescope was suddenly replaced with another.”

Dispersion

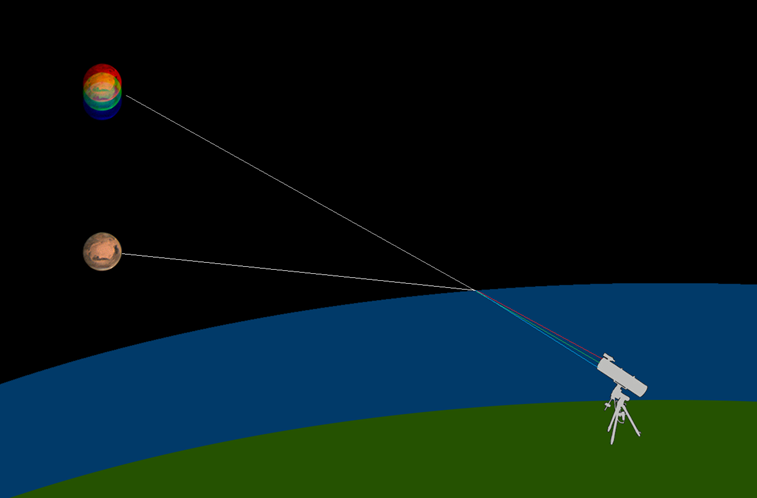
The atmosphere has an effect, like a simple lens and the colors of light are dispersed in various ways.  An object appears higher, as a result, than it really is, in addition to color fringes.  Image sources: NASA/JPL Solar System Simulator, Courtesy NASA/JPL-Caltech https://space.jpl.nasa.gov/.

In the next few years, many of the planets will be found quite close to the horizon.  But, the ADC is your best hope.  You can use it for visual observations, as well as for photography.  Putting it to use is also quite simple: just place it into the recess, where the eyepieces normally is attached.

The advantages of the ADC in a nutshell:

  • ADC corrects atmospheric dispersion
  • Color fringes are reduced or disappear
  • Sharpness and contrast increase, as if the planet were higher in the sky
  • Just put it in the eyepiece recess and adjust the prisms.

Color filters: to unlock Mars’ detailed surface

Color filters are very useful for planetary observations, since they increase contrasts and make many details visible, which you may not see otherwise.  The only requirement is that you should have some experience in observing, because seeing in astronomy is learned.

Color filters are available in sizes 1.25″ or 2″ and are simply screwed into the threads of the eyepiece.

But which details can you see on Mars?

Farbfilter für die Marsbeobachtung

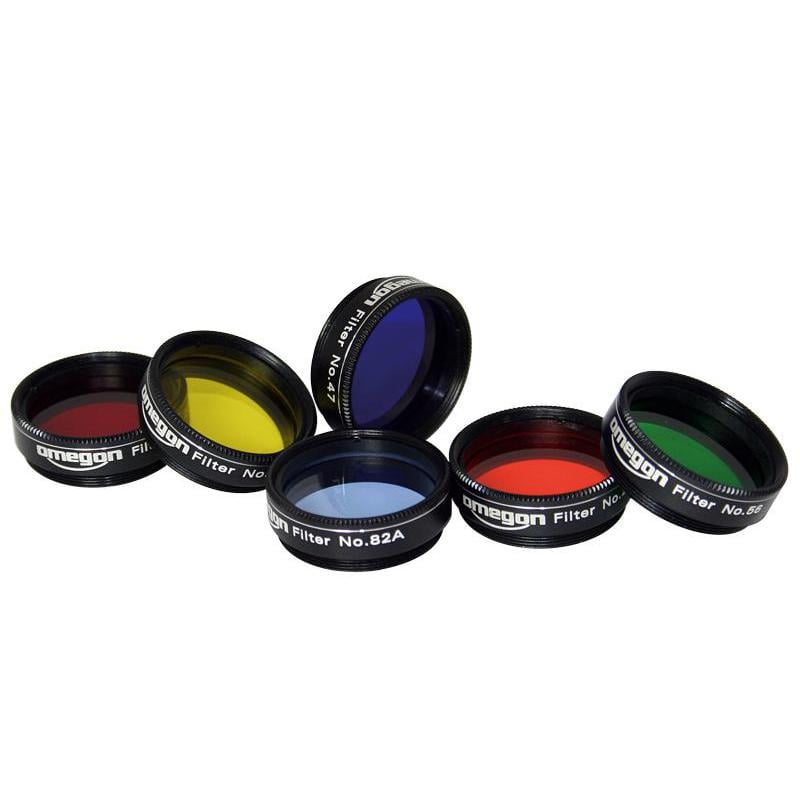
Color filters are screwed directlz into the thread of your eyepiece.

Green filter: with it, you can directly enhance the surface, clouds and freezing fog.

Blue filter: only used for freezing fog and clouds.

Yellow filter: Great for seeing the occasional several week-long dust storm on the surface, by brightening such areas.

Orange and Red filters: Orange filters enhance the bright/dark structures of the surface and are the standard filter for observing Mars. The red filter does the same, but only utilized in large telescopes.

Tip: There are also special Mars filters, which increases greatly the contrasts of the red planet.

Filter wheel: For the quick switch

When you want to use several different filters, we recommend the filter wheel, for a quick switch between filter types.

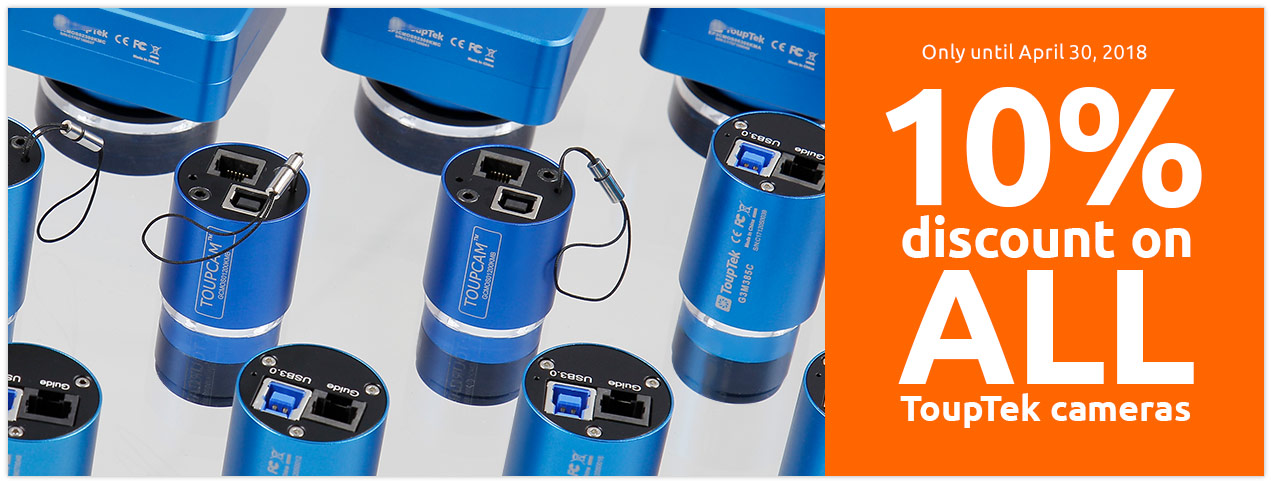
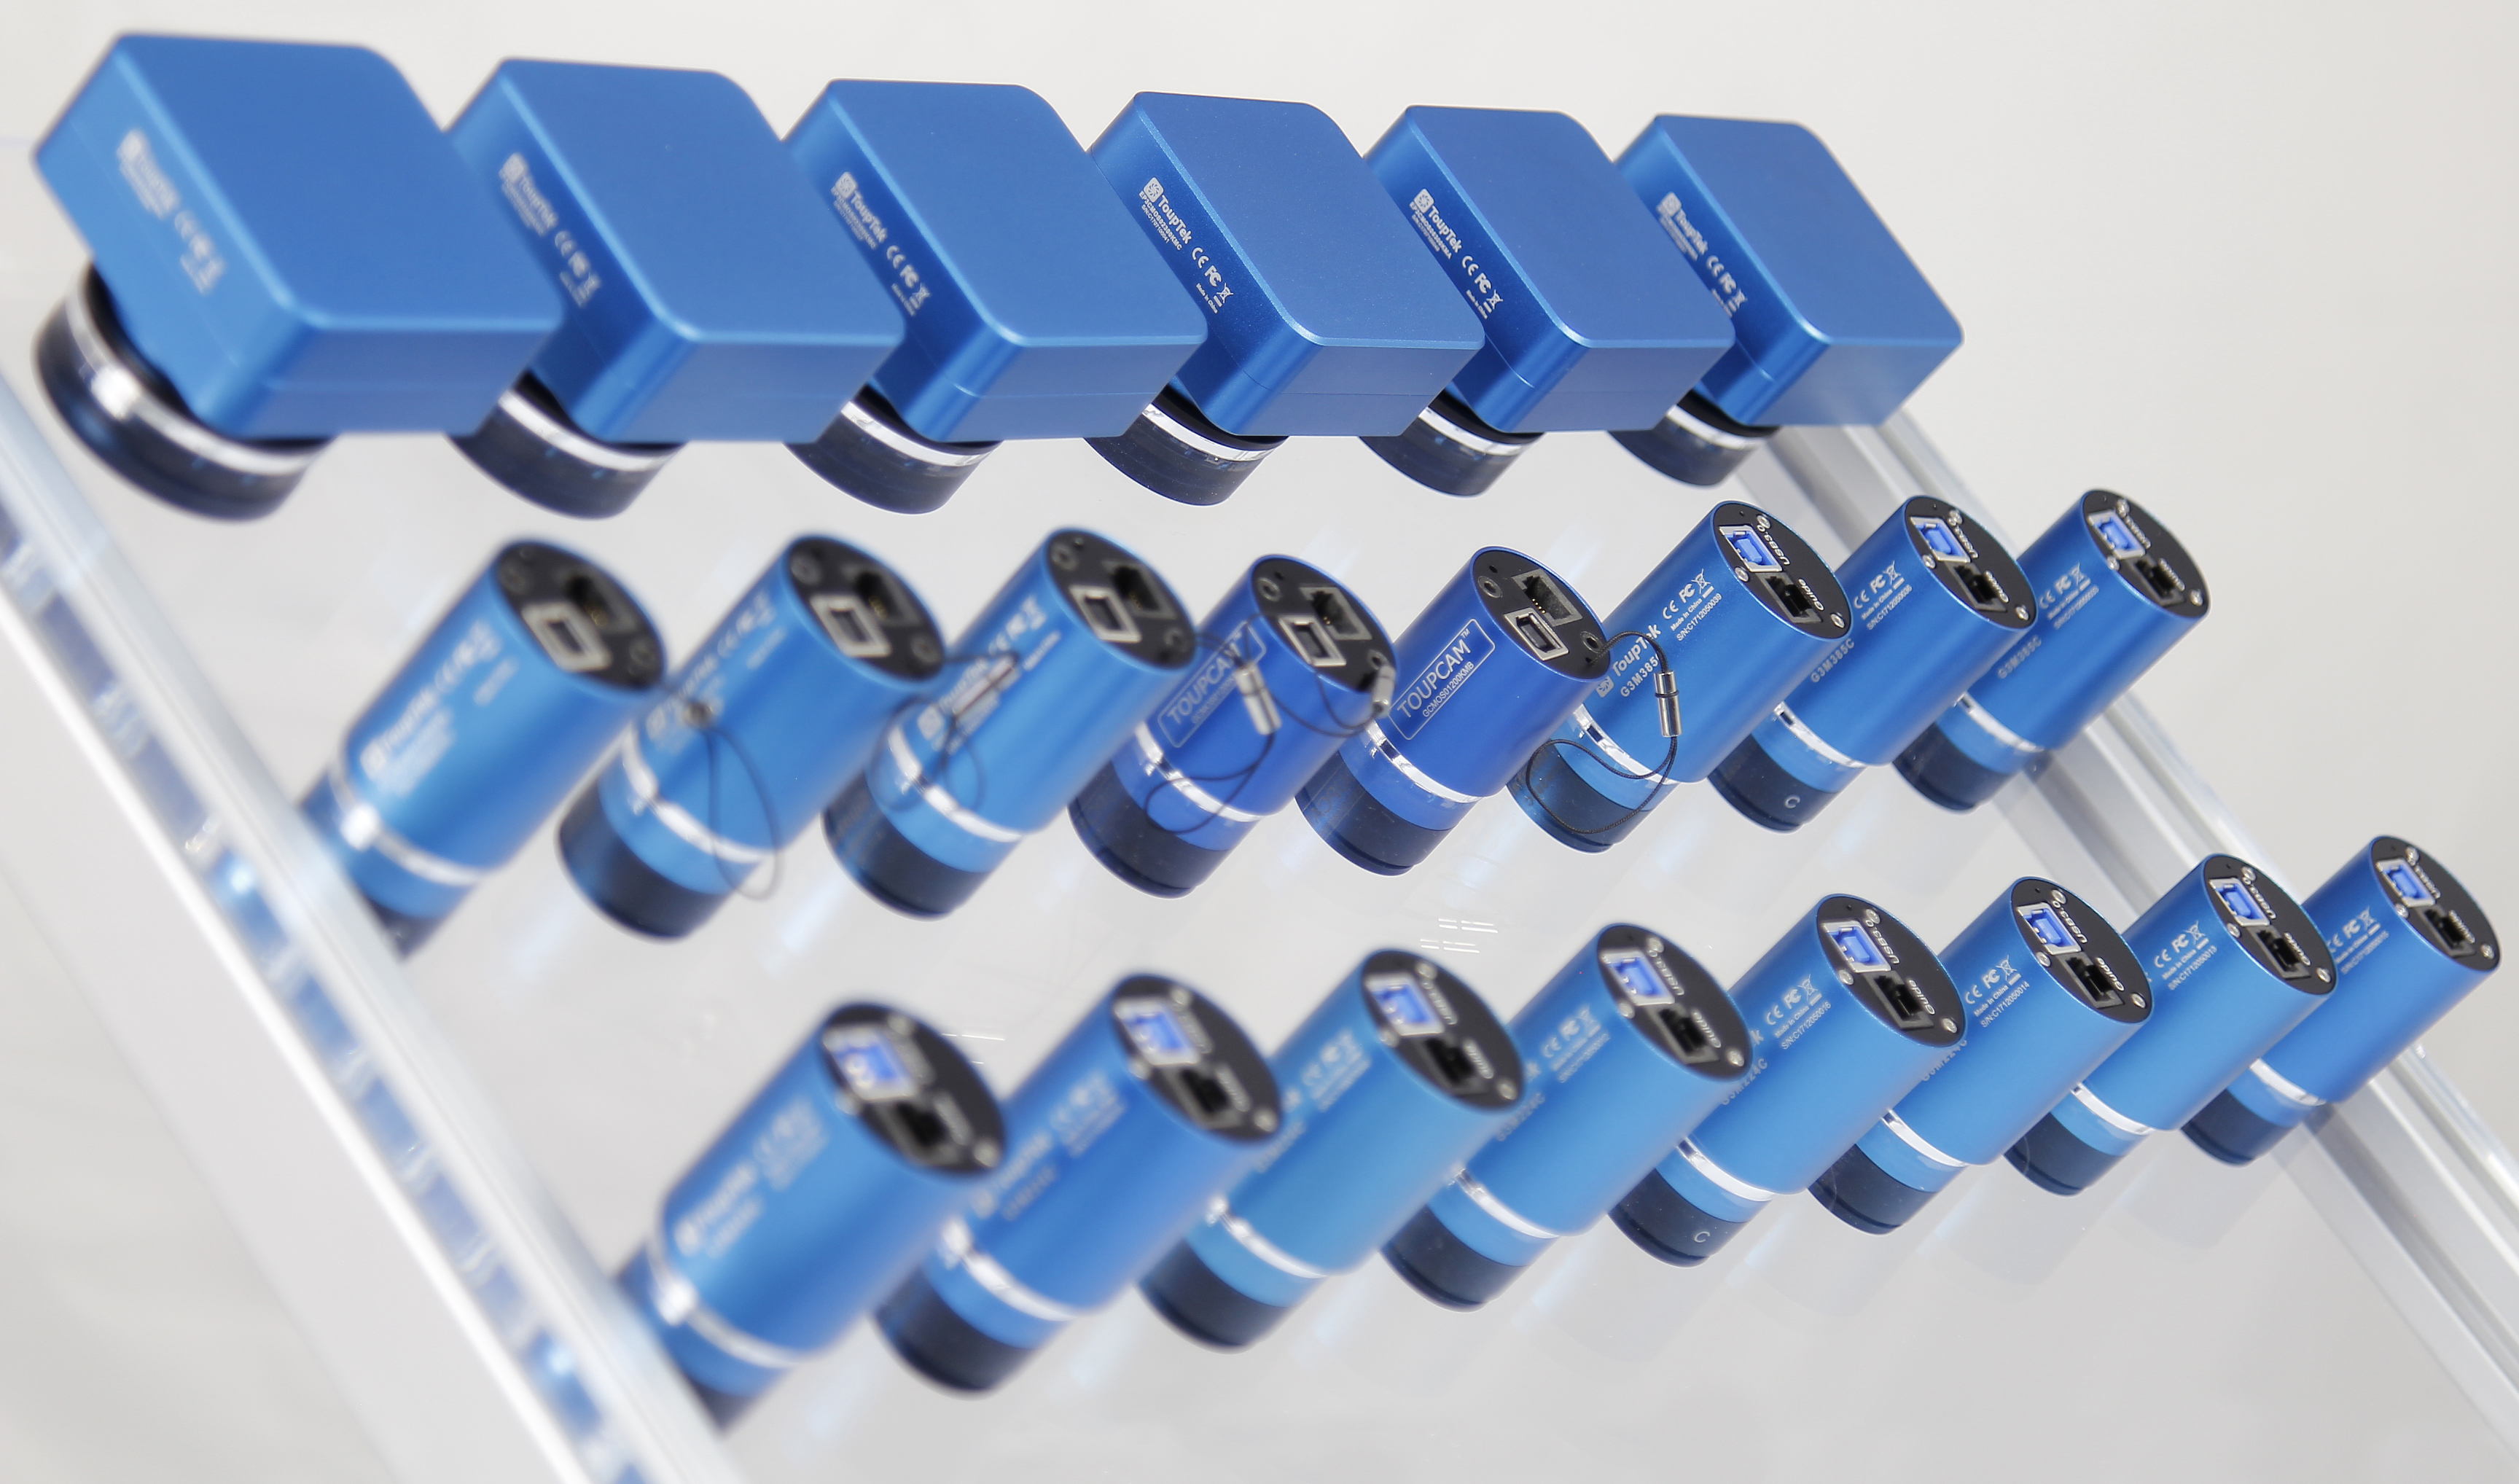
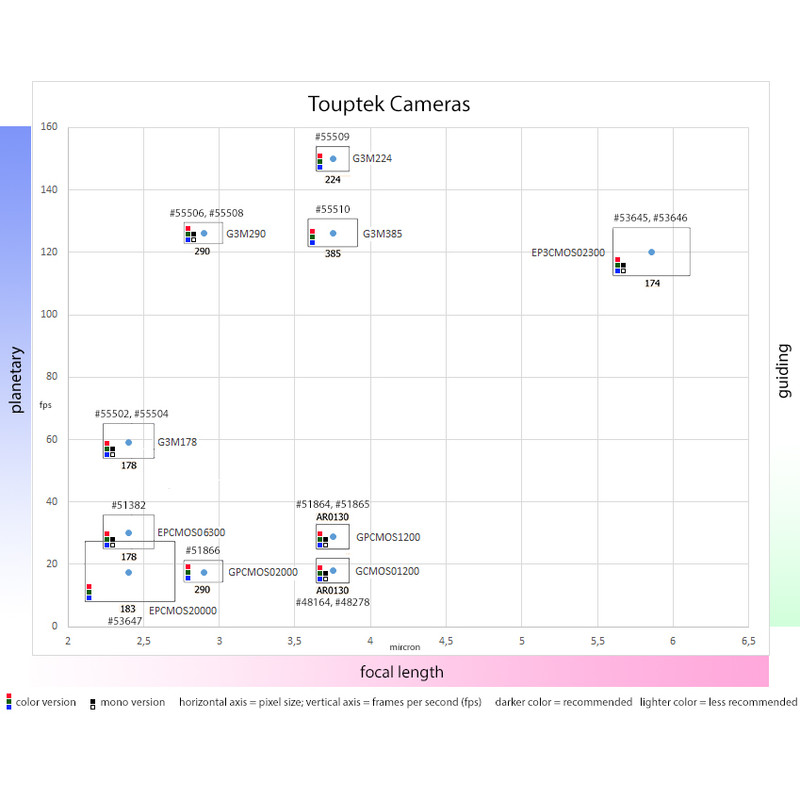
Camera: Capture Mars

Do you want to photograph Mars? Then get your hands on a Touptek Camera G3M178C, which offers a high sensitivity and a resolution of 6.4 megapixels.  Plus, it is extremely fast.  With 59 images per second, you can put the shortest moments to use, resulting in sharp images of the red planet.

Aufbau für Planetenfotografie

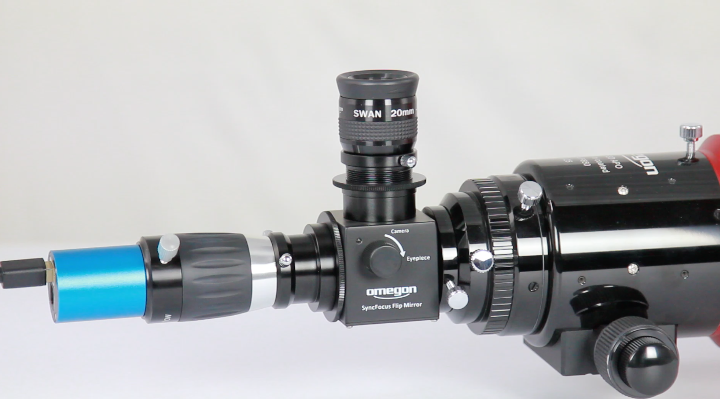
The assembly of a successful Mars photography session: a Touptek camera, a barlow lens with a flip mirror and an eyepiece.

Flip Mirror

A great aid for planetary photography, making centering the planet in the dark hours no contest.  With a flip mirror, you can switch between an eyepiece and camera in mere seconds.

Get out and observe!

Don’t wait until the year 2035! This Summer is a great opportunity to marvel at Mars in all its glory.  In contrast to the opposition in 2003, camera technology has come quite a long way.  Instruments like the ADC additionally enable you to view objects on the horizon.  Get your telescope read and have a look at our nearest neighbor this Summer!

Product tip: Want to show your enthusiasm? Then get your hands on the Mars T-shirt!  The backside features all the info of the opposition: distance, size, and brightness.  Order now!

Mars T-shirt

Mars T-shirt

Until End of April: 10% Discount on all ToupTek Cameras

April 1 2018, Marcus Schenk

Beautiful astro-photos taken by you. Would that not be wonderful? The modern Planet Cameras from ToupTek give you the best chance, to eternalize your passion for Astronomy in the form of a photo.


Huge Spring Sale: 10% discount now on all ToupTek Cameras. Only until the 30th of April.

Take advantage of this opportunity, because the fantastic Opposition of Mars is coming up!


ToupTek offers an all-in-one solution: Each camera comes with the applicable software, making capturing the planetary photos that you have always wanted child’s play – crisp and detailed! New developments in sensors and electrons make a significant difference!


Futher Highlights:

  • Highly modern and extremely sensitive CMOS Sensors
  • Cameras for planets, guiding and Deep-Sky Objects
  • Choose between 2.1 and 6.5 megapixel resolution
  • Monochrome and color cameras available


Mars with ToupTek Astronomy camera

Mars as capture by Bernd Gährken. Get ready for the Opposition of Mars 2018 now!

Get your hands now on a ToupTek Camera of your choice for a great price!

Did you know? With help of two info-graphics, you will be able to quickly find the best camera for you.
Touptek: Which camera is for me? Find out here – all at a glance.

The new Sony Exmor R sensor: What does it mean for astrophotographers?

March 26 2018, Marcus Schenk

“Where there’s a lot of light, there’s a lot of shadow”.

These words come from no less than Johann Wolfgang von Goethe. When he wrote these lines, nobody had even conceived of digital cameras. And the famous poet expressed this in a totally different context.

And yet: This sentence is so well suited to astronomy camera sensors that we simply had to use it.

But how does it all fit together? And why does this quote no longer apply to cameras with new Exmor R sensors? We’ll come back to that.

100% more sensitive cameras by ToupTek

This is news that many friends of astronomy will be pleased with: The latest ToupTek cameras are up to 100% more sensitive (source: Sony) than older, conventional CMOS cameras. For recently, great things have been achieved in sensor technology. To put it briefly: Thanks to the new Exmor R sensor, it’s now possible to put even more object information on the chip with short exposure times.

The cameras by ToupTek have already been fitted with these latest, brand-new sensors: Here’s the link to the cameras.

Until a few years ago, people still preferred CCD sensors. This was because they created less noise, were sensitive and you could recognise more details. But CMOS sensors have been improved. Fast data transport and super-fast digitalisation round out the achievements. Noise was markedly reduced, making this technology interesting for astronomy.

These CMOS sensors are also referred to as front-illuminated sensors. And this is where Goethe’s quote: “Where there’s a lot of light, there’s a lot of shadow” becomes interesting. Because it’s got something to do with the architecture or the construction of the chip.

Der Front-Illuminated Sensor: Lichtstrahlen treffen auf den Sensor, werden aber zum Teil abgelenkt.“Classic” CMOS sensors

Front-illuminated sensors contais quite a few elements that the photons must go through before they reach their target land on the pixel.

First, there are the microlenses, then the colour filters and then finally the electronics. The latter were placed on the chip from above. This means: at this spot, there are aluminium strips, wires and transistors. The photons must go through them, too. After all that, the light finally reaches the long-awaited pixel.

The electronics, however, unfortunately, acts like a shadow-caster. It’s a little like what we experience with telescopes with large secondary mirrors: some of the light is absorbed and diverted.

Some photons simply don’t have a chance. They are not let through or they are simply reflected by the metal wire. This consequence is unavoidable: Less light reaches the sensor.

Sony, however, thought about how current chips could be made more sensitive. And something amazing occurred to them and which is now being used in astronomy cameras: “Back-illuminated” CMOS sensors.


The new “back-illuminated” sensors by Sony

Sony has taken sensors apart and put them back together quite differently. Now, the photons pass through the microlenses and then the colour filters. So far, so good. But after that, they go straight to the pixels.

The electronics, wires and transistors are located behind. The photons now reach the photo cells without being diverted. The silicon substrate is illuminated from behind instead of from the front. Another advantage is STARVIS technology, a sub-group of the Exmor R sensors that possess even higher sensitivity. This technology realises its greatest benefit precisely where there is little light.

Thanks to numerous improvements, the Exmor R sensors are extremely fast , produce even less noise, and are twice as sensitive (source: Sony) and even have higher transmission in the infra-red.

This technology has been used in research for a long time already. But until now, the price of such cameras was astronomically high. Thanks to the fall in price, amateurs can now enjoy the benefits of these CMOS sensors.

What does this mean for your astronomy shots?

  • More light in a shorter time
  • Shorter exposure times – and therefore fewer problems with tracking
  • Galaxies and nebulae can now be photographed without cooled cameras
  • Extremely high frame rates – resulting in even sharper planet shots
  • Higher sensitivity in the close infra-red range – for images of Mars and Venus
  • Brighter celestial objects often possible as live video

Conclusion:

These new “back-illuminated” sensors by Sony offer new and exciting possibilities for astrophotographers. Thanks to the lower costs the prices are low. And the gain is beautiful astronomy photographs with little outlay. But the best of all is: The cameras by ToupTek are already fitted with this technology. Perhaps, we could now say: “Where there’s a lot of light, there remains a lot of light”. At least, as far as these new cameras are concerned.

P.S.:

If you want to use these cameras, too, then go here.

Touptek: Which camera is right for me? How to find out – at a glance.

February 23 2018, Marcus Schenk

Imagine the following situation: You’re looking for the right camera.

The amateur astronomer stares desperately at the hundreds of cameras on the screen. The technical data gives him a headache. Gradually he loses sight of the big picture. Which camera should he buy then? He does not want to search for ever; he just wants to take beautiful photos.

In this post, you will find two aids that will make it easier for you to quickly find the right ToupTek camera for your needs.


Das Touptek Kamera-Sortiment


1. A graphic that will give you an overview

The range of cameras is constantly increasing. How can you keep track of them?

Sensor size, pixel size and resolution are just a few of the key features. And you have to compare all the cameras with each other.

But the question is: Are they suitable for planets, deep sky or only for guidance?

Isn’t there an easier way to find out? Yes, we have wondered that, too; and have found the solution for ToupTek cameras. Here is the result: A graphic for a quick overview that also offers additional information. This saves you from having to constantly click all over the place. What can you see in this graphic?

Sensor size: At a glance, you can see the sensor size of ten different cameras. The frame sizes are matched accordingly.

Article numbers: Above every sensor, there is an article number in addition to the camera name. If you are interested in a camera, you can enter the number directly into the search function in the shop.

Coloured squares: Within the frame, you can see three small coloured boxes and/or a black and white box. It is actually self-explanatory: The boxes indicate whether the camera is available in a colour and/or in a monochrome version.

Number under the sensor: the sensor name is indicated, as IMX178 or AR0130, for example.

Pixel size (micron) and frames per second (fps): The cameras have been plotted on an X/Y graph. You will be able to see immediately whether a camera has small or large pixels, and whether the number of images recorded per second is very low or very high. Sensor size, pixel size and fps: These are all important pieces of information to help you decide which camera is right for your needs.

Planetary, focal length, guiding: Three coloured bars on the edge indicate for which purpose or telescope the camera is best suited. The more colourful the bar, the better suited for the respective area. These bars will tell you immediately which cameras are suitable for you.

Example: A high frame rate is suitable for planetary images, while a very large chip is not particularly well suited for just guiding. Chip size and pixel size will give you a clue about the appropriate focal length of the telescope.


2. How do I distinguish between different sensor sizes?

The sensor sizes of Touptek cameras range from 4.8 mm x 3.6 mm up to the large 20 MP sensor which measure 13 mm x 8.7 mm.

For planet images and guiding, smaller sensors are sufficient; for large moon shots or extended deep sky hosts, there should be more field.

A presentation of the various sizes is difficult, but it is important before making a purchase. That is why we have also created a graphic for you here and projected it on an image of the Galaxy NGC247.

The various frames with product numbers are marked clearly. Much better than an explanation could do, for example, you can see how much bigger the ToupTek EP3CMOS camera20000Kpa Deep Sky Color is than the ToupTek GPCMOS1200KMB Mono Guider.


With these two graphics, you’ll be on the safe side before you make your purchase and without many hours of searching. The best thing to do is take a look at the product pages of modern ToupTek cameras.

Photos taken of the sun in H-Alpha light with the filter QUARK and the new ToupTek camera.

October 13 2017, Stefan Taube

Our Spanish Colleague Carlos Malagon has a clear view of our day star almost every day. He sent us this image of the sun he had taken with the new camera EP3CMOS02300KMC from ToupTek:

H-Alpha-Sonne

The image shows the chromosphere of the sun: This is a part of the sun’s atmosphere above the photosphere, appearing in light with a wavelength of 656 nanometres. This wavelength is also referred to as H-Alpha. It represents a certain excitement condition of the hydrogen atoms in the sun’s atmosphere. At the edge of the sun you see a very nice protuberance.

Besides the camera from ToupTek Carlos Malagon used the H-Alpha filter QUARK from DayStar and the Omegon Pro Apo 80/500 on the mount SkyWatcher Star Adventurer.

This small mount is ideal for travelling. It carries a camera with small optics and tracks it parallel to the rotation of the sky. The Star Adventurer can be screwed on any photo tripod. For this purpose, Carlos Malagon used the Omegon aluminium tripod Titania 500. The photo below shows the complete equipment.

Carlos_Ausrüstung

By the way: Since the sun filter QUARK can simply be inserted into the eyepiece holder between camera and telescope, it can also be quickly removed. The easy to handle equipment can then be simply used to take photos of the night sky.