7,500+ items available from stock
Best price guarantee
Your partner for astronomy

New Products

Posts Tagged 'astrophotography'

Blog Archives

Lunar photography with a smartphone: the Omegon Easypic smartphone adapter

April 27 2017, Marcus Schenk

In the past, taking a photo of the Moon required quite some effort. Take the pictures, develop the film and hope for sharp images. And then came the disappointment if the Moon appeared blurred. This became considerably easier with digital and mobile phone cameras.

In the meantime, smartphone cameras have reached an outstanding level of quality. Which is a good tool for Moon photos, provided that we can tightly mount the phone to the telescope.

Let’s have a look to see how everyone can take a photo of the Moon through a telescope.

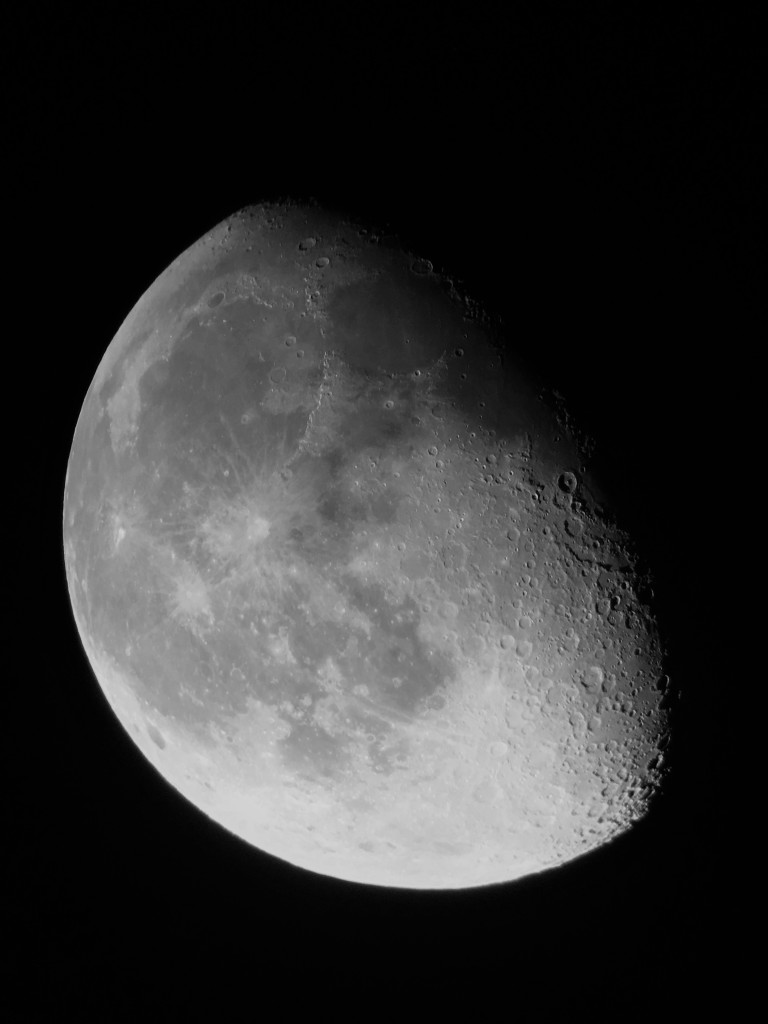
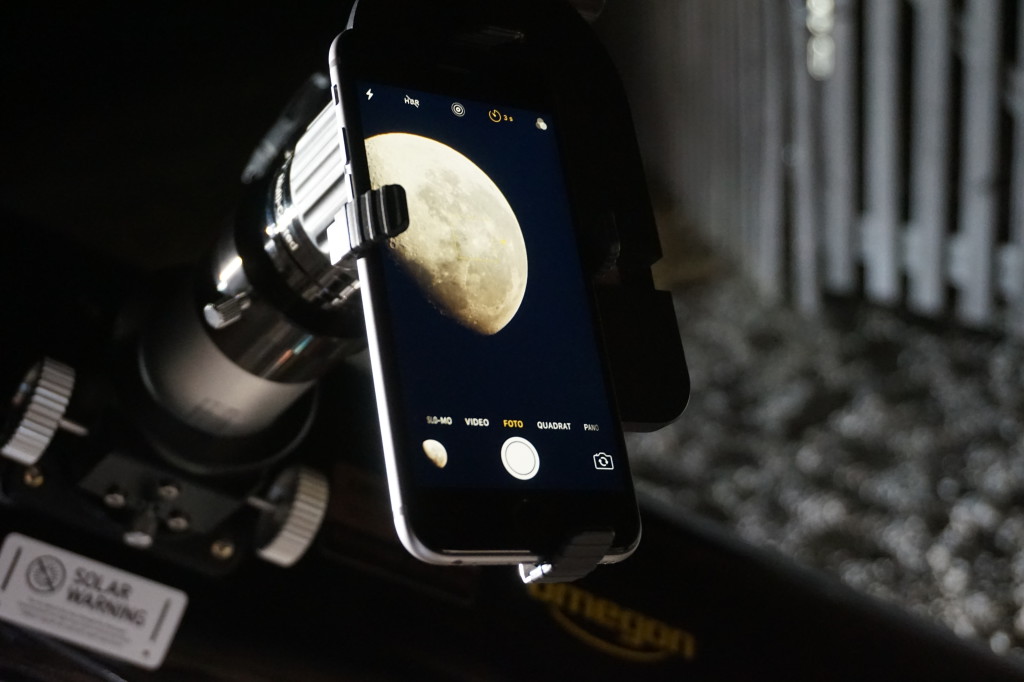
The Moon – shot with an Easypic adapter, an Omegon 8″ Dobson with Redline eyepiece and an iPhone.

Der Mond - aufgenommen mit einem Easypic Adapter, einem Omegon 8" Dobson und einem iPhone.

The difference to other adapters

The Easypic universal smartphone adapter follows a different route to his competitors. Most adapters have a clip that closes around a 1.25 inch eyepiece. The mobile phone is then separately held by a clamp and needs to be correctly positioned above the eyepiece. In itself this is a quite good system but needs quite a lot of experience on the part of the photographer. And in the end, everything must sit tightly in place.

Now the night is not always the right place for patience. And it is pitch black!

Is there no easier way? Yes, sure there is! With self-centring.

Here is how to prepare the adapter

With the Moon in the sky, you direct your telescope to Earth’s satellite. It is already nicely visible through the eyepiece. Now your smartphone and the Easypic adapter are going to play their role.

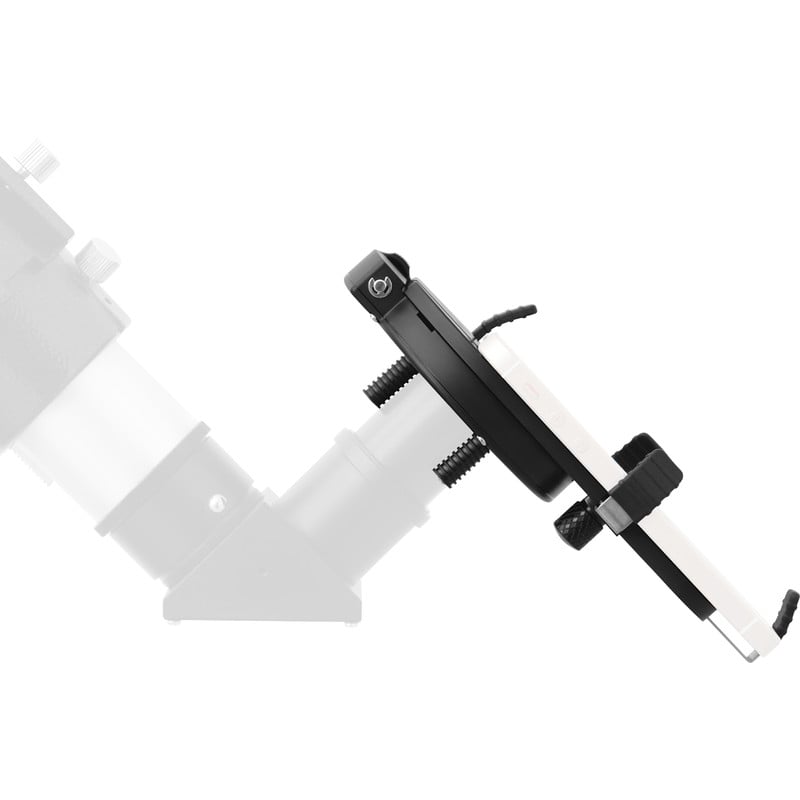
On the back of the adapter, loosen the small screw for the holding clamps. Pull the holding clamps fully to the outside. Then place your mobile phone with its camera lens directly over the central hole. Slide the holding clamps back against your phone and tighten the screw again. Check that the clamps fit tightly so that your mobile will not come loose.

Here is how to connect the adapter to the eyepiece

Now to the easy part! Hold the adapter with the smartphone to the eyepiece, making sure it has direct contact. Then turn the big screw on the side. This allows the movement of three bolts, which accurately clamp around the eyepiece at the same time. This way the adapter centres and fastens automatically around your eyepiece. The camera lens of the smartphone is perfectly aligned with the middle of the eyepiece.

For you this self-centring means: more focus on your object and less worry with technical details.

All done.

So sieht es aus: Das Smartphone am Teleskop und der Mond im Zentrum.

The photoshoot: The Moon in your smartphone

If your camera app has been switched on, you should now see the Moon in your display. Correct the focus once again and everything is ready for taking the photo.

These steps are necessary:
•    Switch off the flash
•    Activate the timer
•    Adapt the exposure time, if necessary and possible

Now press the trigger as usual and take a photo. This image of the Moon was taken with an Easypic universal smartphone adapter and an Omegon 8 inch Dobson telescope.

Using neutral density filters to reduce brightness

In most cases adjusting the correct exposure time is enough for successful Moon images. However, planets like Venus or Jupiter very often appear too bright in an image. They are over-exposed. The planet discs appear burned out. The solution: neutral density filters and variable polarising filters. This is our trick to be able to show the details of the planets.

Conclusion:

A smartphone in combination with an Easypic universal smartphone adapter allows you to take quick photos of the Moon and planets. You don’t have to be an expert: even connecting to the eyepiece is child’s play. All you need to do is position the adapter correctly. The smartphone takes photos of the Moon with outstanding sharpness. A fact that all of us could only dream about a few years ago.

EAGLE: The computer for astrophotography

September 12 2016, Stefan Taube

Why EAGLE?

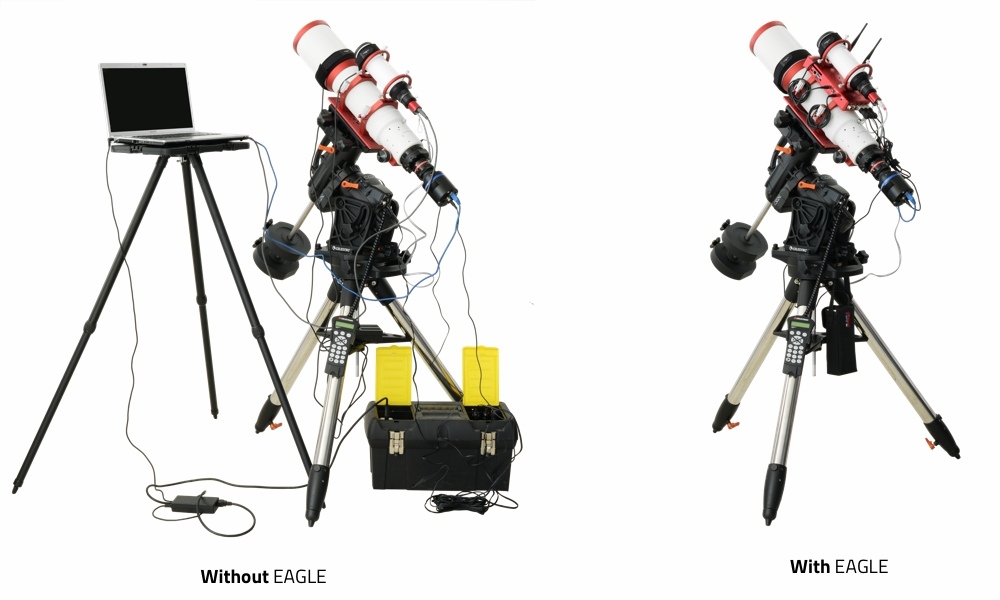
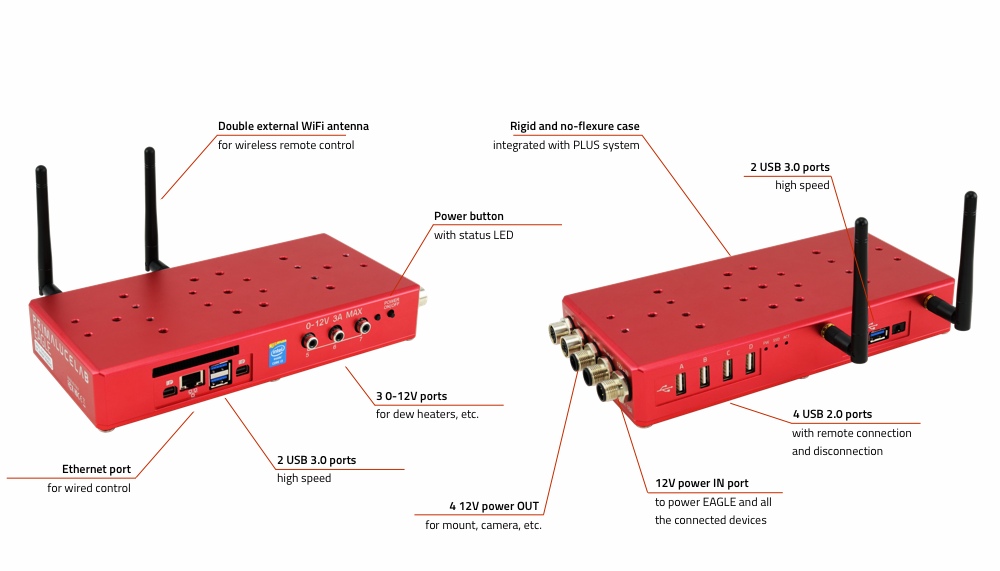
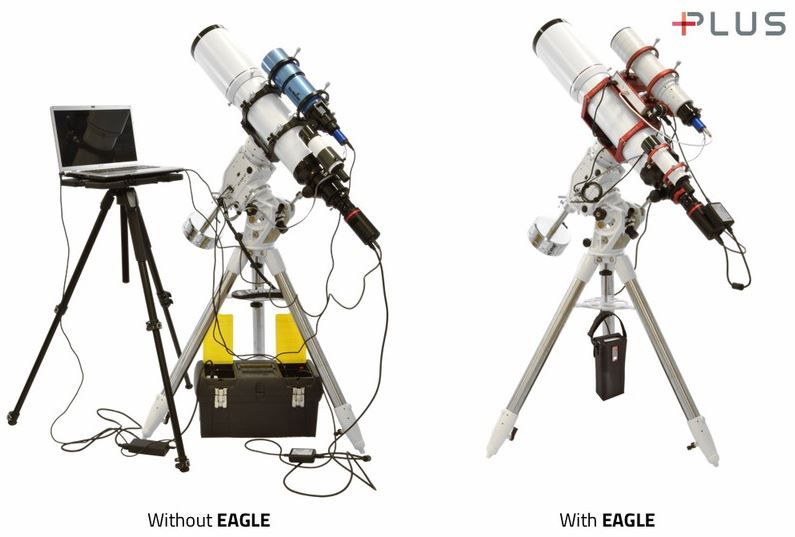
Hardly any other sector of our hobby, astronomy, has experienced such a dynamic development over the last few years than astro photography. But this all comes at a price! If in the past one had to set up a Dobsonian telescope, search the eyepiece bag for the correct focal length and probably also a colour filter, the mobile astronomer of today travels with an “observatory to go”: Equatorial mount with heavy counterweights, optics, camera, guiding telescope, guiding camera, laptop and large powerpack. Is there no easier way? The EAGLE control unit makes this possible. It is a computer that is tightly connected to the tube, and it controls mount, camera and guiding camera, centrally supplies electric current, and saves images. You can operate EAGLE wirelessly via WIFI with an input unit of your choice.

EAGLE

No messy or torn cables

All power and data lines to the mount and peripheral equipment run centrally from EAGLE. This allows the use of short cables and to leave these cables partially connected for a quicker setup. Since the EAGLE computer performs the same tracking movements as the mount, no cables can be wound up or torn off by the mount. You can quite confidently allow your astro photographical equipment to run for hours without supervision. The only cable you need to keep an eye on is the electric power supply cable for the EAGLE. Talking of power supply: Due to the power management of the EAGLE, you only need a smaller Powertank, or you can take photos over an even longer period of time.

EAGLE generates its own WIFI

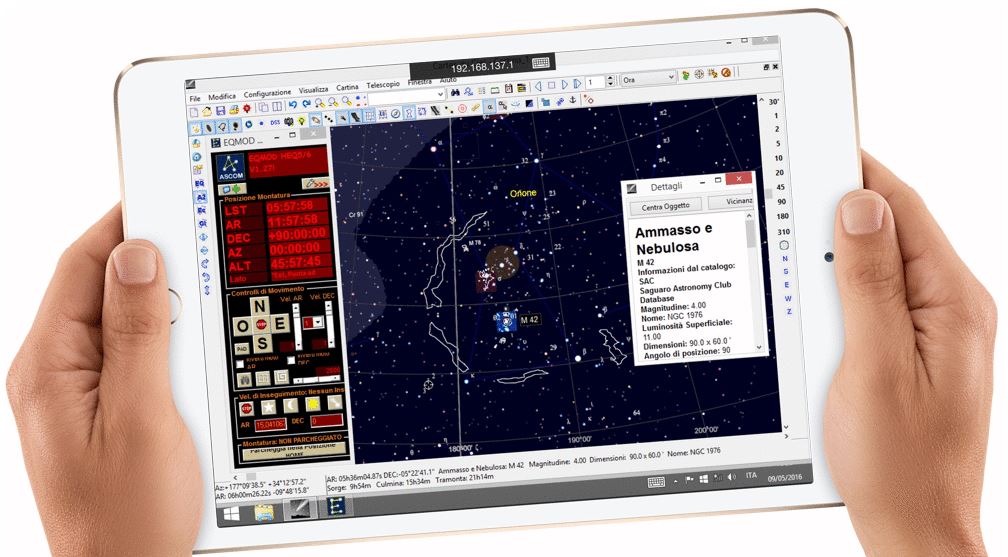
With the associated app you can use all the programs you need, wirelessly and conveniently from your garden chair. Popular software like PHD2 Guiding are pre-installed. Since the EAGLE runs under Win 10 Enterprise, you can also install other programs. The advantage of EAGLE is the fact that you can control your system with any WIFI-compatible computer and any operating system: no matter whether you use a laptop, tablet or smartphone, and no matter whether you use Windows, Android or Apple. In the field, the WIFI range is approximately 25 metres.

EAGLE-Tablet

EAGLE saves your photos

You can have the camera images directly transferred to your tablet, laptop or smartphone via WIFI. Since you obviously take a lot of photos which need to be saved without losses, the EAGLE is equipped with an SSD memory card. Saving to a USB stick is also possible. However, there is no possibility to edit any of the photos in EAGLE. The computing power has been designed for low current consumption, which is why EAGLE also works without ventilation.

EAGLE is a fixed part of the system

The EAGLE computer is no additional accessory that you have to carry around. The small, but very stable box can stay mounted to your tube. The best way of installation probably is the installation between the tube and the guide scope rings. However, you can also mount the EAGLE box on the same prism rail that you use to fasten the telescope on the mount. This is recommended if you do not use a guiding tube. On our EAGLE product page you can see examples for this.

There is nothing you can’t do without the EAGLE control unit. However, anyone who is actively involved in astro photography on a regular basis and now and again likes to travel to good star gazing locations or telescope meetings, will quickly appreciate the EAGLE: no cable problems, no computer crash, a stable power supply, a compact system.

There is also a more powerful version available, which has been designed for large mounts and observatories: EAGLE Observatory.