

Sharp images of the Moon with a DSLR
Tips for an optimised workflow
The Moon is the ideal object for anyone getting started in astrophotography. Stacking and sharpening make details visible.
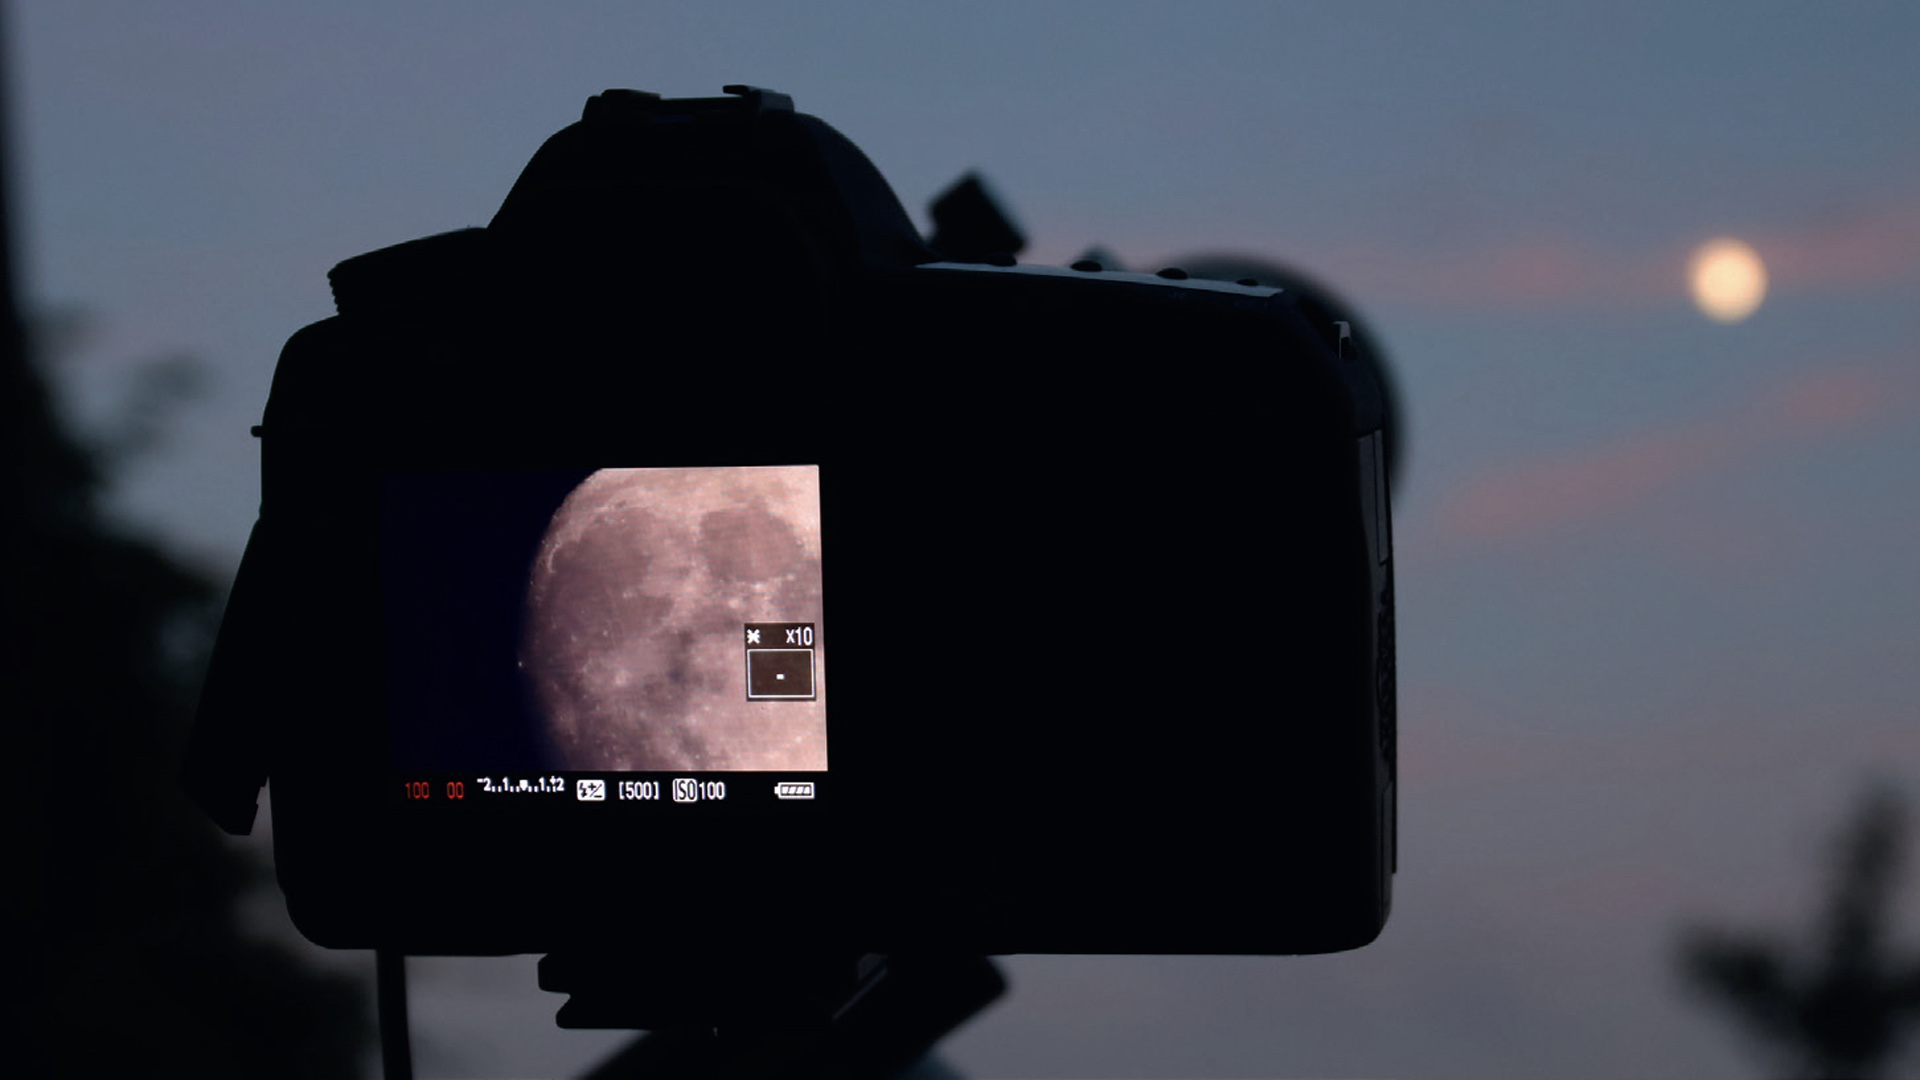 Photographing the Moon with a DSLR attached to a telescope. The Moon is focused using live view
on the camera display. M. Weigand
Photographing the Moon with a DSLR attached to a telescope. The Moon is focused using live view
on the camera display. M. Weigand
Creating a series of images
The Moon is an ideal object for anyone getting started in astrophotography. You will very quickly be able to produce presentable results with many details. But there is also a lot of potential for optimisation here. Sometimes the end result can be very different depending on the procedure used.
Once you have taken your first steps photographing the Moon with a DSLR camera, it will definitely not be long before you find yourself in the following situation: you have just enjoyed admiring the sharp crater edges at the terminator, but when you take a closer look at the Moon images on the display you are disappointed because the crater edges appear significantly more lacklustre than you just experienced with your own eyes. How can you represent what you actually saw?
In order to make maximum use of the chip surface, it is recommended that you use around 1,400mm focal length for APS-C format cameras and around 2,000mm focal length for full-frame cameras. There is sufficient light available with lunar photography to work with low ISO settings. Apart from that, you should also take care with your camera settings to ensure that the images are saved in RAW format. In this format, the images are not affected by the camera's internal processing, unlike the JPEG setting. Automatic algorithms running include edge smoothing, image sharpening, and white balance. In addition, the RAW format offers a significantly larger dynamic range with 16,384 brightness values (14 bit) per colour channel compared to 256 (8 bit) in the JPEG format. This is an important advantage for the many different shades of grey on the Moon's surface and is especially true when you are working with the subtle colour nuances of the lunar surface. Last but not least, JPG images are fraught with compression artefacts, whose unattractive effects will emerge during image processing.
Once you have configured your camera you can take a few dozen shots to capture as many sharp moments as possible – for the example shown, it was 50 images. This allows you to do more sharpening later during processing without image noise appearing immediately.
Pre-processing
Since DSLR images are very large, it makes sense to make your life easier for the stacking program by preprocessing them with the PIPP program. Its function was described in issue 5 of Adventures in Astronomy. The aim is to automatically pre-centre the Moon and, if necessary, to cut away larger, black areas from around it. This makes stacking much faster. The pre-processed images are saved in TIFF format.
Stacking with multipoint alignment
The next step is to load the images into, for example, RegiStax 6.1 or a similar stacking program. It is important to use as many alignment points as possible, as the seeing can vary significantly across the Moon’s surface. Multipoint Alignment divides the Moon into many small zones with alignment points that are checked for orientation and quality in each frame. Once the quality limits have been individually selected, the remaining usable images are stacked. The resulting combined image is saved again in TIFF format for further processing.
Tonal values and sharpening
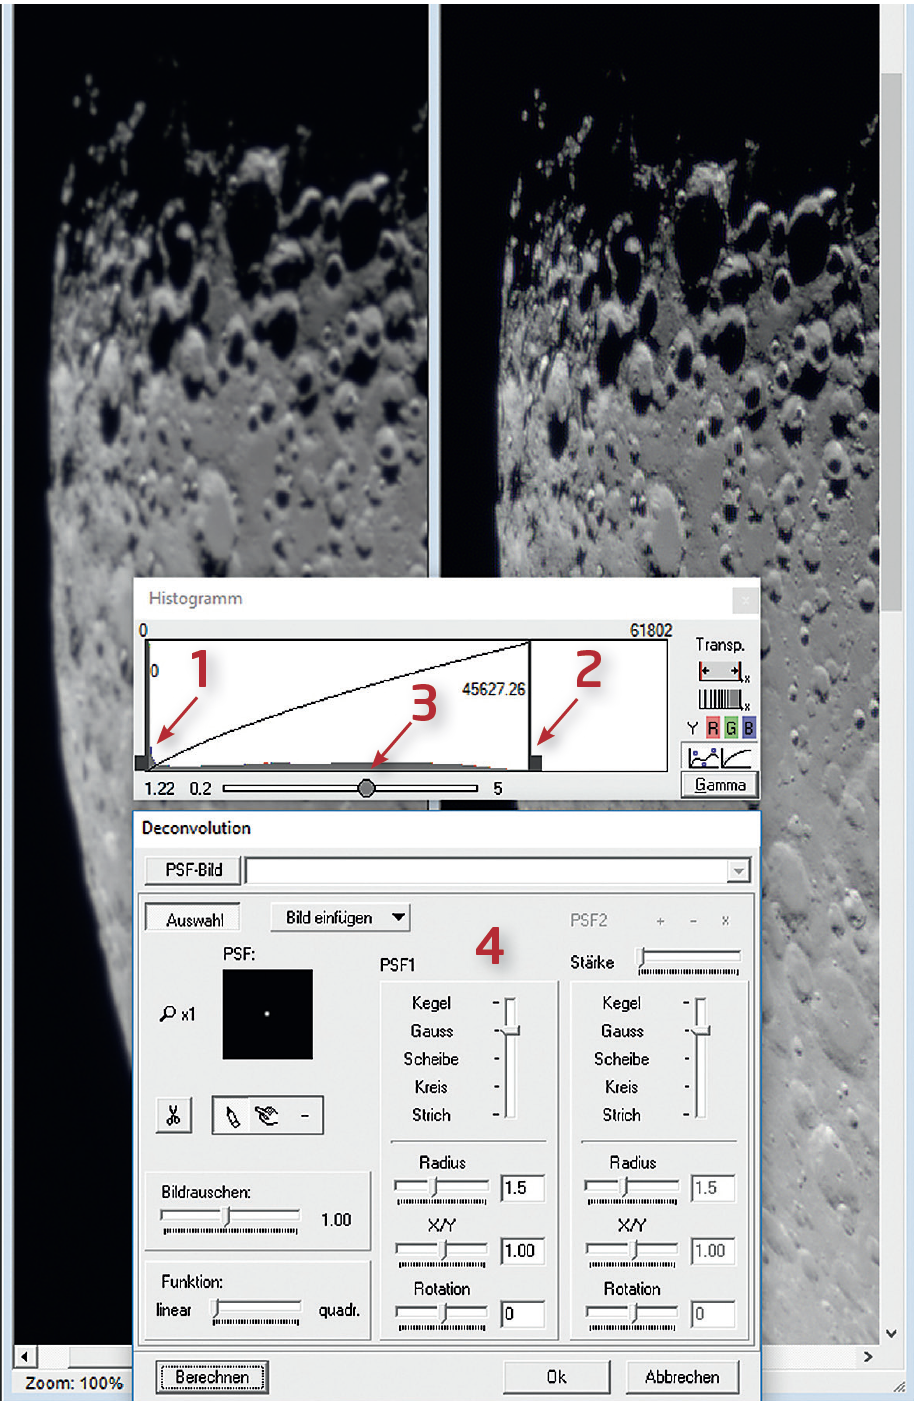 Adjusting the tonal values via the black (1) white (2), and gamma (3) values as well as sharpening using deconvolution (4) in Fitswork. M. Weigand
The Fitswork program was used to edit the images shown in the example here. The first step is to adjust the tonal values using the black and white sliders in the histogram if, for example, the image is a little too dark. Compared to the visual experience, the terminator region appears relatively dark on photos. In order to increase the brightness of the darker regions and to get closer to the non-linear brightness perception of the human eye, a gamma correction of between 1.2 and 1.3 is recommended.
The most important step in Fitswork is the image sharpening, because the composite image from Registax bears very little relationship to the visual experience when it comes to the impression of sharpness. Deconvolution sharpening is highly recommended.
This attempts to reverse the soft focus of each pixel caused by the seeing by, for example, applying a Gaussian blur. This method can produce great results, but it also mercilessly produces image noise – hence the stacked image series. However, if a little too much noise is created, it can be adjusted slightly using the Image Noise slider.
The most important deconvolution parameter is the filter radius. The optimal setting depends on sampling and the seeing during imaging and must be determined by trial and error. Previous experience has shown values between 0.7 and 2.5 to be most appropriate – in the example shown, it was 1.5. For a particular telescope-camera combination, the optimum values vary only slightly from case to case. Generally, all other filter parameters play almost no role.
The optimal filter settings result in crater edges that now appear much sharper than in the JPEG image, and small craters are more visible. If necessary, you can follow with a second round of sharpening with a moderately set "unsharp mask".
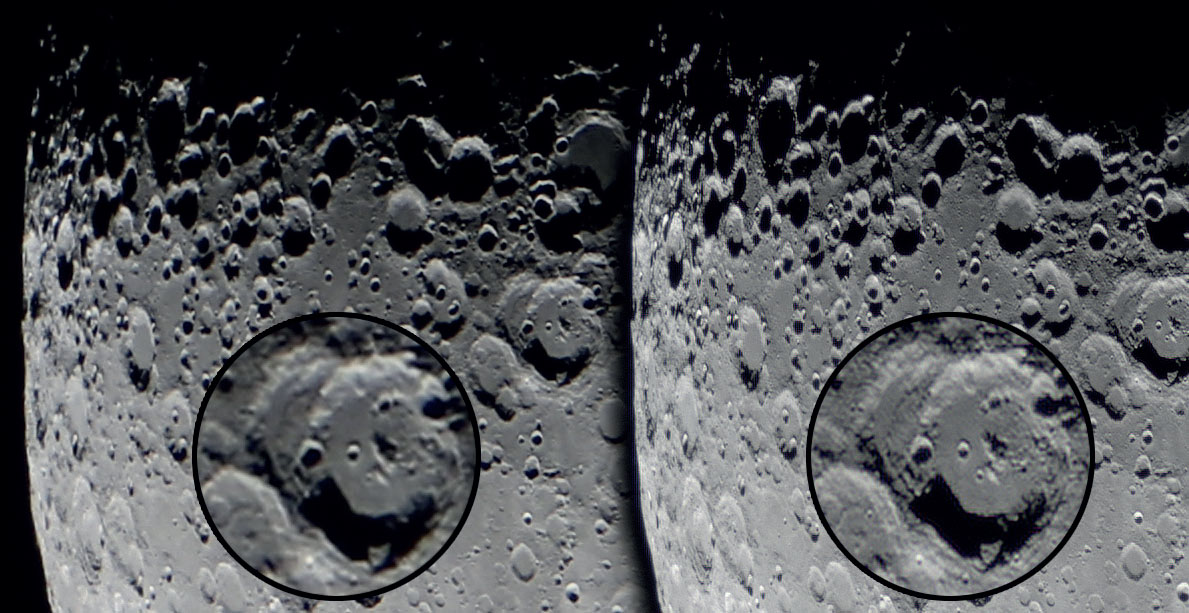 The JPG single image (left) disappoints when it comes to fine detail. The result of the optimised workflow with significantly improved sharpness is shown on the right. M. Weigand
Author: Mario Weigand / Licence: Oculum Verlag GmbH