

You don't always need to use tracking!
Astrophotography on the go
Impressive images of the Milky Way can be created without large amounts of equipment. Software is useful here!
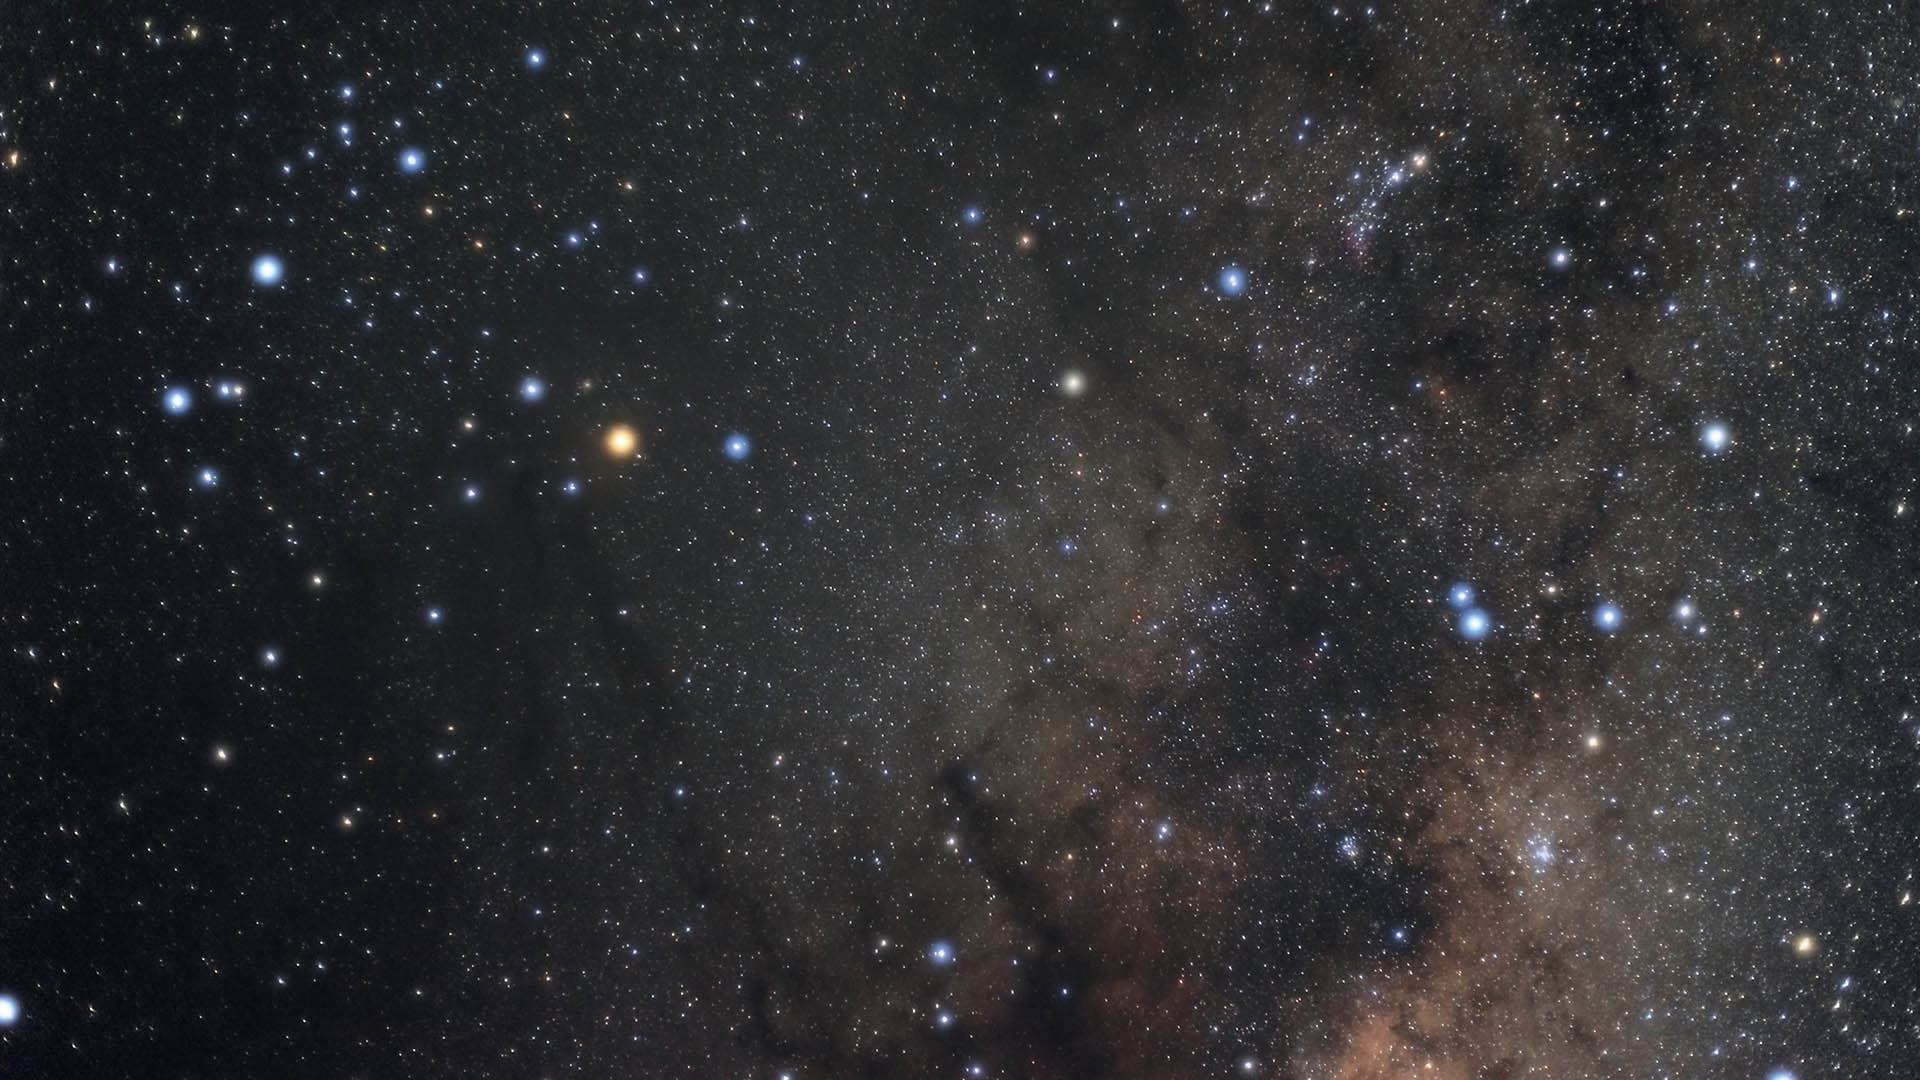 A photograph of the constellation of Scorpio, which was created without tracking. The focal length was 50mm and the exposure time was 7s at ISO 3200 and f/1.8. Taken with a Canon EOS 5D Mark II which has a pixel size of 6,4μm, resulting in a trail length of 4 pixels before processing. 15 frames were stacked to create this result. M.Weigand
These days, astrophotography tends to be fairly technically demanding. However, beautiful results can actually be achieved with very simple means. This is especially interesting if you want to pursue your hobby on holiday, when it is usually difficult to take much equipment with you. In particular, most mounts needed for tracking will not fit in a suitcase. So what astrophotography is possible without tracking?
Of course, you will never be able to do deep sky photography with long focal lengths without tracking. But, for example, images of the Milky Way, which are decorated with countless nebulae, dark clouds and star clusters, are absolutely possible. But, you need to ensure that the star trails are not too long if you really want to create an attractive image. The length of star trails in an image depends on several factors. It can be easily calculated in pixels using the following formula:
Trail length in pixels = 0.0727 * f * t * cos(δ) p.
Where f is the focal length in mm, t is the exposure time in seconds, δ is the declination of the object in degrees, and p is the size of the pixels in μm. Trails are longest near the celestial equator, here the declination is 0° and the resulting cosine is 1.
The correct exposure time
If, for example, you want to photograph the constellation Sagittarius with a 35mm lens and 5μm pixels, you will have a trail length of two pixels after four seconds of exposure time. The maximum acceptable trail length also depends on whether the resolution of the image will anyway be reduced later. Then the star trails can be several pixels long, or you can work with correspondingly larger pixels.
A telephoto lens in the 200mm range represents the limit of what is photographically possible. In this case, the trail length is still acceptable at exposure times in the range of one second. Images with some detail can be created of the brightest deep sky objects, such as M 31 and M 42, without tracking. For a good signal-to-noise ratio, however, you will need several hundred images, which are averaged during processing.
Aperture and ISO
Besides the correct exposure time, the next questions concern the optimal camera settings and the lens aperture. Normally, even expensive photo lenses used for astrophotography are stopped down to around f/5.6, because nothing reveals aberrations so clearly as bright dots with a dark background. However, to produce as much signal on the chip as possible in a short time, a wide aperture is required. There will be trade-offs on image quality without tracking, and the best compromise for each lens must be found individually using a small series of test images.
The ISO setting is the second important parameter; it should be set unusually high at 1,600 or more, and possibly significantly higher depending on your camera's noise characteristics. The maximum useful setting also depends on the ambient temperature, higher values can be used on cold nights.
Furthermore, the camera should be operated in RAW mode and without any internal image processing.
Correcting star trails
Last but not least, software also helps: one example is Fitswork, which is available free of charge, and which enables you to deconvolute star trails. To do this, the image must be rotated in such a way that the trails run horizontally using the menu option Edit - Image Geometry - Rotate Image. Then go to Edit - Special Filter to select the function you need. The Horizontal Width filter slider adjusts the trail length, and Threshold limits the brightness of the section of the image you are correcting. This allows you to reduce background data artifacts, but you may not be able to eliminate them completely if the correction required is more extreme.
Fitswork also offers another way to correct distorted stars. This can be done using the Edit - Sharpening - Decrease Star Radius function. Here, too, the star trails must be oriented horizontally. It is then important to select Only Horizontally in the filter settings. The Remove Stars slider also makes the stars appear softer so that they do not appear quite so “punched out”. Here, artifacts usually have less impact on the end results.
Trial and error is required to decide which of the methods produces the best result. Furthermore, this technology has limitations: both functions are recommended only for slightly distorted stars, as increased correction will result in unwanted artifacts. Also, Fitswork can only correct linear star trails. When using objective lenses with short focal lengths, or where the subject is close to one of the celestial poles, the trails are often curved. Correction for this is then not possible.
 An image of the constellation Scorpio over the Alps (left). The image still shows clearly distorted stars even when reduced. The middle image shows the result of selecting Deconvolute Star Trails and the settings used. On the right are the settings and the result of selecting Decrease Star Radius. M. Weigand
Trial and error is required to decide which of the methods produces the best result. Furthermore, this technology has limitations: both functions are recommended only for slightly distorted stars, since increased correction will result in unwanted artifacts. Also, Fitswork can only correct linear star trails. When using objective lenses with short focal lengths, or where the subject is close to one of the celestial poles, the trails are often curved. Correction for this is then not possible.
The bottom line
It is possible to capture very deep images without tracking and with wide-angle lenses. Software can help with slightly distorted stars.
Author: Mario Weigand / Licence: Oculum Verlag GmbH