

Using lucky imaging to create detailed pictures of the Moon & more
Processing videos with AutoStakkert!3
How do you take the best pictures of the Moon? Take a lot of images and select the sharpest! AutoStakkert! helps with this.
 The surface of the Moon always offers an exciting subject, and the finest details can be extracted from a video if you have the right software. M. Weigand
Spring offers good opportunities for lunar photography. As the waxing Moon progresses through its phases, our satellite reaches a reasonable height above the horizon, so that the chances of good visibility are high. The best images are created using lucky imaging, in which a large number of images are created and then the sharpest ones are selected. Programming enthusiasts among the hobby astronomer community have developed ever better software solutions to do this in recent years.
AutoStakkert! by Emil Kraaikamp is a popular program among solar system photographers. The program effectively uses modern multi-core CPUs and works very quickly, so that the evaluation of a video takes just a few minutes. The following takes you step-by-step through the Autostakkert! process, using a video of the Moon as an example. The workflow begins with the loading of the video.
Image stabilisation and quality analysis
Before we can start looking for the sharpest images, we need to centre the object in order to compare the individual images’ quality. The initial settings depend on the subject. Select Planet (COG) to centre delineated objects according to brightness, or select the Surface option for format-filling lunar landscapes. The alignment box is then positioned over a distinctive surface feature and its size adjusted. The quality analysis is then configured. In each image, AutoStakkert! analyses the gradients in brightness – they are steeper when images are sharp. Noise naturally also produces a brightness gradient, which is why the Noise Robust parameter is already set to 4 by default. If the images have a lot of noise you may need to select a higher number. The Laplace Δ option is selected depending on sampling. If the focal length is actually too long (oversampling), quality analysis must be carried out on rather rough structures and the tick should be removed. If, on the other hand, the finest recognisable structures are very small, selecting Laplace Δ makes sense, possibly in combination with a higher Noise Robust setting. In addition, the local quality analysis option Local (AP) can be selected to achieve better results. The Global (Frame) setting is recommended only in difficult cases with fluctuating image brightness. Then, by selecting 2) Analysis, the key lucky imaging step begins. The output from the quality analysis is a graph showing the images sorted by their quality.
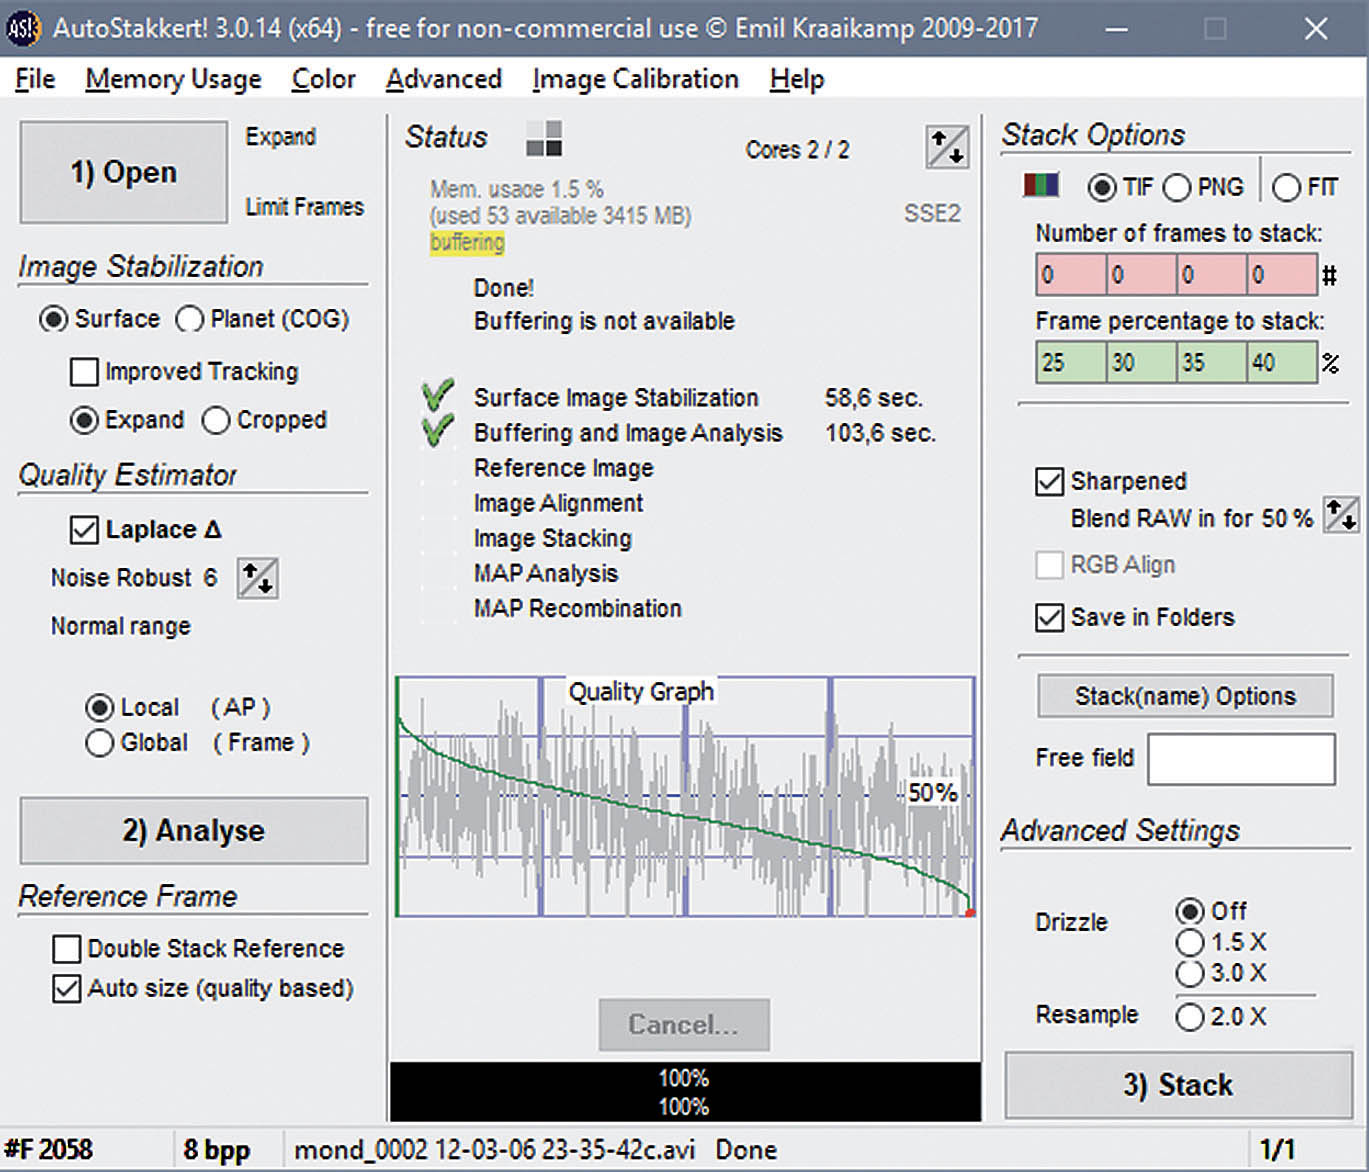 The Autostakkert! main window. The process steps can be found in the three sections to the left and right of the status bar in the middle. There you can see the quality graph below the analysis. The seeing was not especially good in this example, and the best usage rate was around 30%. M. Weigand
Experimenting with the stack size
The quality process provides information about a sensible image usage rate. Poor seeing requires a rigorous exclusion of images that are too deformed or blurred. On an average night, usage rate values of 40% to 60% can be expected. If you have many images, or images with very low levels of noise, lower values can be tried and the result may be sharper. Over time, you get a feel for the correct usage rate. However, it is often only possible to get the best result through trial and error. It is helpful to look at the images sorted by quality and do your own visual check. AutoStakkert! facilitates this process by producing stacked images for several freely selectable stack sizes in a relatively time-saving way. For a better comparison of the different results, the Sharpened setting is recommended, as this will make the differences in the composite images more apparent.
However, before the first stacked image is generated, fine-tuning can be performed by aligning small individual segments of the image. All necessary settings can be found in the menu bar at the left of the image display. AP Size allows you to choose between different alignment point sizes, and Place APs in Grid automatically and evenly distributes alignment points across the entire field of view. The more finely structured the subject, the smaller the areas that can be used. Min Bright determines the brightness limit for the points. Individual points can also be set or removed manually if required. All other options can be left for now, and the stacking process can be started by selecting 3) Stack.
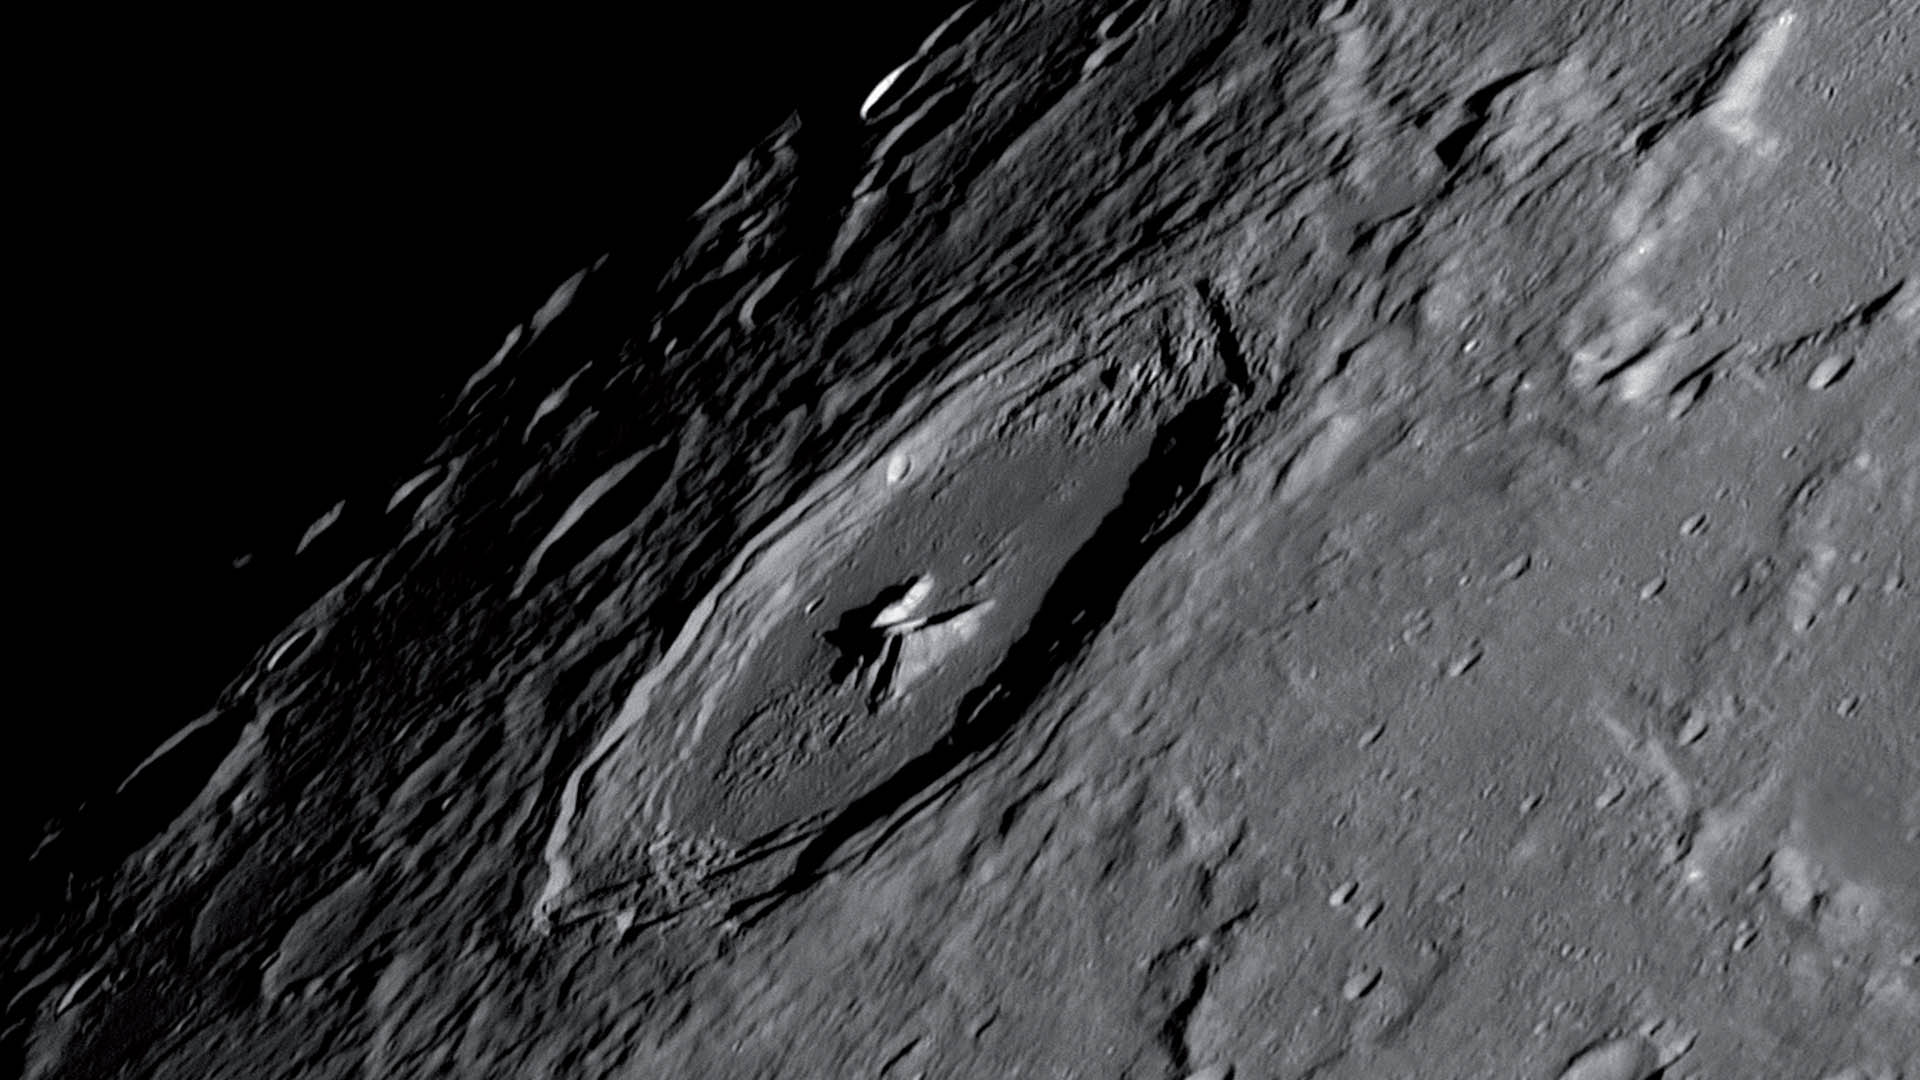
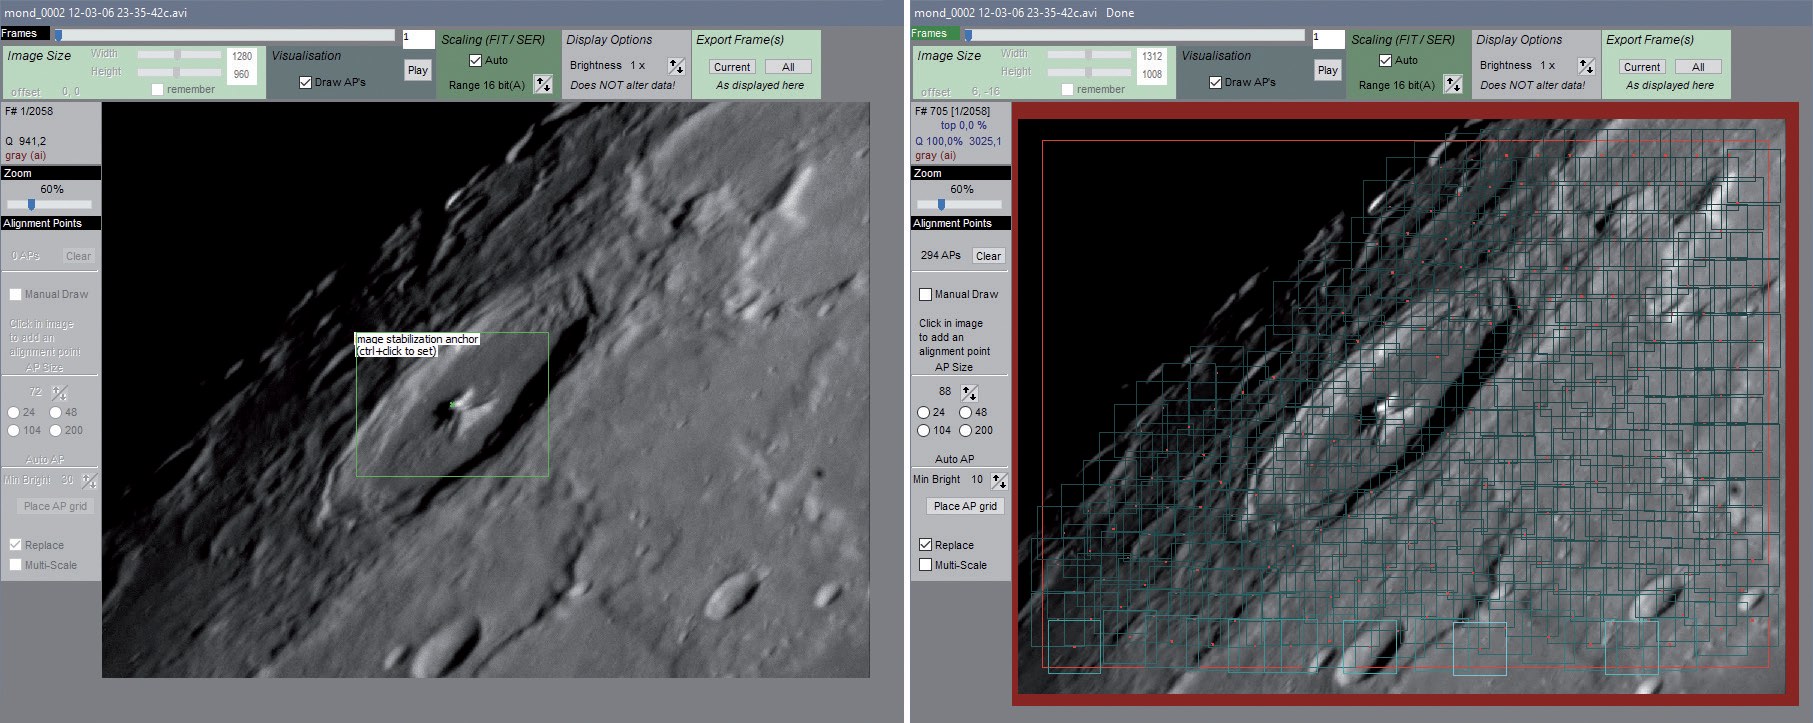 The image display with the stabilising anchor on the centre mountain of Pythagoras on the left, and the grid of alignment points on the right. M. Weigand
The stacked image
Processing is completed after a few minutes. Stacked images do not usually look particularly sharp at first glance, so fine details need to be worked out during subsequent processing. Various programs’ sharpening algorithms are suitable for this task. For example, it is worth experimenting with Deconvolution and Iterative Gauss Sharpening options in Fitswork, or Wavelet Sharpening in RegiStax6.
The bottom line
Thanks to development work by some very dedicated software amateurs, lucky imaging is now easier, faster and more accurate than ever! AutoStakkert! is an excellent tool for processing videos – not just of the Moon. It is also possible to get much more out of images of Mars in opposition which is coming soon, and which will be visible low on the horizon under difficult conditions.
Author: Mario Weigand / Licence: Oculum Verlag GmbH