

Using Astrometrica to determine the position of minor planets
Getting started measuring astronomical objects
Emulate astronomy professionals and try to determine the position and brightness of objects.
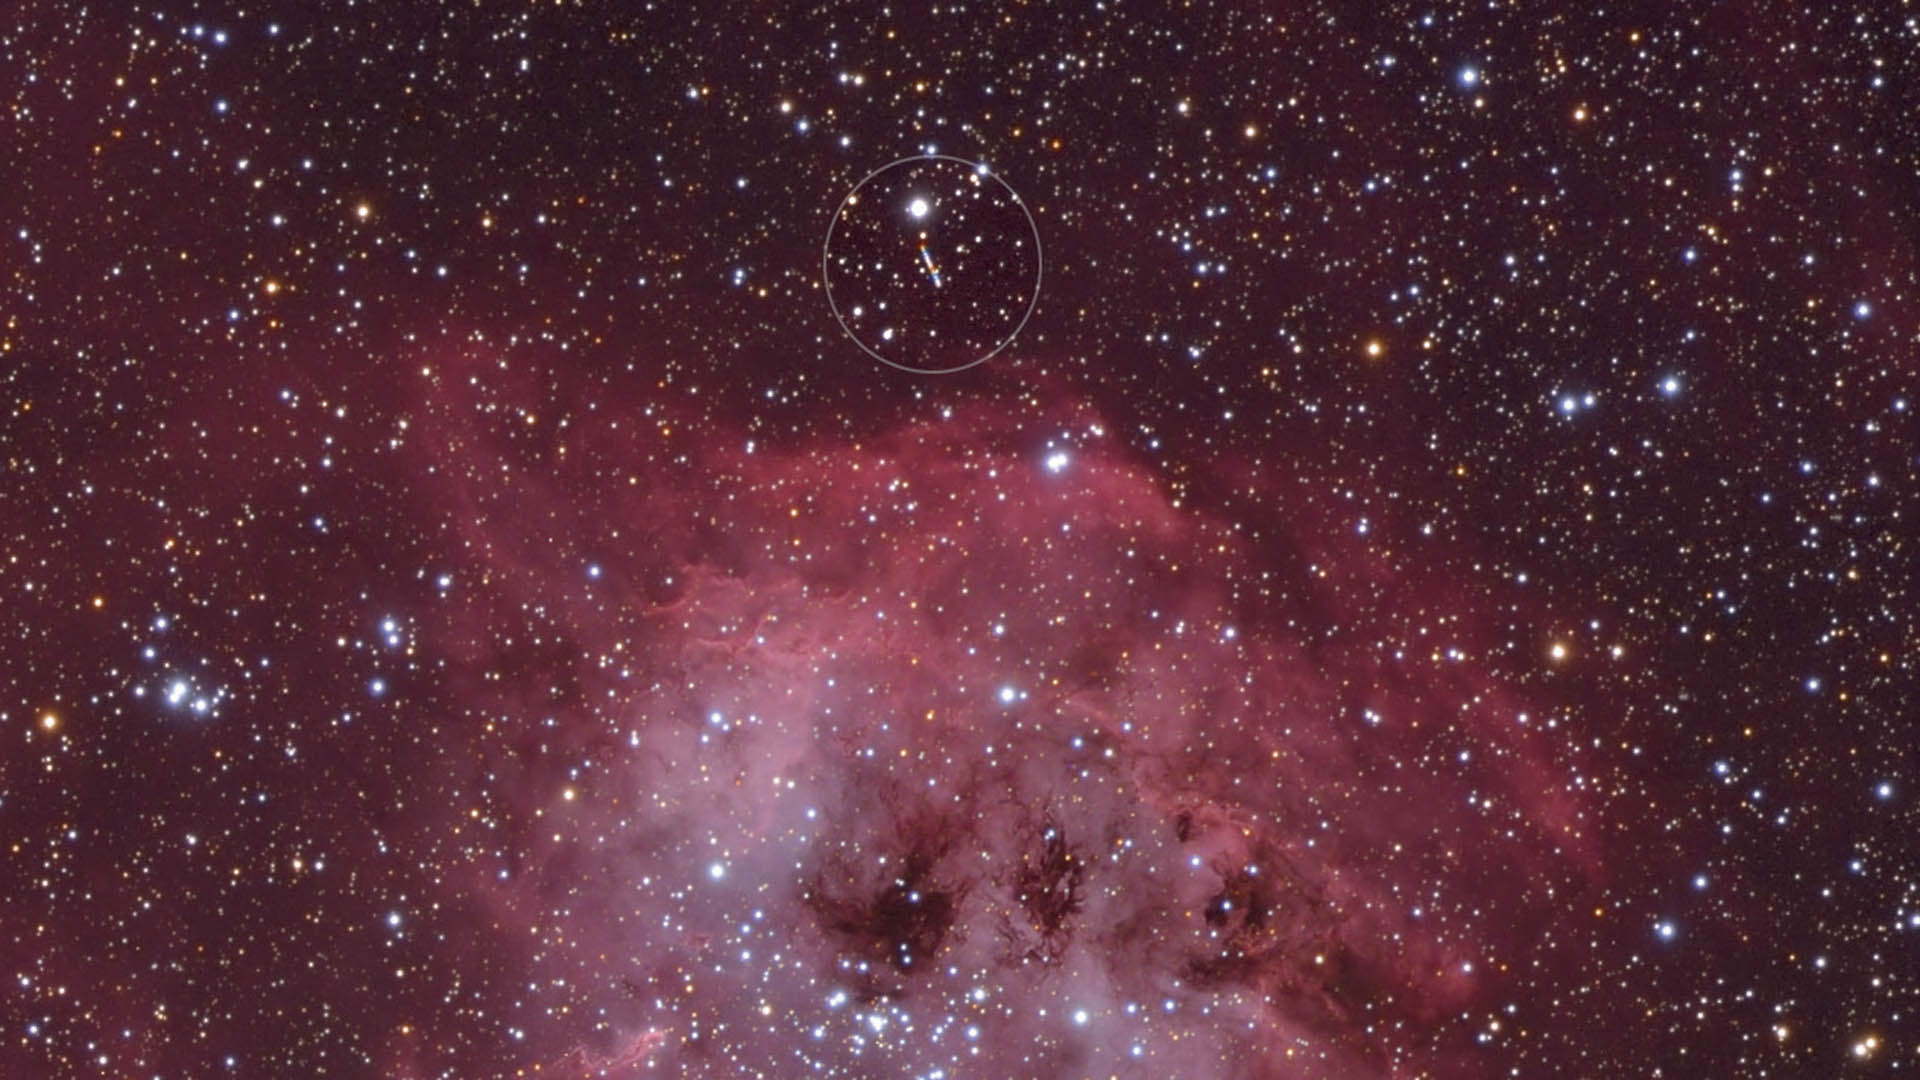 A typical image near the ecliptic: the minor planet 81 Terpsichore (marked with a circle) causes a bright trail on this image of the nebula IC 410. M. Weigand
The primary goal of many astrophotographers is to produce beautiful images. However, amateur astronomers can also use their equipment to devote themselves to classic astronomy tasks such as astrometry and photometry, i.e. determining the position and/or brightness of objects. You can evaluate your images using the Astrometrica program.
The huge potential reservoir of very valuable telescope time in the professional sector is an advantage for amateur astronomers, even though this has reduced somewhat due to automatic scanning operations.
Hobby astronomers can help improve the data situation by observing minor planets, comets, or even variable stars. Here, as an example, we describe how to determine the position of minor planets.
Which equipment is suitable?
The technical requirements for getting starting with the measurement of astronomical objects are not high. A small, tracked telescope with a CCD camera is, in principle, all you need for measuring objects. Sampling of 2"/pixel (or better) is useful for astrometry, and this can be achieved with a small refractor. If you are searching for still unknown minor planets, then it is an advantage to work with image fields - and therefore also chips - that are as large as possible, in order to capture the largest possible celestial area. However, this does not play a major role in your first attempts on known objects.
Typically, for minor planets you need exposure times of a few seconds to a few minutes. Furthermore, the object must not be overexposed for good measurement results. The duration is a compromise between achieving a good signal-to-noise ratio whilst still maintaining a point-shaped image. At longer exposures, the movement of minor planets will quickly become noticeable. When comparing multiple images, minor planets reveal themselves as moving points in front of the star background.
Here, we introduce the Astrometrica program which is used to evaluate the images. Its structure is simple and all its important functions can be accessed via the toolbar. Incidentally, it is not even necessarily necessary to have your own pictures for your first attempts. The software comes with a small set of test images that match the default values in the configuration.
Getting started with Astrometrica
Astrometrica first needs some information from you so that it can successfully evaluate images. This is why the first step is to go to the Program Settings to input information about the observation location and imaging equipment. These include the telescope focal length, chip characteristics, and orientation of the camera. You may also need to adjust how time information in the FITS header is to be interpreted. Technical information about the camera sensor is usually found in its data sheet.
Now Astrometrica knows the dimensions and orientation of the image field. You can usually leave the starting values for the other program settings unchanged, and refine them later as necessary.
This allows the FITS files to be loaded. Dark and bright images can also be processed for calibration purposes. As they are opened, the time information from the FITS header of each image is displayed for confirmation.
Comparison with a star catalogue
The coordinates of the centre of the image are entered as precisely as possible, after which the evaluation can start using the Astrometric Data Reduction function. Alternatively, in the case of a known minor planet or comet, its expected position taken from the catalogue can be loaded. Then the automatic detection of the star pattern starts. The USNO-B1.0 catalogue of the United States Naval Observatory is installed by default, which contains around one billion stars up to a brightness of magnitude 21. If required, more detailed catalogues such as the UCAC4 can also be used. This may be necessary for longer focal lengths or smaller fields of view.
If the parameters in the configuration are correct, the result of the comparison is displayed after a few seconds. The stars in the image are then marked with circles, where green represents detected reference stars. If the signal of a reference star is too faint, it is highlighted in yellow.
 Astrometrica's graphical user interface with a successfully detected star field. M. Weigand
If the match fails, it can be manually corrected. The reference catalogue pattern is moved with the arrow keys and adjusted with the orientation angle as well as the focal length setting until a match is achieved. Often the focal length is the source of the error, as it can deviate from the manufacturer's specifications due to production tolerances. If the values are changed here, they should also be later changed in the settings so that the automatic adjustment will work from then on.
Astrometric evaluation
If the reference star pattern is found, we are only a few steps away from an initial position determination. The blinking function helps to identify objects that are moving in the image field. If an object is detected, a click delivers the position fit. The object's brightness profile is adjusted using a Gaussian function. This is also possible to do automatically for all images in a sequence using the Moving Object Detection function. The result of successful astrometry is the equatorial coordinates of the object! The results are logged in the MPCReport.txt text file.
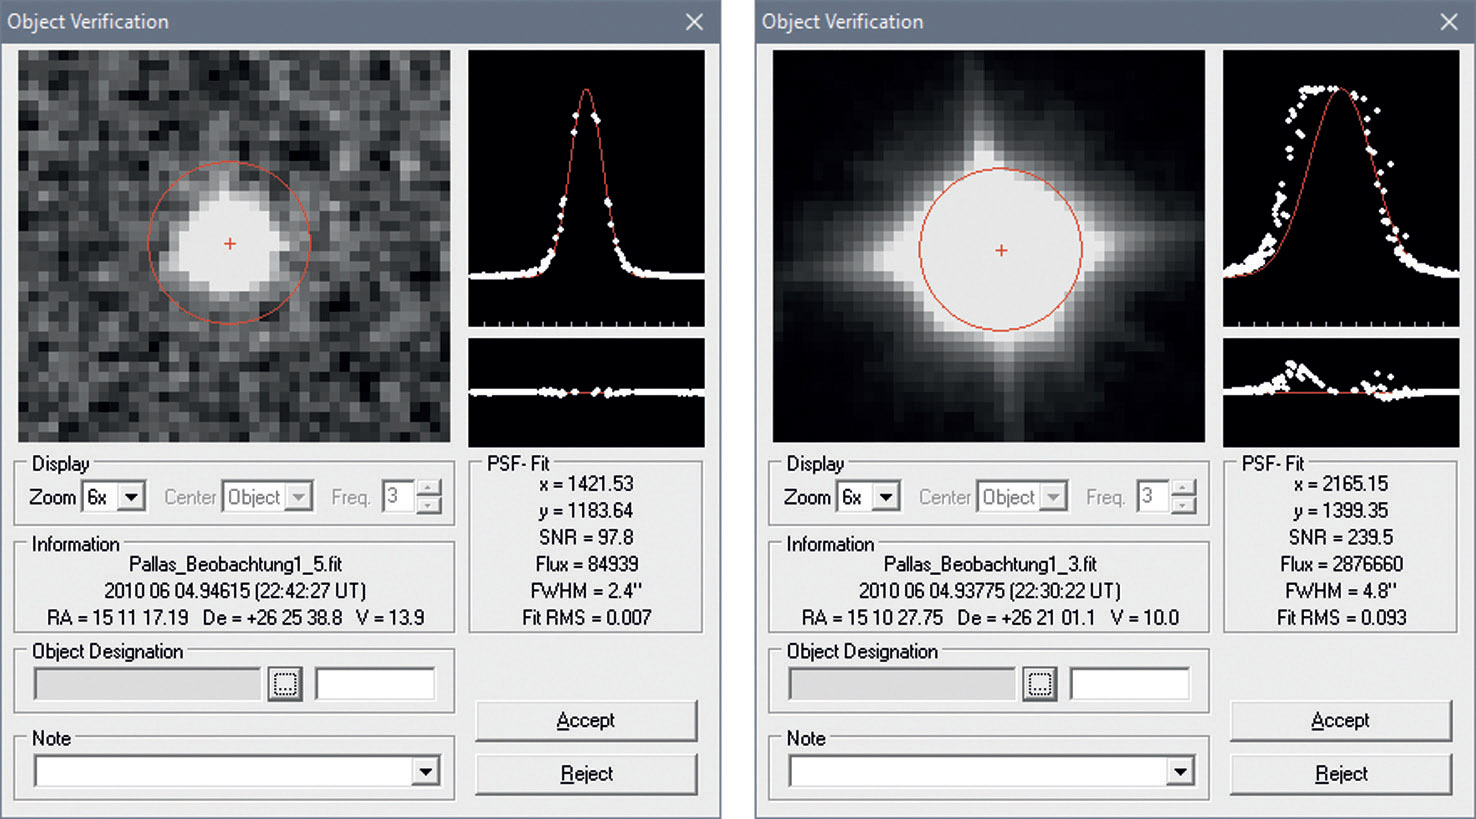 A good position fit of a minor planet on the left and an example on the right that is not optimal due to overexposure. M. Weigand
The bottom line
Hobby astronomers can also very easily use their photographic equipment for measurement projects. With an appropriate level of enthusiasm, your monitoring of asteroids or comets can contribute to the improvement of orbit data. Another field of activity is the observation of variable stars or novae and supernovae. You can also use the procedure described above to evaluate photometric data with the help of Astrometrica.
Author: Mario Weigand / Licence: Oculum Verlag GmbH