

Step-by-step guide to creating high-resolution Moon mosaics
Your own poster of the Moon
How to create your own high-resolution portrait of our satellite, suitable for a large-format poster.
 Would you like to see the fine details of the Moon's surface as a large-format poster to hang on your wall? This is easy to do using the mosaic technique. M. Weigand
The Moon is probably the most generous object for astrophotography. It is easy to take pictures that show many details - even using fairly simple tools. And with a little diligence, you can combine several images to form a large mosaic. Your reward is your own high-resolution portrait of our satellite, suitable for a large-format poster.
With its angular diameter of around 0.5°, the Moon is simply too large to create a detailed lunar panorama with a normal high-resolution planetary camera. Therefore, the road to creating your own Moon poster takes you via the mosaic process, and we present the individual work steps below.
Phase 1: Aufnahme
If the Moon is high in the sky and the air is still enough, you should set the focal length to the highest possible level, then you can start with data collection. FireCapture software comes highly recommended for photographing planets, the Moon and the Sun, and can be downloaded free of charge.
Use the live image first of all to carefully focus, and continue to check the sharpness as you proceed. Exposure parameters are then selected using bright lunar formations. Depending on the lunar phase, you should especially pay attention to the bright craters Aristarchus, Proclus, Byrgius, Tycho and small craters around Stevinus, ensuring that these are not overexposed: the Histogram function in FireCapture will help you assess this, the brightness values should not reach saturation.
Now traverse the lunar surface a little at a time, line by line or column by column. Depending on the seeing and noise levels, a few hundred images per section are generally sufficient. The image fields should be stacked with an overlap of around 20% - enough so that the images will fit together seamlessly, even if there are slight inaccuracies in the positioning.
The total duration should be born in mind during the image capture phase, as changes are already visible at the terminator within 30 minutes. Of course, the smaller the frame, the longer it takes to shoot the complete mosaic, as many more video sequences are required.
It is therefore recommended that you image the terminator in a vertical pattern first.
To finish, a review of the data collected should ensure that no section of the surface has been missed. One possible cause of this: the relatively short exposure times may make it difficult to align the mount with the celestial pole. However, you should place importance on good alignment to be sure there are no gaps in the mosaic due to drift caused by poor tracking.
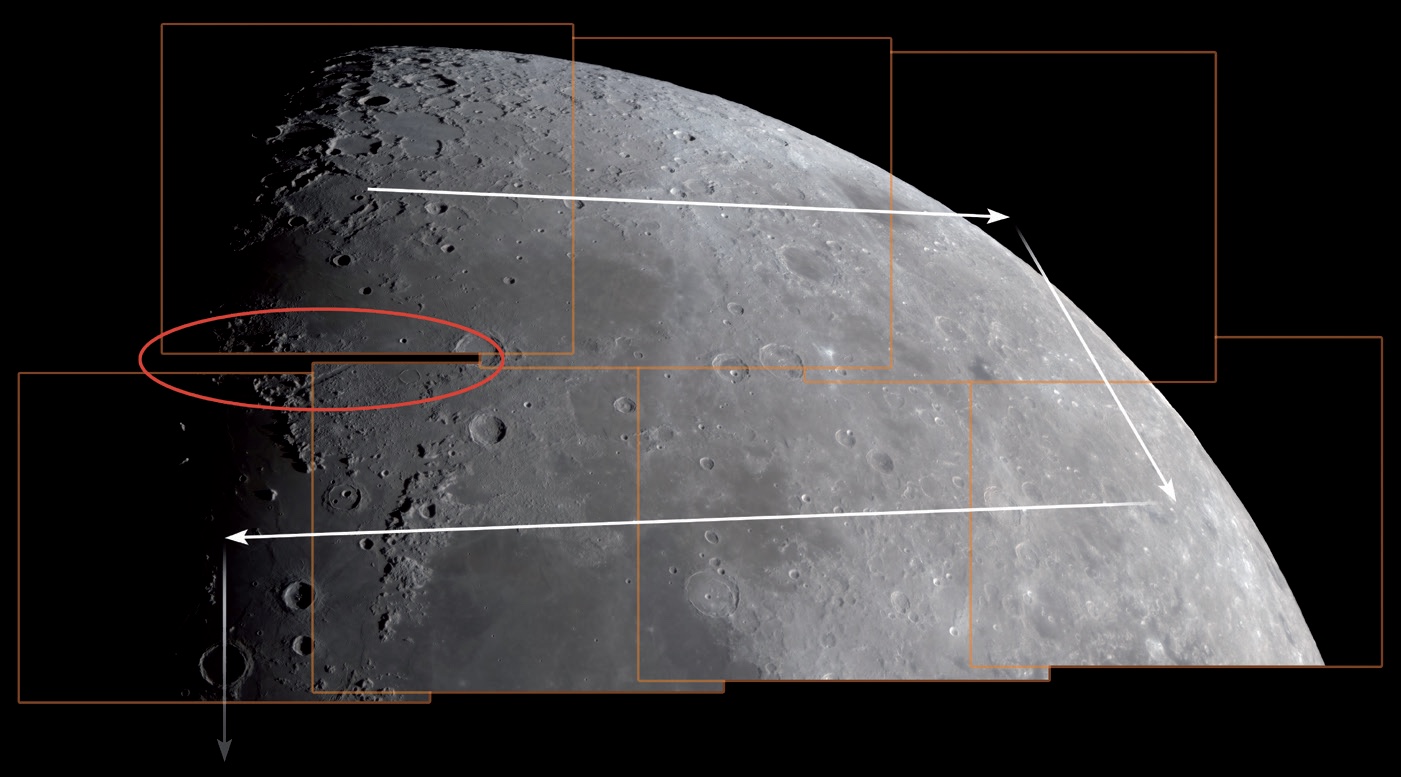 You will track across the surface of the moon section by section during the imaging process, like travelling along a winding road. However, you should ensure you have good tracking or plenty of overlap overlap to avoid irritating defects. It is also helpful if the edges of the image are oriented parallel to the direction of movement as much as possible M. Weigand
Phase 2: Stacking
The user-friendly program AutoStakkert! is one suggestion for processing video data. It is important when you get started to select the "Cropped" option instead of "Expand" for the mosaic technique. This will cut away untidy edges that would otherwise introduce unsightly artefacts into the mosaic.
Phase 3: Sharpening
The AutoStakkert! composite image should be sharpened in the next step, as it will usually look fairly fuzzy. This can be done with different programs, Fitswork software being one of these. For example, a combination of "deconvolution" and "iterative Gaussian sharpening" will deliver convincing results. The same filter settings are applied to all images and the results are saved in TIFF format for the next step. Note: to ensure that all images have similar tonal values, the "set black level always to 0" option should be enabled in the Image Display settings.
Phase 4: Create the mosaic
A few years ago, this phase would have been the most lengthy one, but now there are programs that automatically assemble the mosaic and, if necessary, even out differences in brightness and colour between the individual sections. A popular tool for this is the Image Composite Editor - or ICE for short - from Microsoft. Here, the images can simply be loaded onto the graphical user interface using drag & drop. The software is intuitive and easy to use. A click on "Stitch" starts the mosaic process. The result is presented after a short wait, it can still be rotated and cut at this stage. Finally, the "Export" function is used to save the Moon mosaic in a selection of formats.
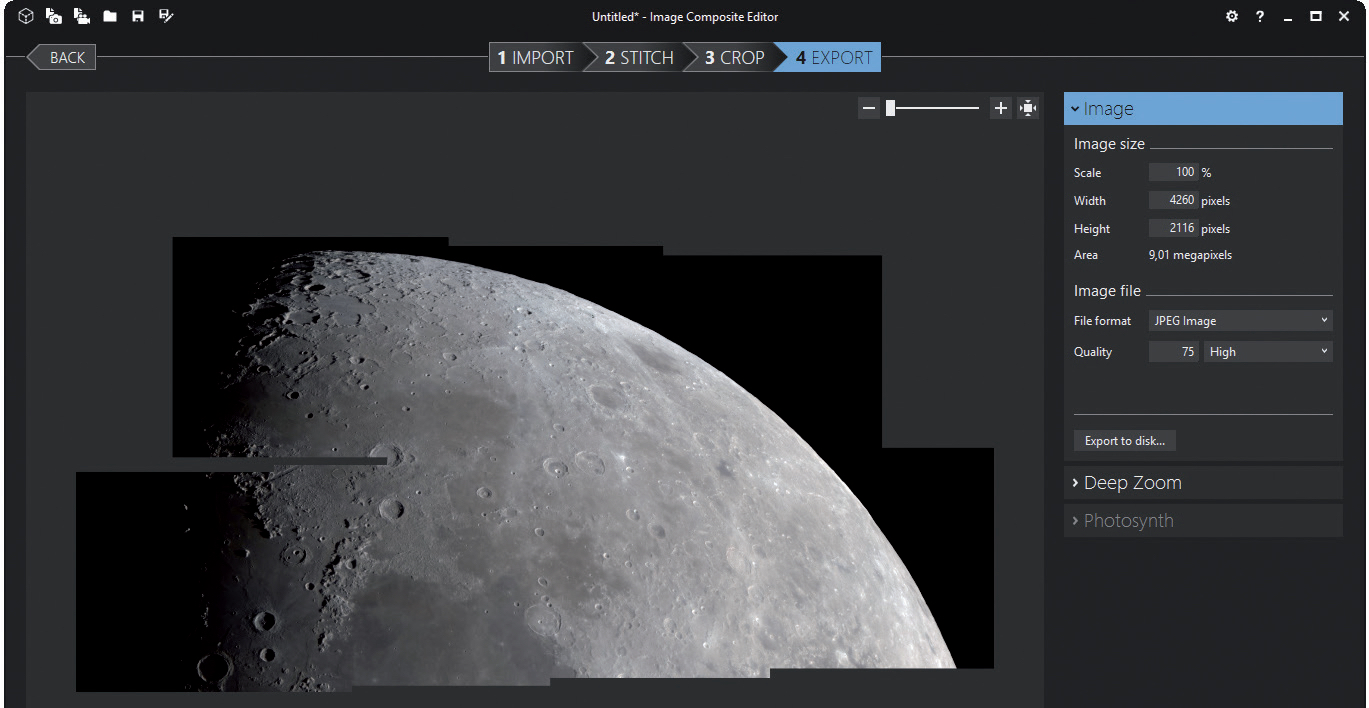 Microsoft's Image Composite Editor program is easy to use. The workflow is organised into four steps IMPORT, STITCH, CROP and EXPORT. M. Weigand
To finish: Tonal values & contrast
The regions at the terminator appear much darker than visually perceived through the eyepiece if you did not change the gamma value during imaging. The gradation of the brightness values must be changed in order to obtain a representation that is closer to what is actually seen. In Fitswork, this is achieved by using the gamma slider on the histogram, which is increased from the default value of 1.0 to around 1.25. White and black values can also be adjusted for a better contrast. That’s it! All that’s left to do to create your very own Moon poster ready to hang on a wall is to send the data to a suitable photo service for printing!
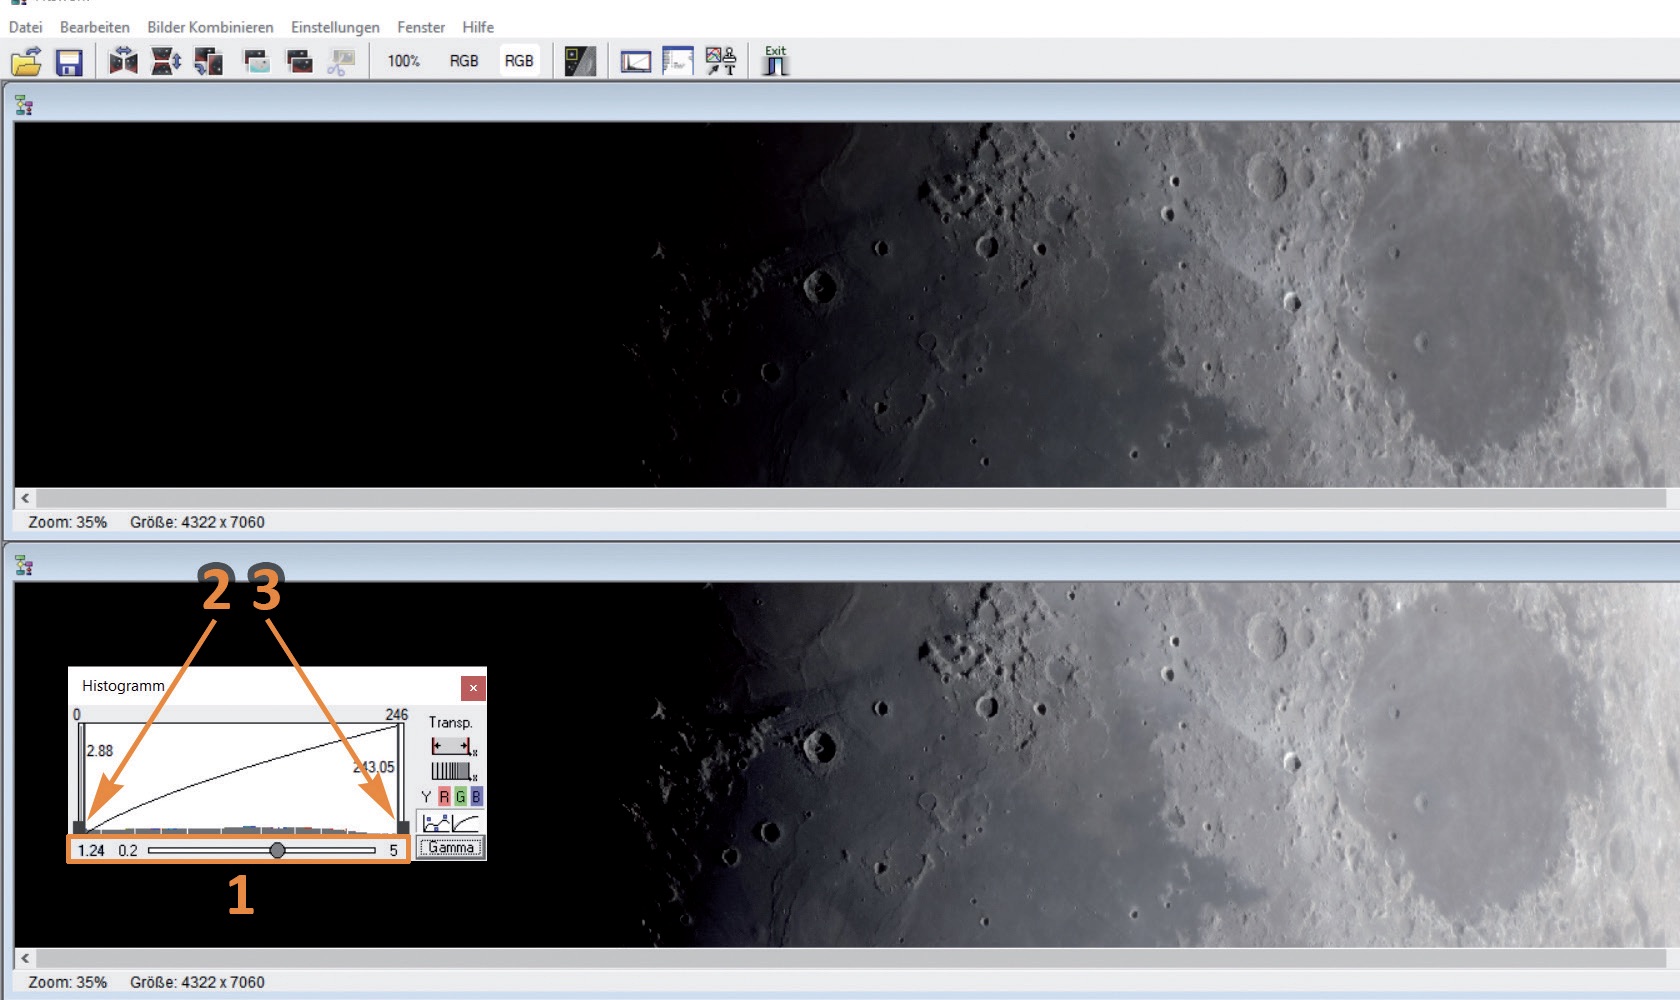 The gamma control (1) slightly lightens the dark areas at the terminator. Black (2) and white (3) values are used to adjust the contrast where necessary. M. Weigand
Author: Mario Weigand / Licence: Oculum Verlag GmbH